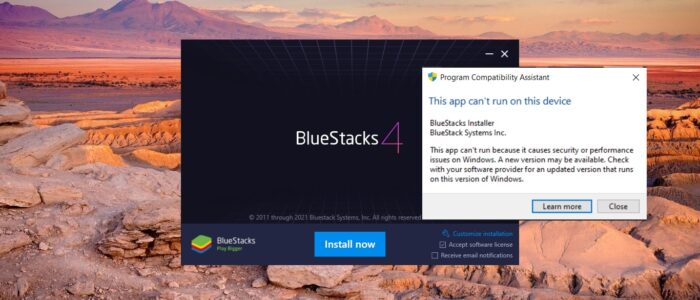
BlueStacks is one of the popular and free emulators for running Android apps on a PC or MAC computer. Like any emulator, Bluestacks creates a virtual version of an Android device that runs in a Window on your Computer. Bluestacks is free to download, install and use. And it can run almost all android app and games. You can download Bluestacks from its official website. Recent one user reported that he is not able to install Bluestacks on his Windows machine. While installing Bluestacks, he received the This app can’t run Bluestacks error.
“This app can’t run because it causes security or performance issues on Windows. A new version may be available. Check with your software provider for an updated version that runs on this version of Windows.”
This article will guide you to fix This app can’t run on this device while installing BlueStacks on Windows 10.
Fix This app can’t run on this device while installing BlueStacks:
There are many possible reasons for the “This app can’t run error” if you want, you can check the complete resolution methods one by one and try to fix this error. But this error particularly appears while installing BlueStacks. Here we mentioned few possible resolution methods to fix this error.
Check the Virtualization:
As I mentioned above, Bluestacks creates VM and then runs the android on it, so it’s very important to enable Virtualization on your machine. Follow the steps below to enable the Virtualization.
Note: The Virtualization Option is differs from one system to another. Kindly check your motherboard manufacturer guide to enable this option.
- Restart the computer.
- Boot your system to Enter BIOS -> Advance setting
- Enable Intel VTT/Intel VT-x or AMD-V. depending on your processor.
- Now restart the machine
After enabling the hardware virtualization, try to install the Bluestacks and check you are getting any error.
Disable the Hyper-V:
Open Run command by pressing Windows + R and type control and hit enter. This command will open the Control Panel.
In Control Panel, click on Programs and Features.
In Programs and Features from the Left-hand side, you can see the Turn Windows features on or off. Click on it.
And you will get another Pop-up, Turn Windows features on or off. Uncheck the Hyper-V and click on Ok.
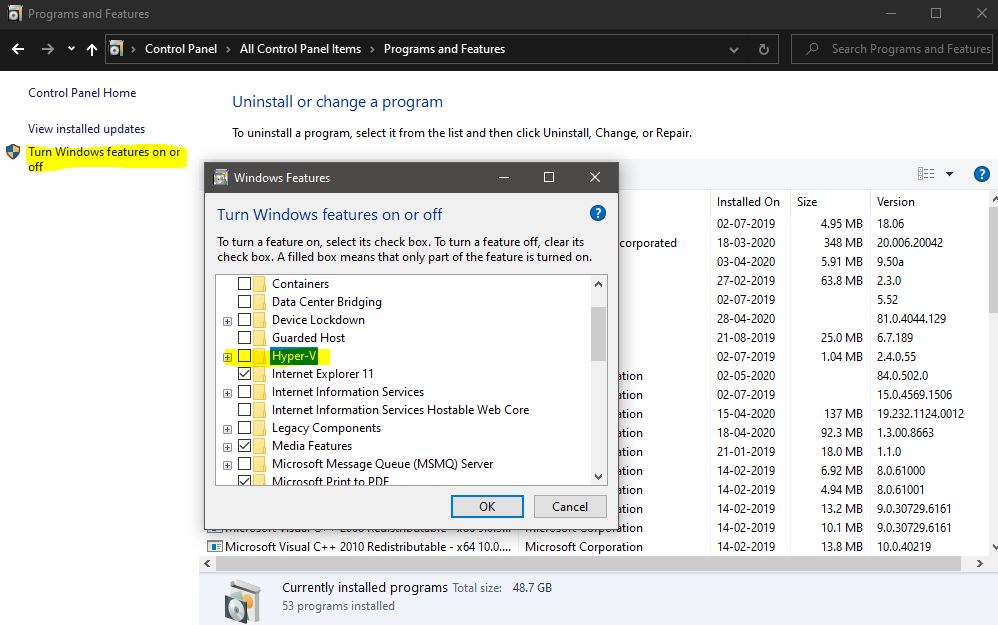
This will disable the Hyper-V on your system. Restart the system once, after the system restart, try to install the BlueStacks.
Run the BlueStacks in Compatibility mode:
This error is from the Program Compatibility Assistant, so try to run the BlueStacks installer in different Compatibility mode.
Right-click on the BlueStacks installer and choose Properties.
Under the Properties window, click on the Compatibility tab.
Click on Run Compatibility troubleshooter first, and check, it resolves the issue or not. If not, click on the Run this program in compatibility mode for option. And choose the operating system.
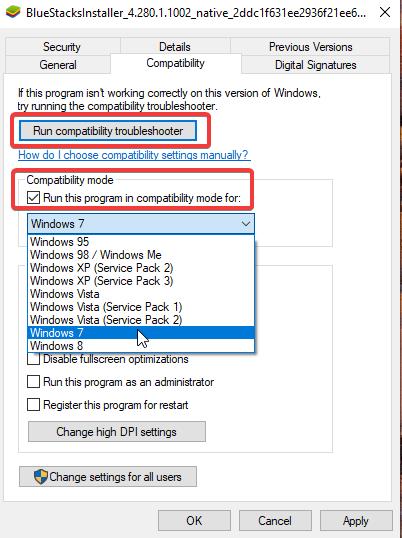
Click on Apply and OK. Mostly this will fix the issue.

