Windows 11 comes with the new feature named Desktop stickers that persist when you change your PC’s background image. This Desktop stickers feature is included in the customization option that will let you to place stickers on your desktop. The stickers will stay in the same position even when you change the desktop background. The desktop sticker feature will allow you to add, place and resize stickers for the desktop. You can access the Desktop sticker functionality by right-clicking on the desktop. Desktop sticker is disabled by default in Windows 11, but you can enable this feature manually using the following steps until you’re on Windows 11 22H2. If you’re on Windows 11 build 22621, then you can enable Desktop stickers.
Enable Desktop Stickers on Windows 11:
Note: Modifying the Registry is risky, and it causes irreversible damage to your OS Installation Follow the steps correctly. Friendly advice Before Modifying Registry Creating Restore Point is recommended.
Open Run command by pressing Windows + R and type regedit and hit enter, this command will open the Registry editor console.
Now navigate to the following path.
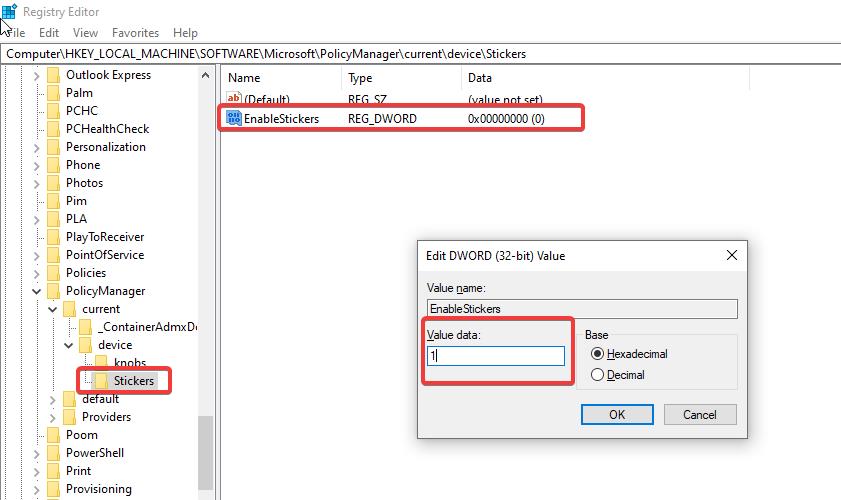
HKEY_LOCAL_MACHINE\SOFTWARE\Microsoft\PolicyManager\current\device
From the left-hand side look for the Device registry key and right-click on the Device registry key and choose New > Key and name it as Stickers.
Click on the Stickers registry key and form the right-hand side, right-click on an empty area and choose New > DWORD (32-bit) value, and name it as EnableStickers.
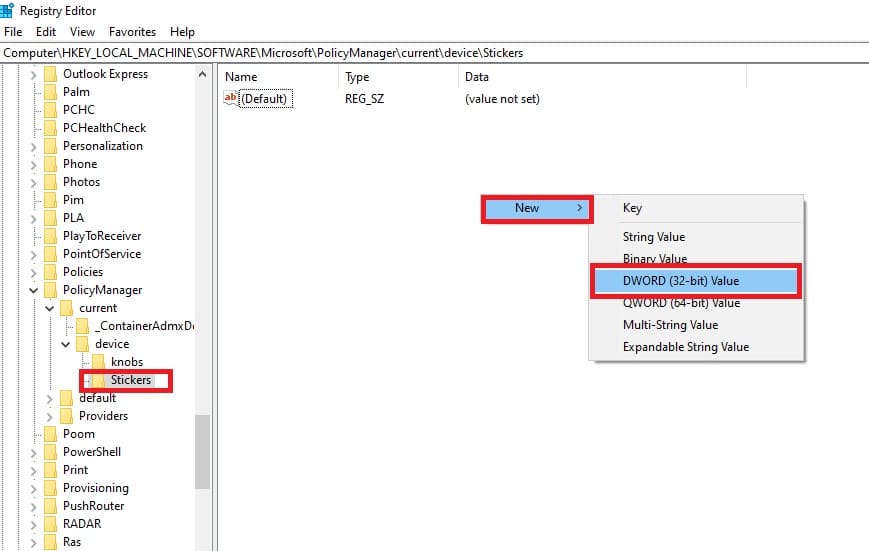
Double click on EnableStickers DWORD and set the value as 1 and click on Ok. Close the Registry Editor and restart the system once.
That’s it you have successfully enabled Desktop stickers.
How to Add Desktop Stickers to Windows 11 Desktop?
Once you enabled Desktop stickers, then you can see the Option “Add or edit stickers” on the desktop right-click context menu.
You can also access this option using Windows Settings, Go to Windows Settings > Personalization > Background > Choose Stickers for your wallpaper.
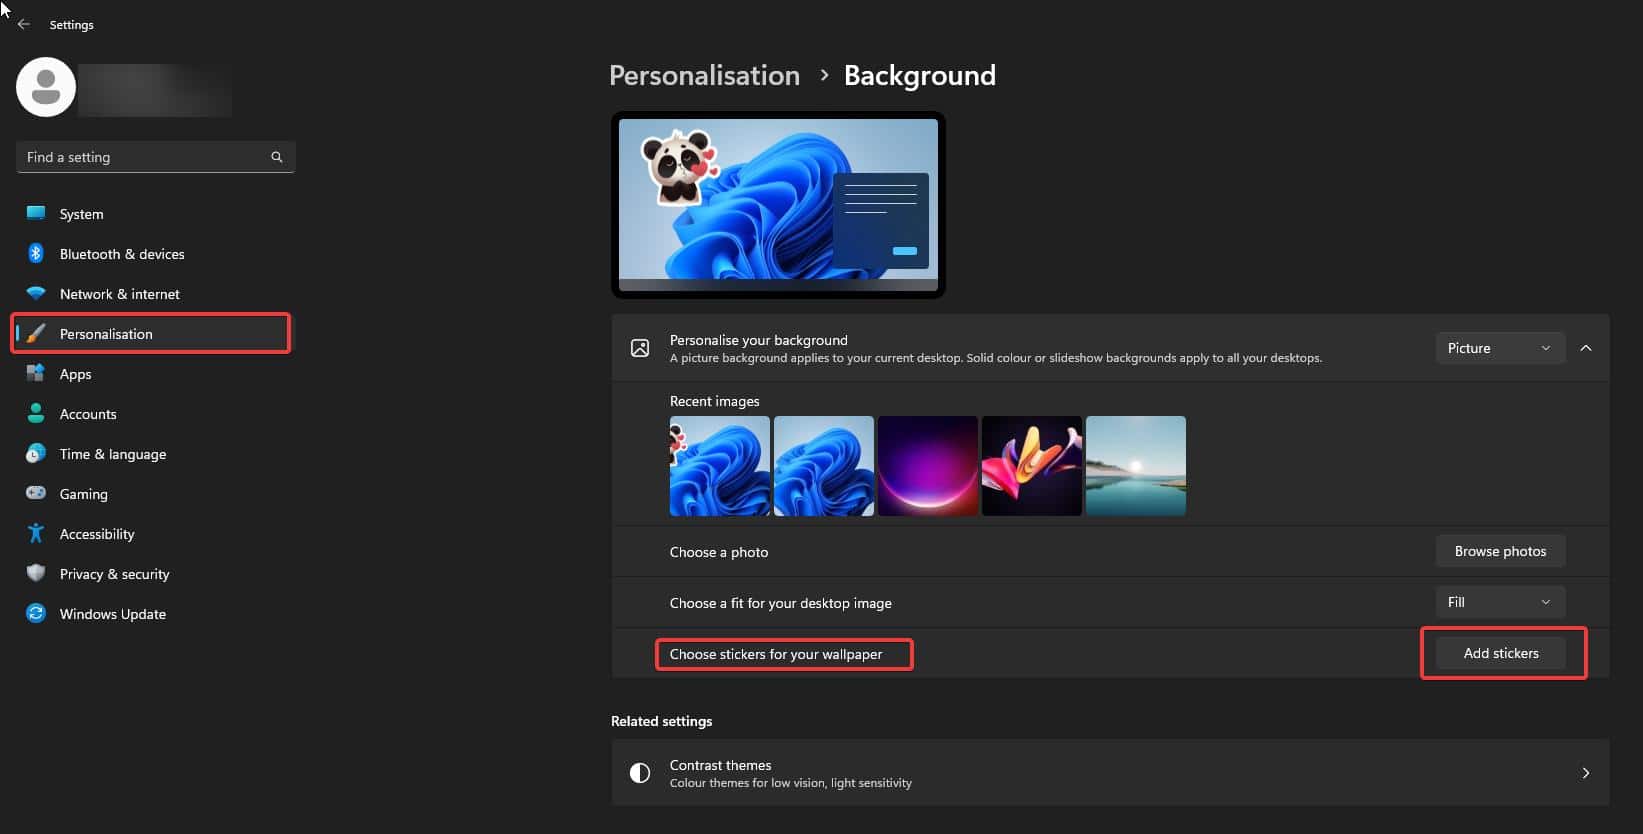
Now you will see the sticker picker interface, scroll through the list and choose your favorite stickers. If you want you can create your own sticker, once you choose the sticker, the sticker will appear on the desktop, now you can move, and resize it.
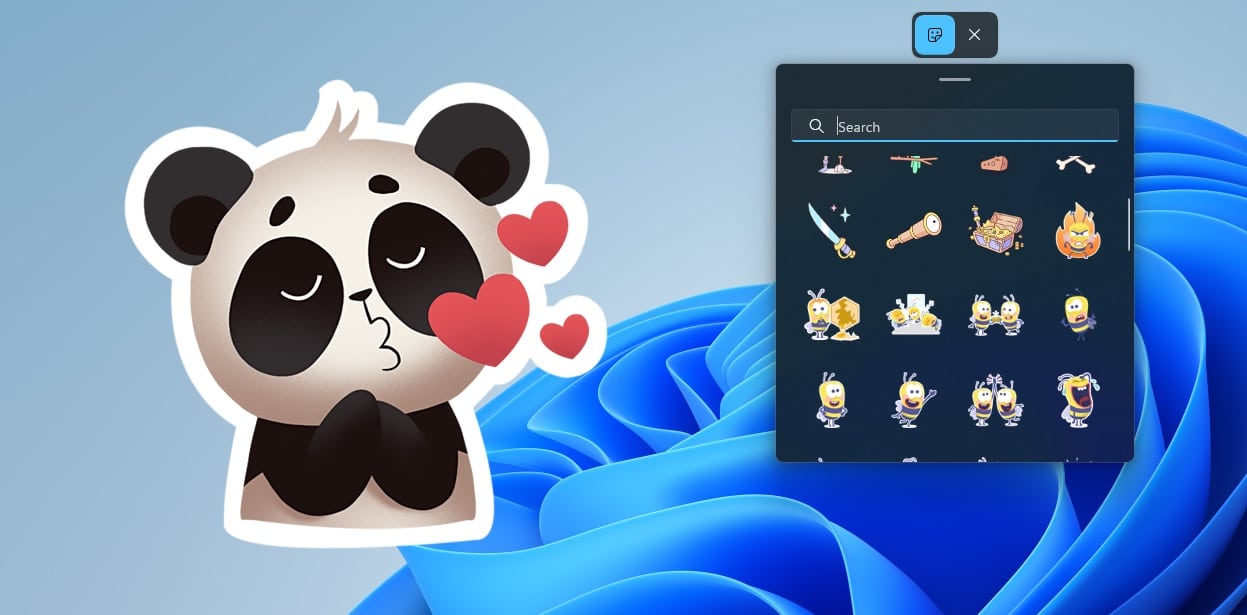
If you want to remove the sticker, click on it from the sticker editor and click on the trash icon to remove it.


