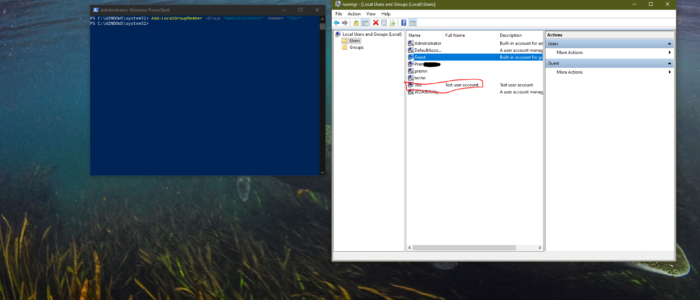
Windows PowerShell is a powerful tool that is developed by Microsoft for purposes of task automation and configuration management. This is based on the .NET framework and it includes a command-line shell and a scripting language. Windows PowerShell is designed especially for system administrators. If you are a windows administrator and if you know PowerShell very well and you can simplify and automate tedious and repetitive tasks by creating scripts and combining multiple commands together. This article will guide you to Create New Local User Account using PowerShell, We already know how to create a local user account using Control panel, settings, and command Prompt. If you want to Create New Local User Account using PowerShell follow the below-mentioned steps.
Steps to Create New Local User Account using PowerShell
- Open PowerShell as admin mode and type the following command and hit enter.
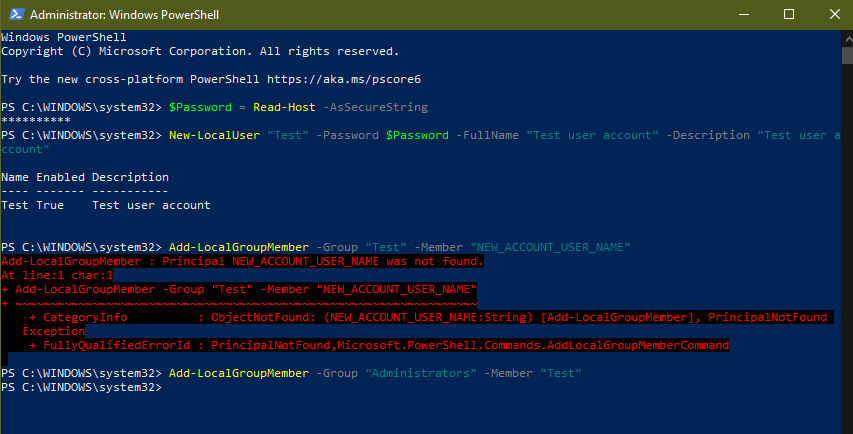
- Before creating a New Local User Account, Type the following command to temporarily store the password.
- Create a $Password as a Secure string Variable and press Enter:
$Password = Read-Host -AsSecureString
- Now Type the Password you want to use for the new local user account and hit enter.
- Now create a new user account using the following command, Copy paste the following command, and hit enter.
New-LocalUser “NEW_ACCOUNT_USER_NAME” -Password $Password -FullName “USER_FULL_NAME” -Description “Description of this account.”
Note: Make Sure to change the NEW_ACCOUNT_USER_NAME to some other Username as your wish. And Change the description to anything you want.
Add User account to the Administrator Group:
User group is really just a collection of user accounts. Rights and permissions are assigned to a group, and then those rights and permissions are granted to any account that’s a member of the group. Group membership can determine a user’s access to files, folders, and even system settings. After creating a new user account we have to move that account to the correct user group.
Add-LocalGroupMember -Group “Administrators” -Member “NEW_ACCOUNT_USER_NAME”
Note: Make Sure to change the NEW_ACCOUNT_USER_NAME to some other Username as your wish.
Once you completed all the steps, new user account will be created and moved to the specific user group. As per the above command, the new user account will be moved to the administrator group with full admin privileges.

