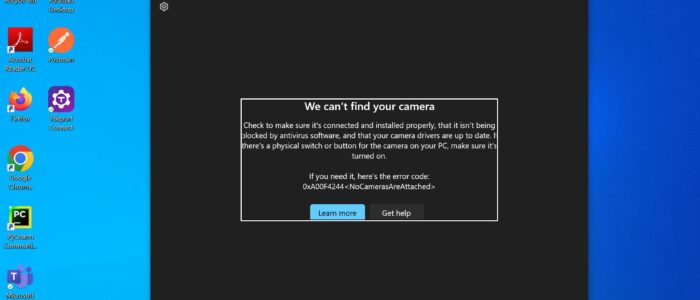
The “No Cameras are Attached 0xA00F4244” error in Windows 11 usually indicates that the system is unable to detect your camera or webcam. This can be caused by several factors, such as incorrect settings, Disabled built-in camera on BIOS, outdated drivers, or hardware issues. This article will guide you to fix the No Cameras are Attached 0xA00F4244 error in Windows 11.
Common Reasons for “No Cameras are Attached 0xA00F4244” Error:
The Windows Camera App error 0xA00F4244 typically occurs when the operating system cannot detect or access the camera on your device. This error can arise due to various reasons, you can find the list of reasons below.
- Inbuilt Camera Disable
- Outdated Camera driver
- Problematic camera app
- Camera Hardware issue
- Windows Update and Antivirus issue
Fix No Cameras are Attached 0xA00F4244 error in Windows 11:
If you are trying to access the camera app and it’s throwing an error like “We can’t find your camera” followed by the error code 0xA00F4244(0xC00D36D5), it means that your device or application is unable to detect your webcam. This error mostly occurs when there is an issue with the camera’s driver. But you can try out other troubleshooting methods, to resolve this issue.
Solution 1: Check Physical Connections and Camera Switch
External Camera: If you’re using an external camera, ensure it is properly connected to your computer. Try plugging it into a different USB port.
Built-in Camera: Some laptops have a physical switch or a keyboard shortcut (usually Fn + [key with camera icon]) that disables the camera. Make sure the camera switch is enabled.
Solution 2: Allow Camera Access
Windows 11 has privacy settings that control the access to your camera. If the privacy settings are blocking camera access, you may encounter the “Can’t Find your Camera” error. To check and adjust these settings:
Click on the Start menu, then click on the Settings icon (shaped like a gear).
In the Settings window, from the left-hand side pane select “Privacy & security”.
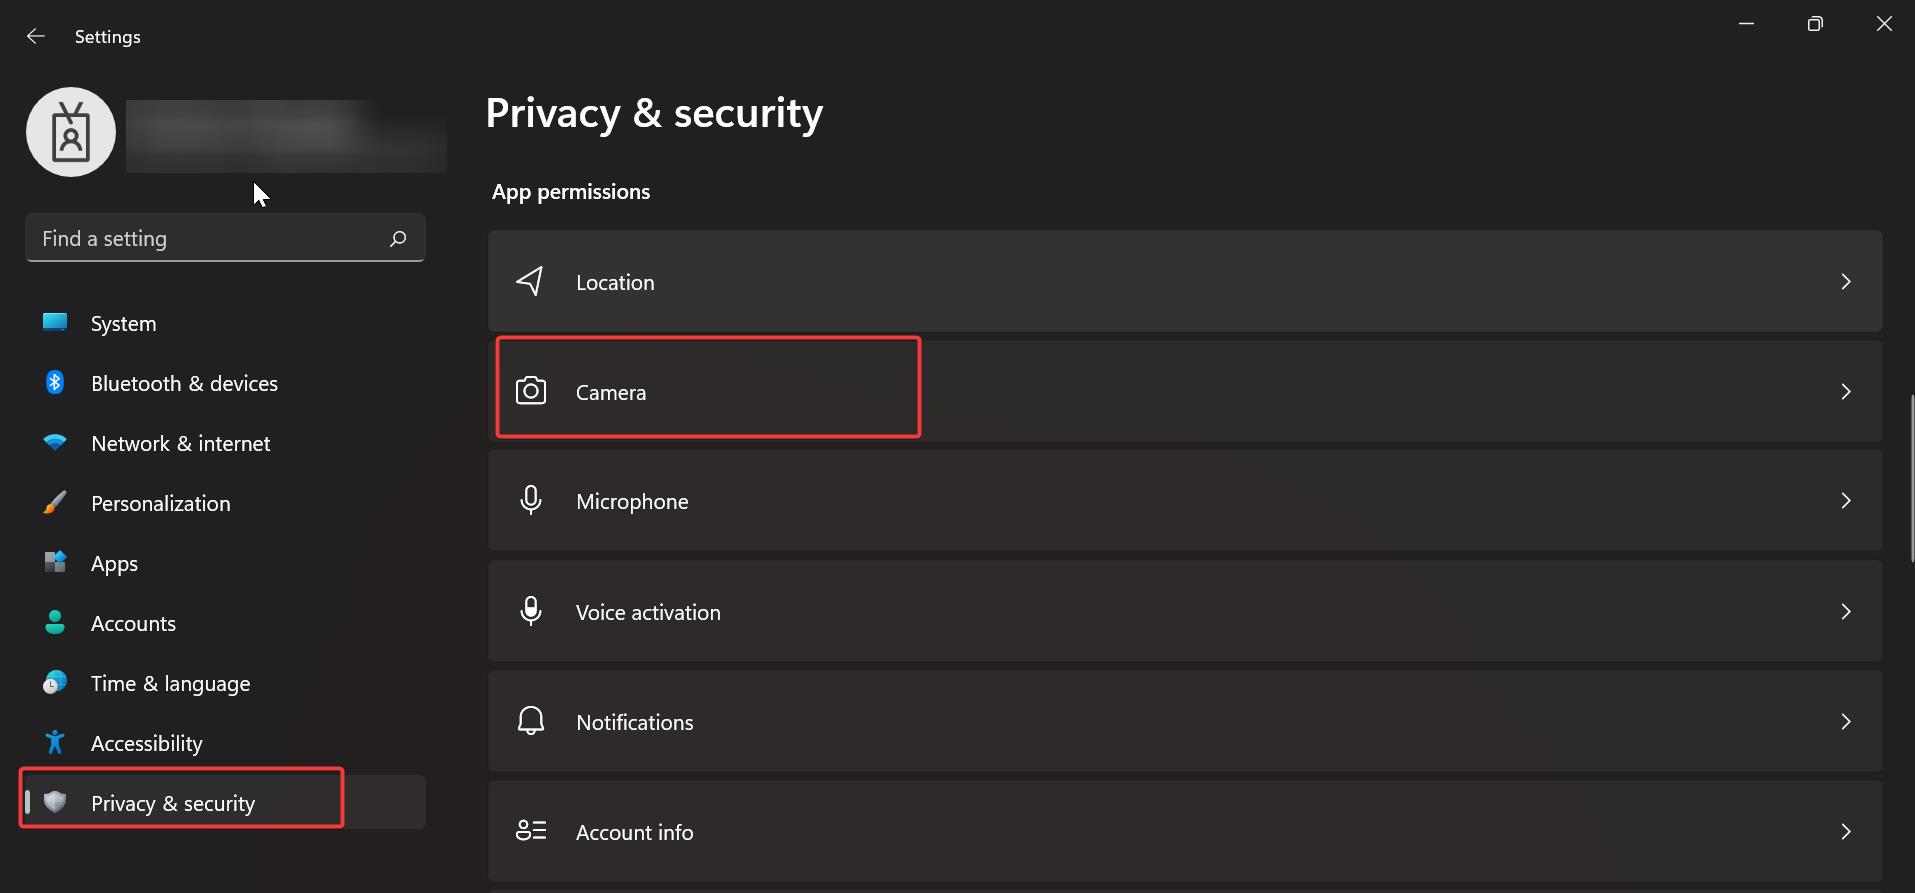
On the right-hand side pane under App permissions, Choose “Camera”.
Turn on the Camera access toggle button. Turn on Let apps access your camera.
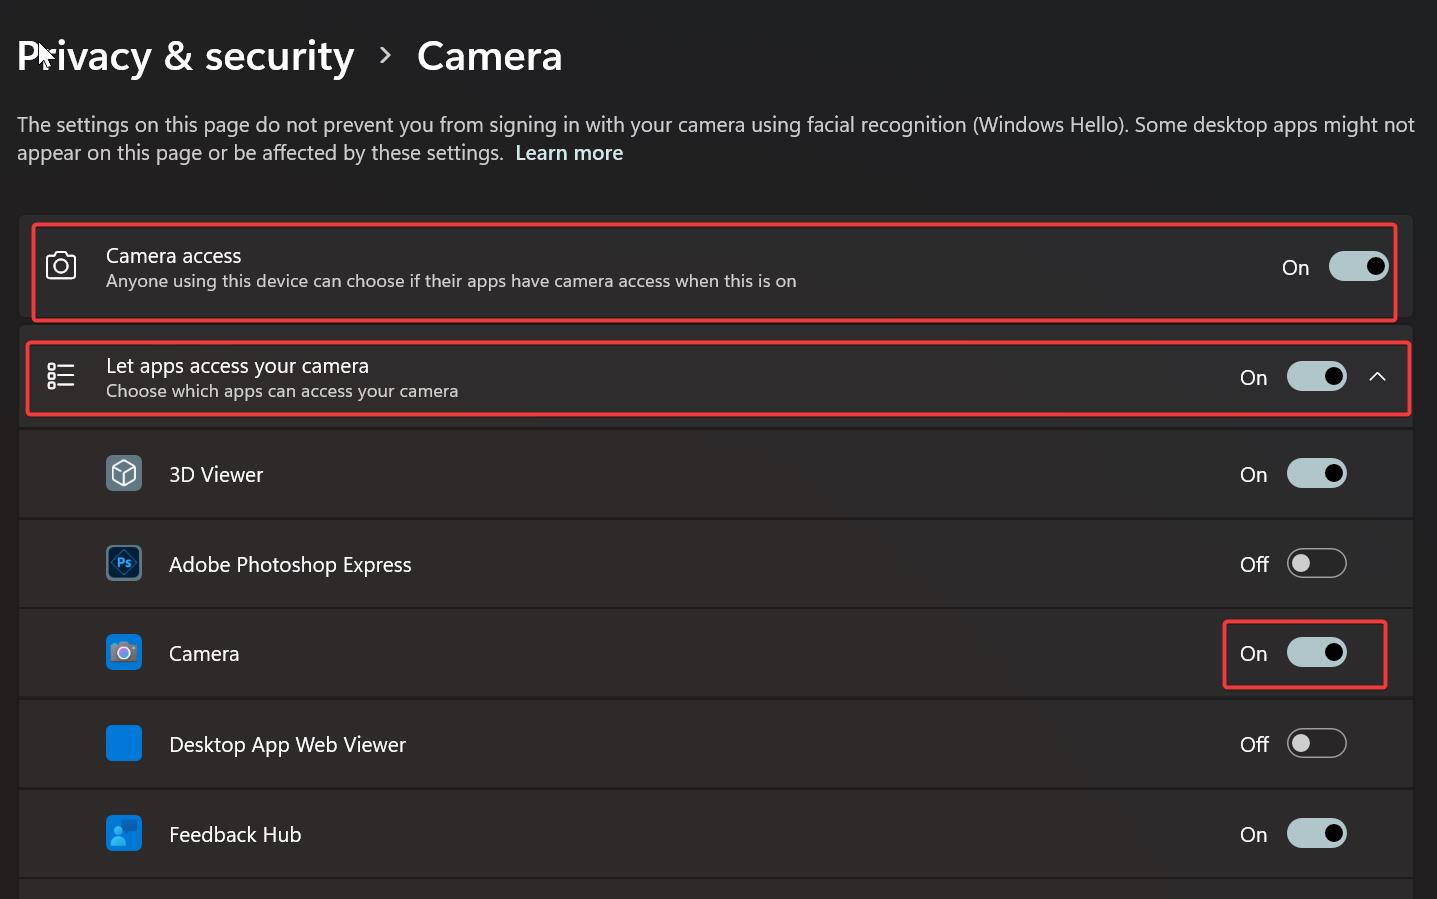
Scroll down and check that the toggle switches for individual apps are also turned on if you want them to have camera access.
Restart your computer and check if the error has been resolved.
Solution 3: Update Camera Driver in Device Manager
Outdated or incompatible camera drivers could be the reason behind the “Can’t Find your Camera” error. Follow these steps to update your camera drivers:
Press the Windows key + X on your keyboard to open the Power User menu.
Click on “Device Manager” from the list of options.
In the Device Manager window, locate and expand the “Cameras” category.
Make sure the camera is not disabled. If it is disabled then right-click on it and choose Enable Device. Right-click on your camera device and select “Update driver”.

Choose the option to automatically search for updated driver software.

Wait for Windows to search and install any available updates for your camera driver.
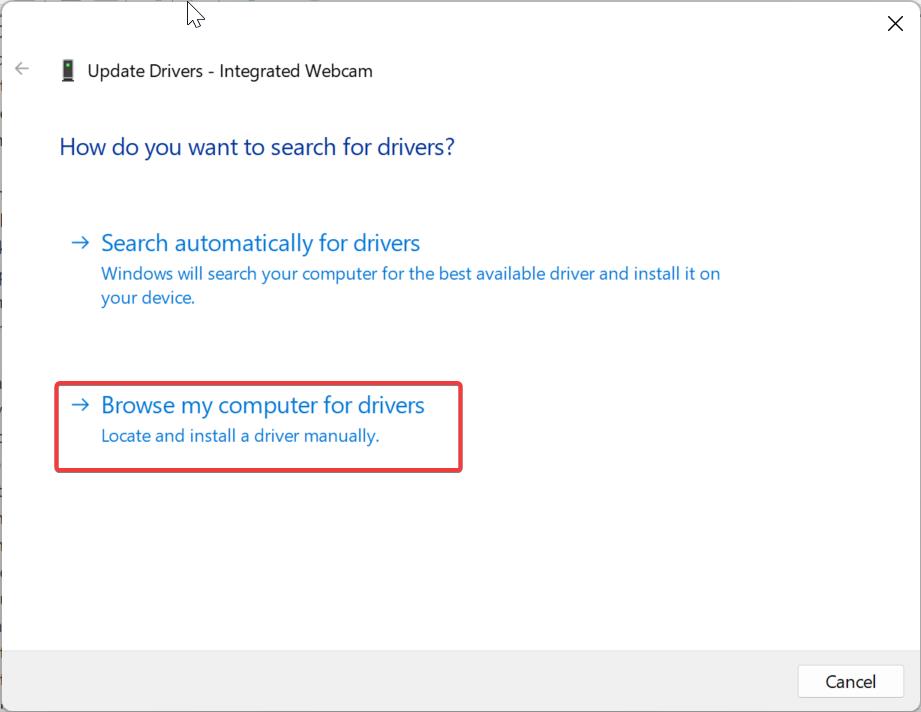
If the driver is not updated, then select manual driver installation, Click on Browse my Computer for drivers then choose Let me pick from a list of available drivers on my computer.
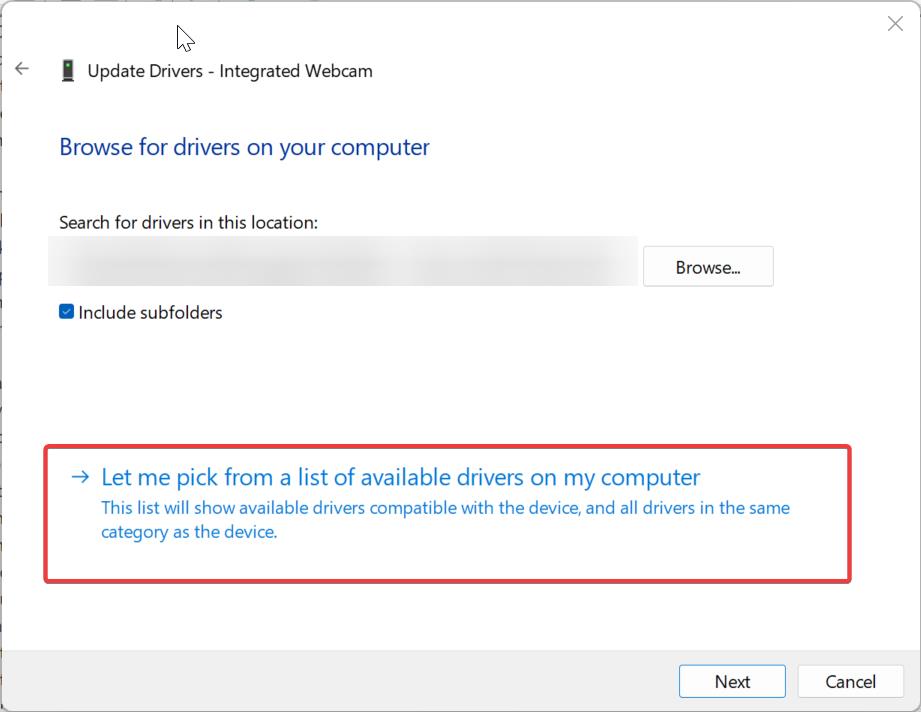
Choose USB Video Device and click on Next, let the drivers to install.

Next, close the Window and restart your system once. Mostly this will fix the issue.
Restart your computer and check if the error has been resolved.
Solution 4: Reset the Camera App
If the camera app itself is causing the error, you can try resetting the app and its permissions. Follow these steps:
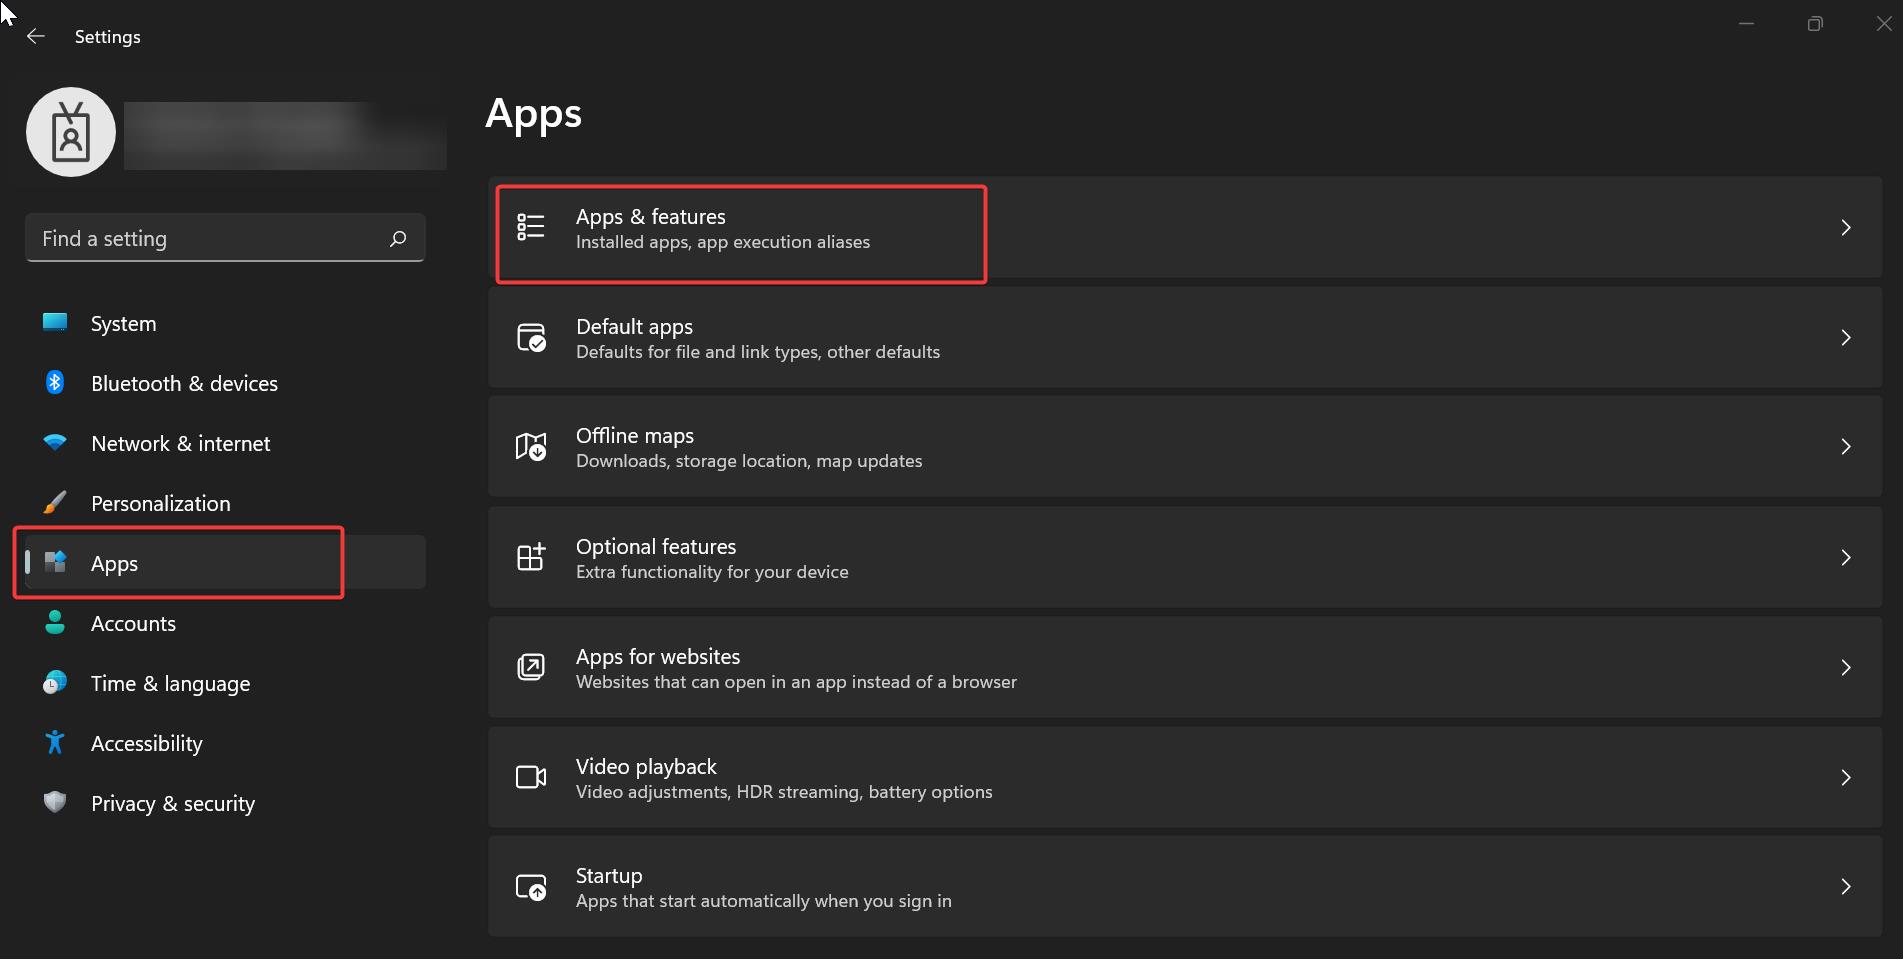
Open Windows Settings by pressing Windows + I and from the left-hand side click on Apps and from the right-hand side click on Apps & features.
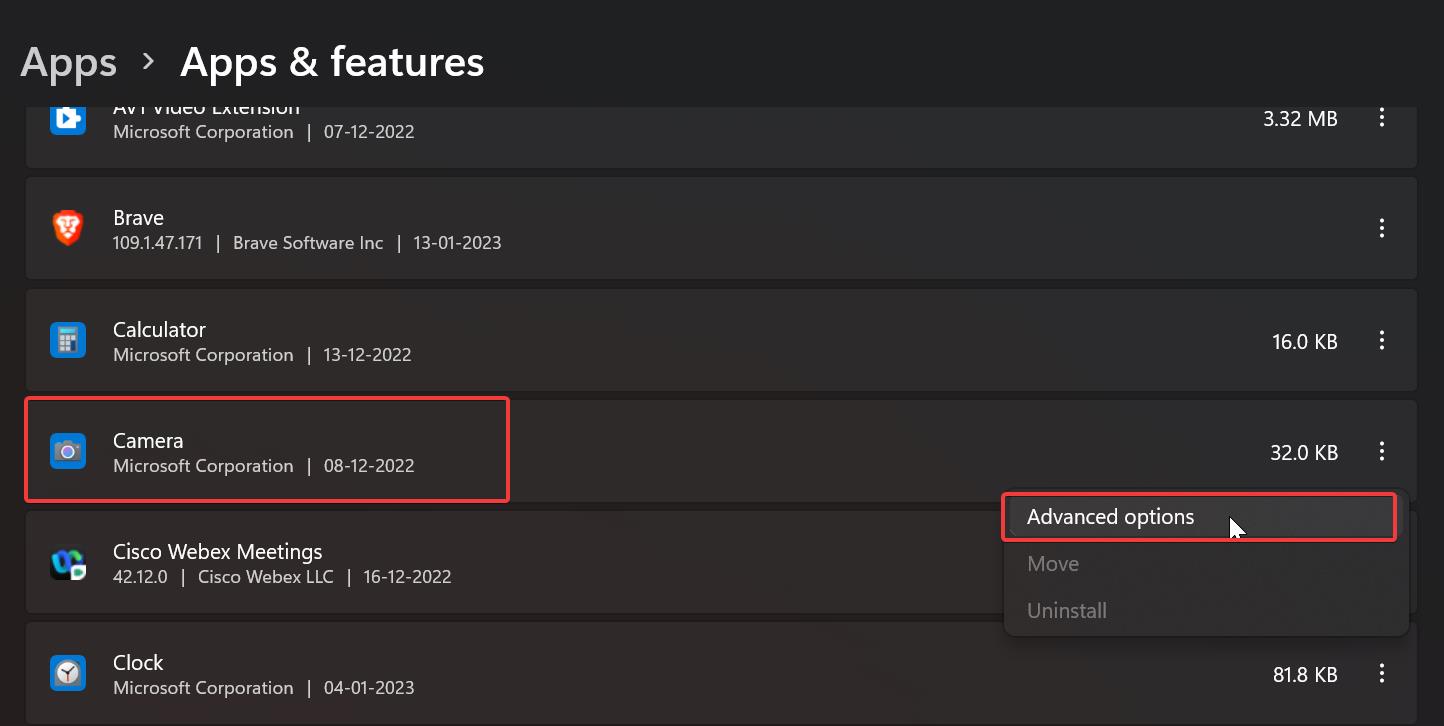
Under Apps & features, look for the Camera app, click on the three dots on the camera app and choose Advanced Options.
Under Advanced Options, scroll down and look for Reset or Repair options.
Try clicking on the Reset option, this will reset the camera app, app data will be deleted during the reset process.
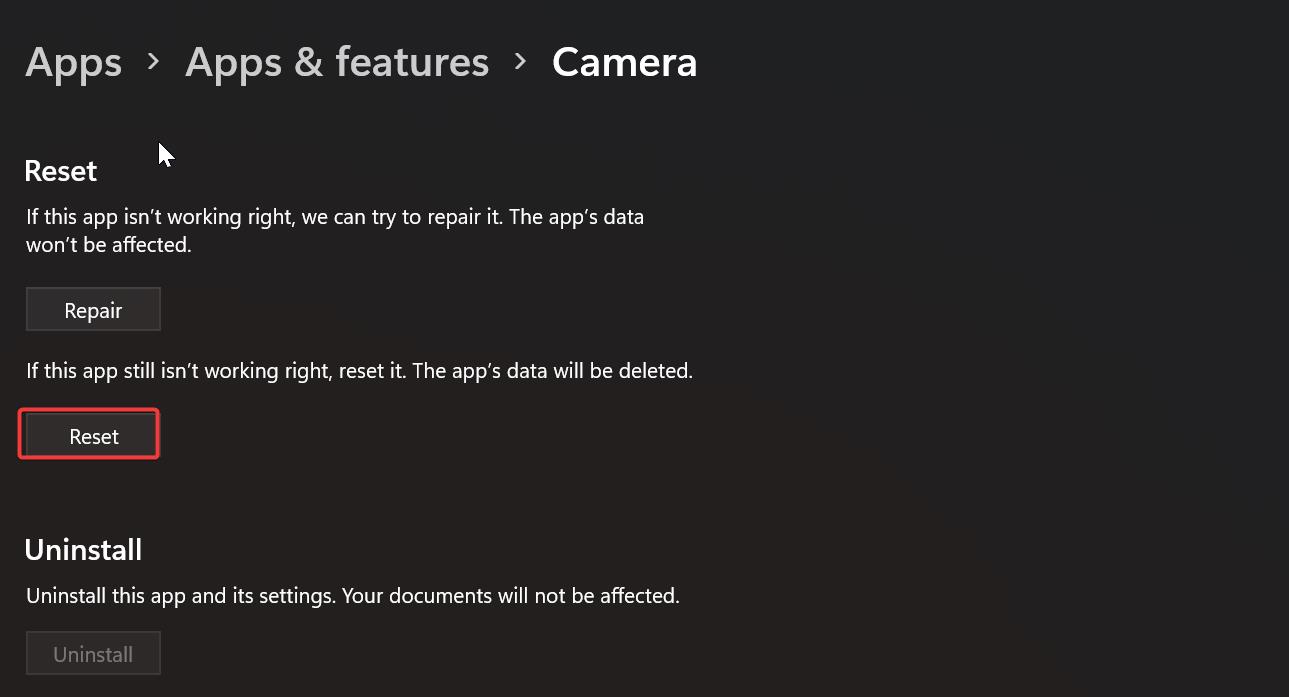
Once the reset is complete, try to open the camera app. If the reset didn’t work out, try to repair the camera app.
Restart your computer and check if the error has been resolved.
Solution 5: Using Registry Editor
Open Run command by pressing Windows + R and type regedit and hit enter, this command will open the Registry Editor.
Now navigate to the following registry path.
Computer\HKEY_LOCAL_MACHINE\SOFTWARE\WOW6432Node\Microsoft\Windows Media Foundation\PlatformFrom the left-hand side click on the Platform registry key and from the right-hand side pane, right-click on an empty area and choose New > DWORD (32-bit) Value.
And name the DWORD as EnableFrameServerMode, double-click on the DWORD and modify the value data to 0 and click on OK.
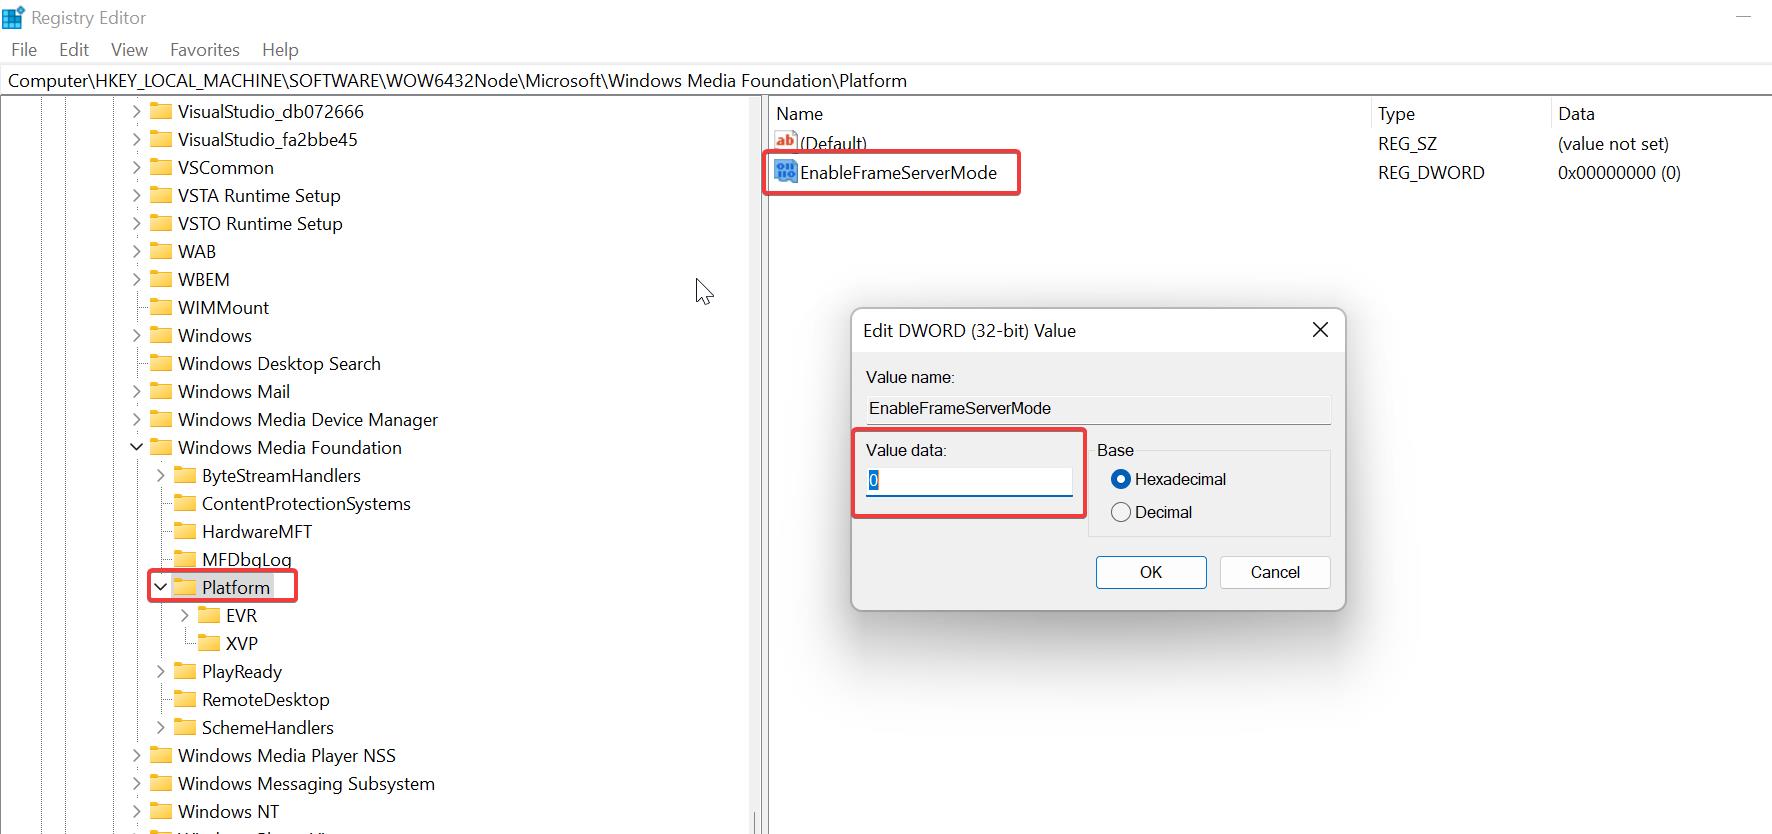
Close the Registry Editor and restart your system once.
Solution 6: Run Windows App Troubleshooters
Open Windows Settings by pressing Windows + I and from the left-hand side click on System and from the right-hand side click on Troubleshoot.
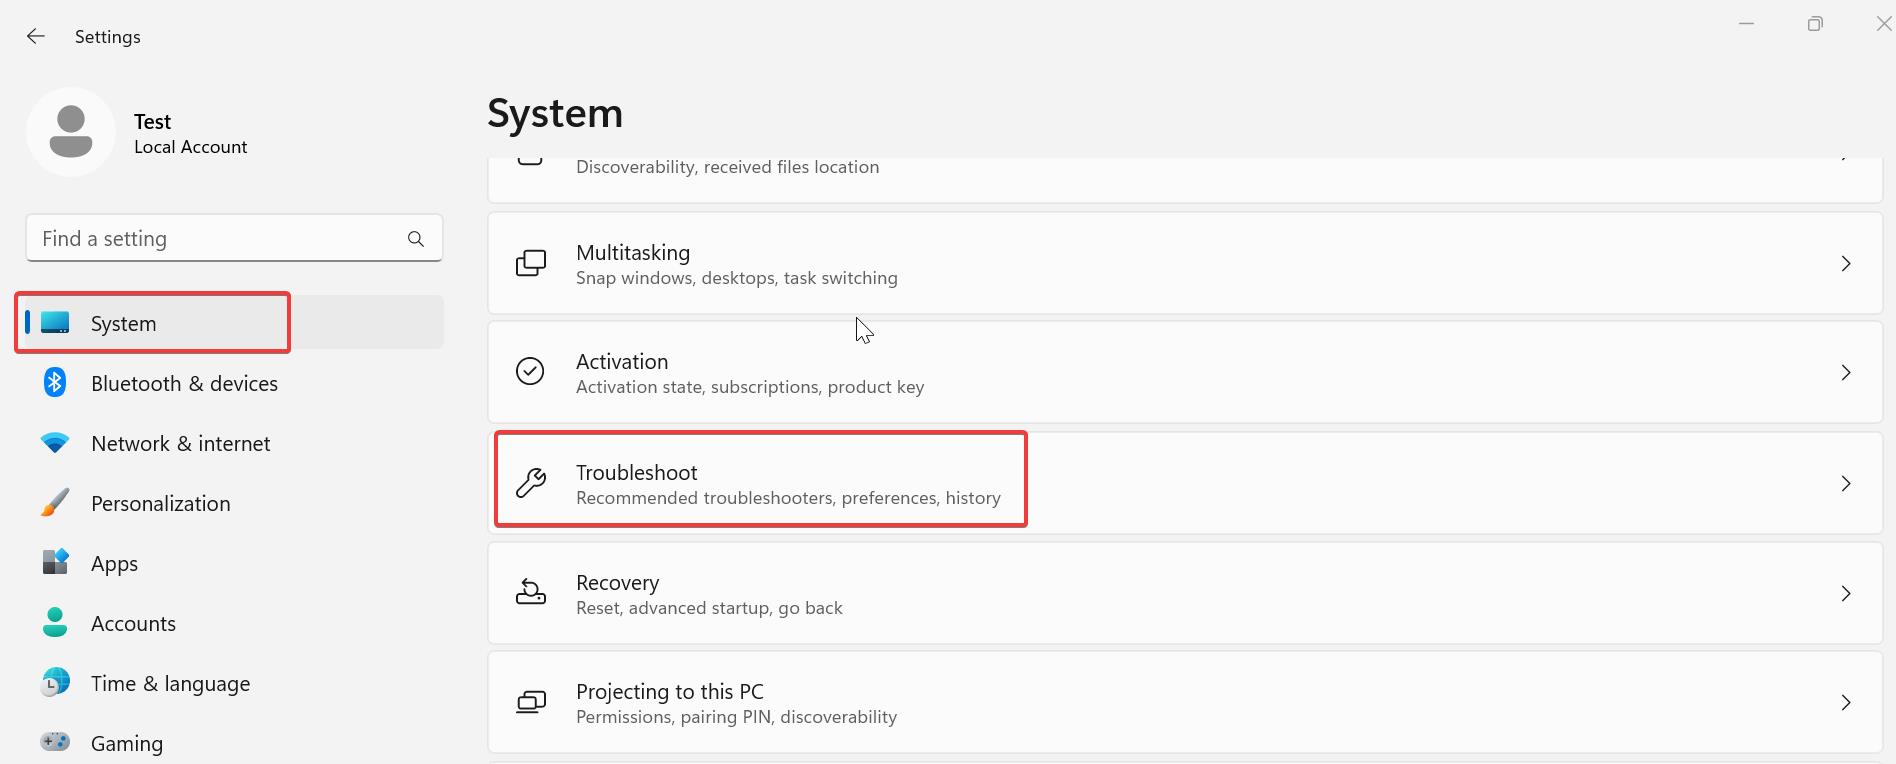
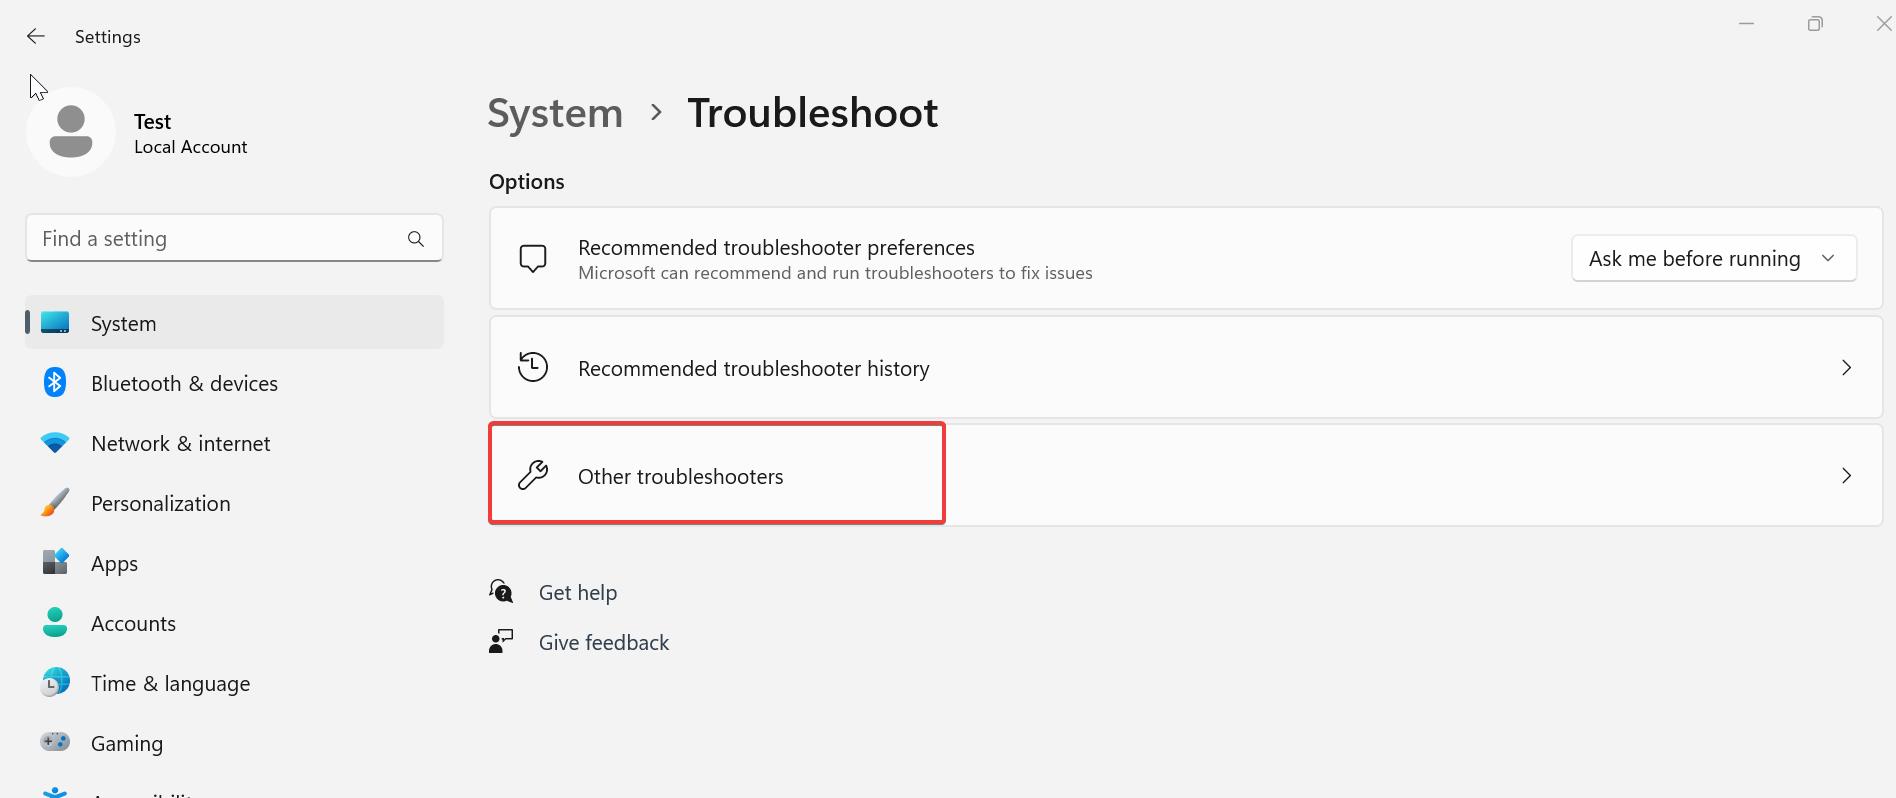
Under Troubleshoot click on Other Troubleshooters.
Under Other troubleshooters, look for Windows Store Apps. Click on Run to start the Troubleshooters.
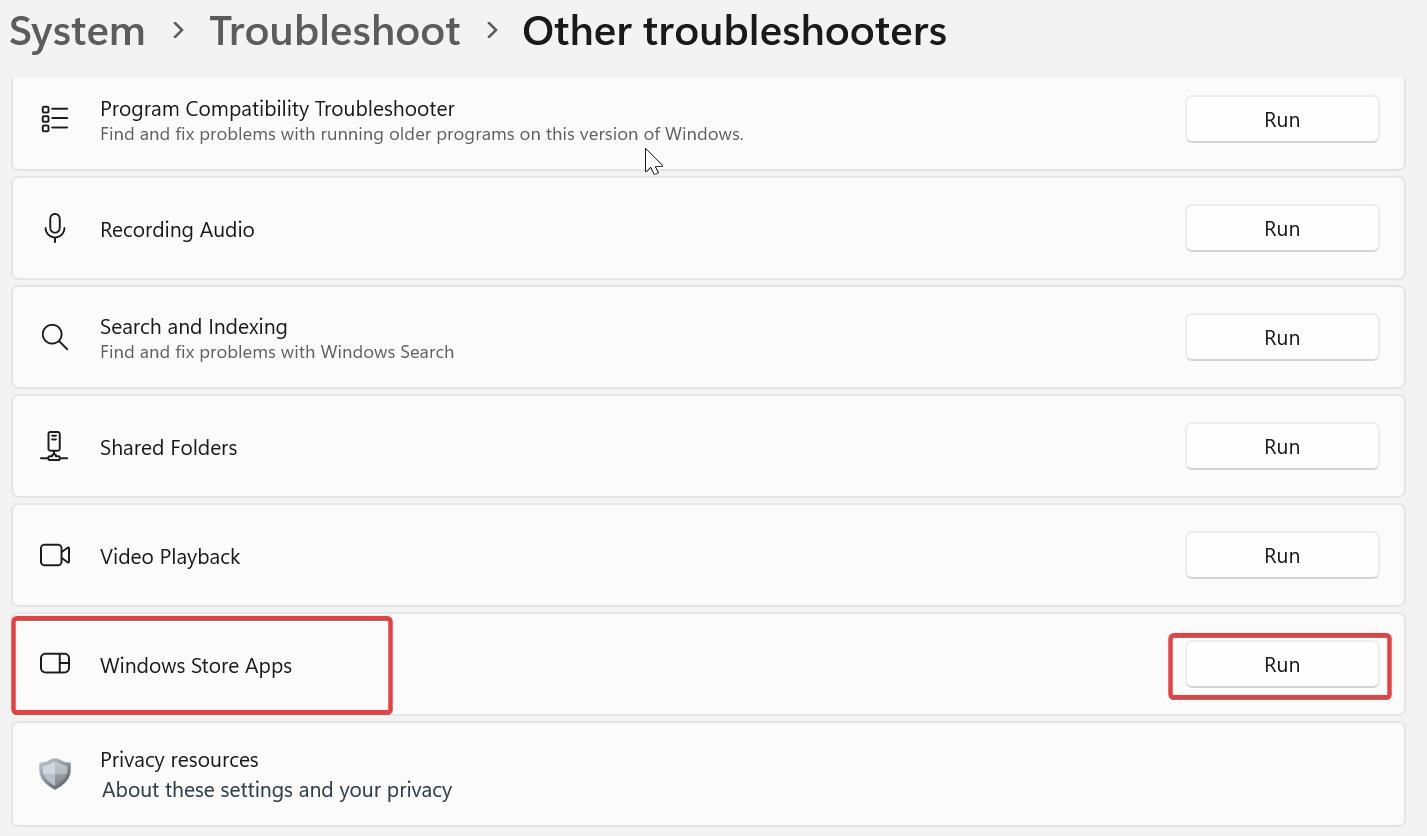
And run the Camera Troubleshooters to check if there is any issue with the inbuilt camera.

Solution 7: Check for Windows Updates
Open Windows Settings by pressing Windows + I and from the left-hand pane click on Windows Update.
From the right-hand pane, click on Check for Updates, If there is any pending updates, click on Download and install all.
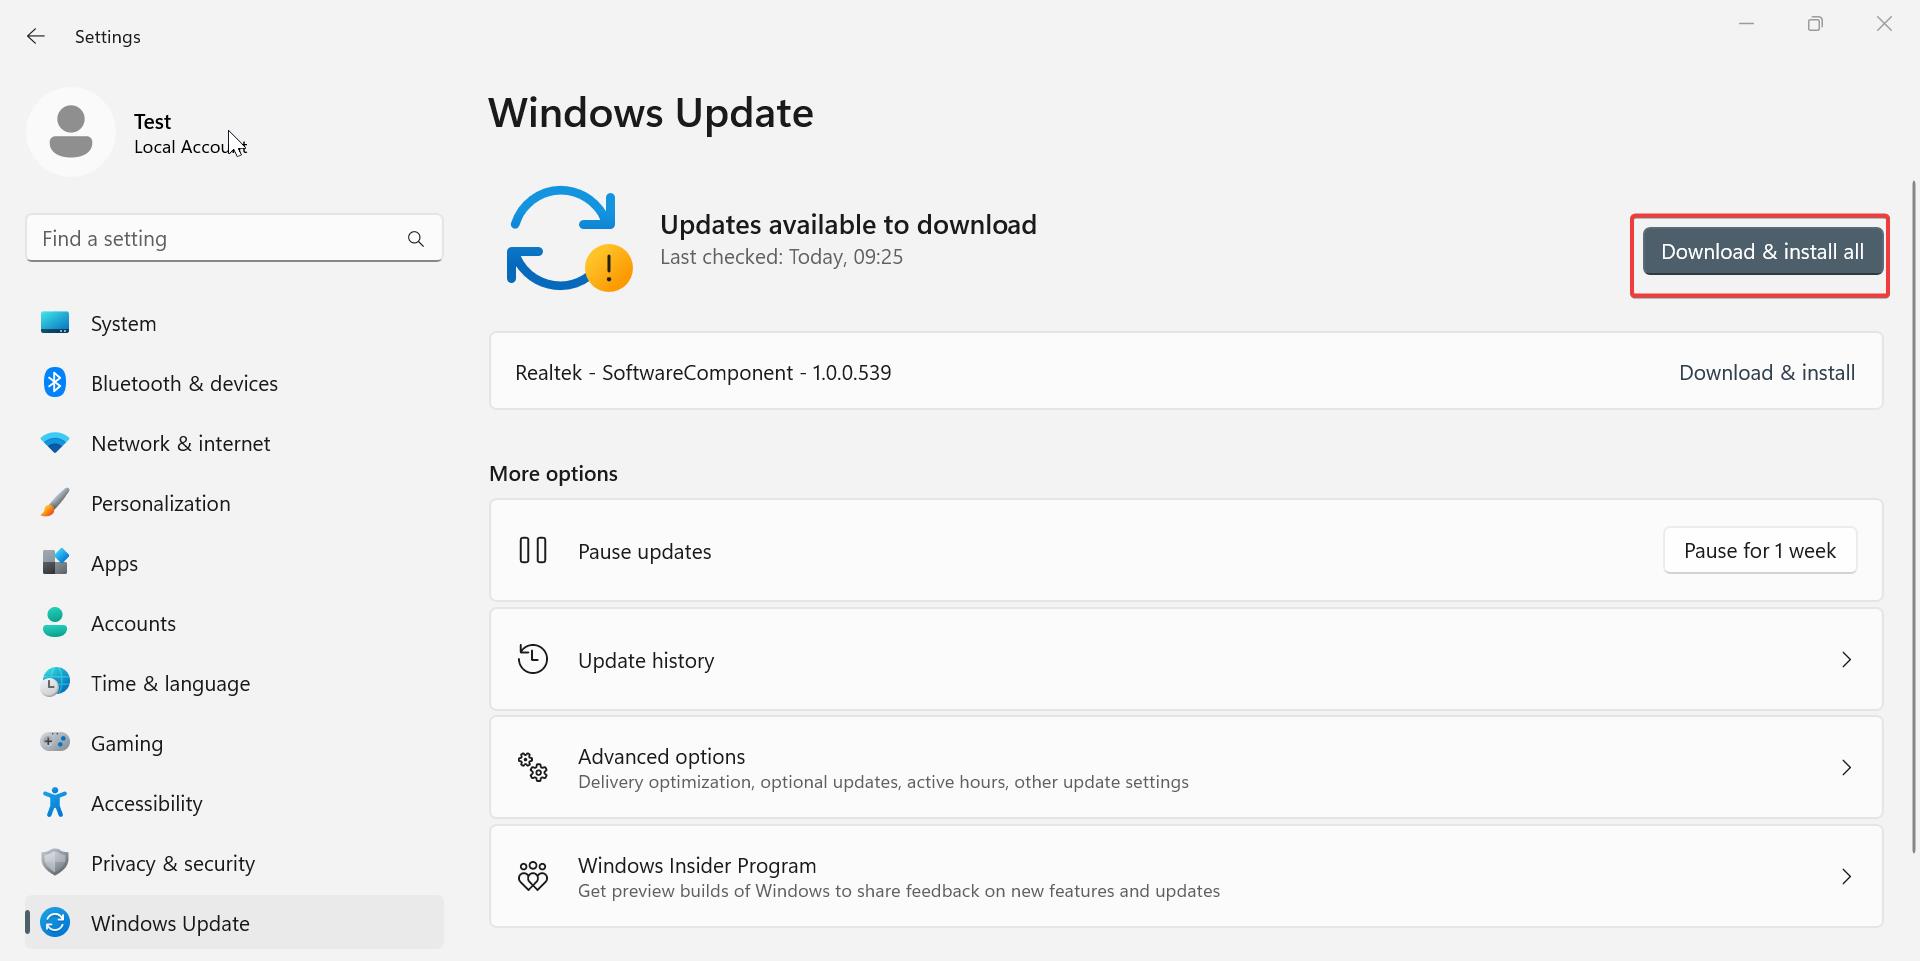
Restart the system once and check.
Solution 8: Check BIOS/UEFI Settings
Restart your computer and enter BIOS/UEFI (usually by pressing F2, Del, or another key during startup). Look for settings related to the camera and ensure it is enabled. Save and exit BIOS/UEFI.
Solution 9: Use a Different User Account
Sometimes, user profile corruption can cause this issue. Delete the old user profile, Create a new user account, and check if the camera works when logged into that account.
By following these steps, you should be able to resolve the “No Cameras are Attached 0xA00F4244” error on your Windows 11 device.

