Control Panel in Windows 10 is the centralized configuration area where you can change nearly all the settings. Like operating system settings, keyboard and mouse functions, passwords and users, network settings, Power management, desktop backgrounds, sounds, hardware, Programs, installation and removal, speech recognition, and parental control. Disabling the control panel will restrict users to uninstall programs, mess with system settings, and nearly to do anything. Many companies restrict their project users from accessing the control panel. If you are looking way to enable or disable the control panel then this article will guide you to achieve this. By default control panel is enabled in all windows versions. If you found any restrictions on any computer then reverse the below-mentioned methods to unblock the restrictions.
Disable Control Panel in Windows 10:
Method 1: Disable Control Panel using the Registry editor.
Method 2: Disable Control Panel using Group Policy Editor.
Note: Modifying the Registry is risky, and it causes irreversible damage to your OS Installation Follow the steps correctly. Friendly advice Before Modifying Registry Creating Restore Point is recommended.
Method 1: Disable Control Panel using the Registry Editor
Open Run command by pressing Windows + R and type Regedit and hit enter, this command will open the registry editor.
Now Navigate to the following path.
HKEY_CURRENT_USER\Software\Microsoft\Windows\CurrentVersion\Policies\Explorer
From the left-hand side click on Explorer and from the right-hand side right-click on the empty area and create a new DWORD. New > DWORD (32-bit) value.
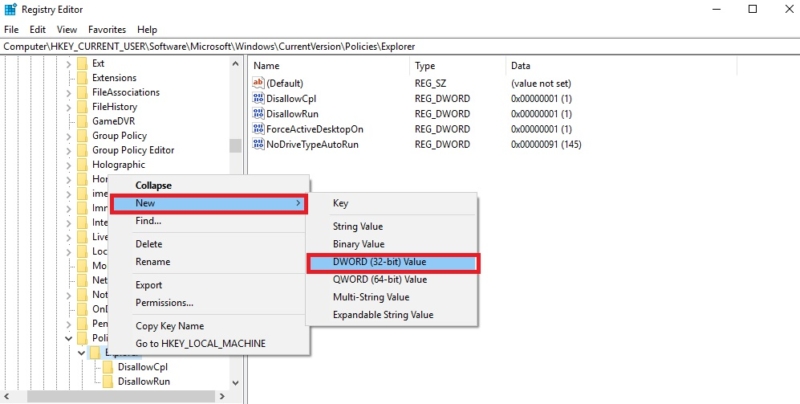
Name the DWORD as NoControlPanel and double-click on the NoControlPanel. Modify the value to 1 and then click on OK.
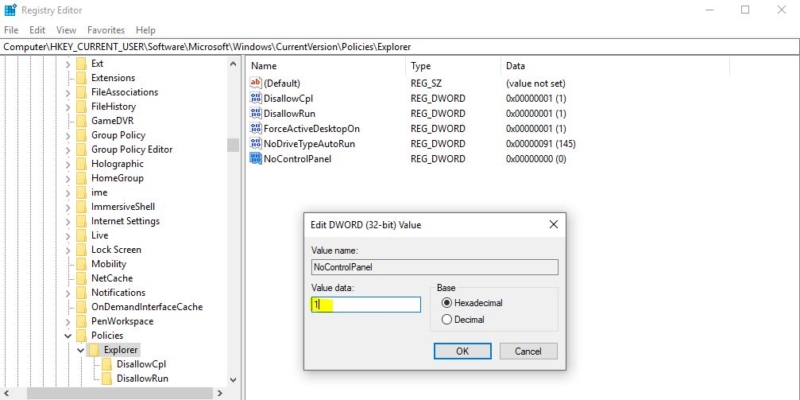
Restart the system once this will disable the Control Panel.
Method 2: Using Group Policy Editor
Open Run Command and type Gpedit and hit enter this command will open the Group Policy Editor.
Now Navigate to the following path.
User Configuration > Administrative Templates > Control Panel
Make sure to select Control Panel then in the right window pane double-click on “Prohibit access to Control Panel and PC settings” policy.
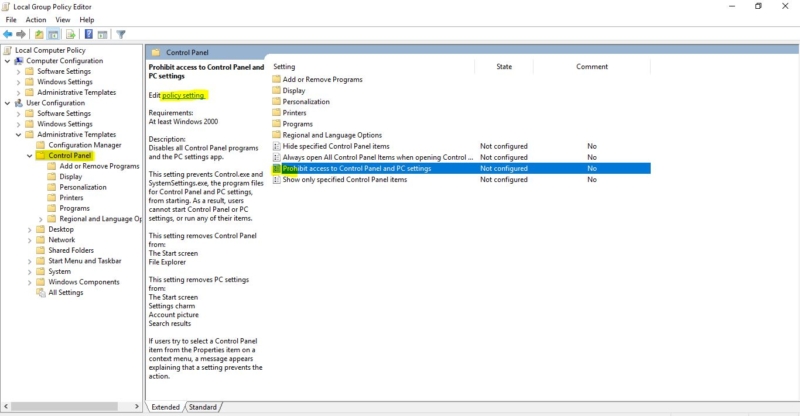
Select “Enabled” under policy settings then click Apply followed by OK.
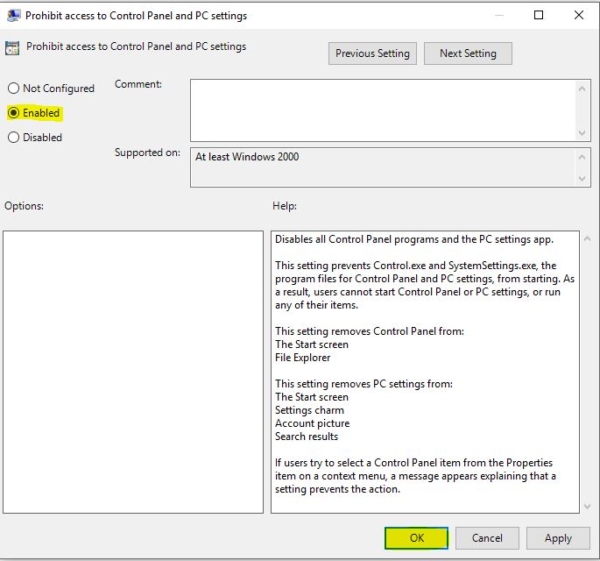
Reboot your PC to save changes. Once everything is Done Reboot the PC Once to make it effective. After enabling it you can see the Control panel Icon, but you can’t Open it. It will prompt an error Like this.
“This operation has been canceled due to restrictions in effect on this computer. Please contact your system administrator.”
Read Also: Fix Control Panel is not Opening in Windows 10


