In Windows 11 Memory Integrity is a Windows Security feature that is an inherent part of Windows Security. Memory Integrity is referred to as HVCI Hypervisor-Protected Code Integrity and it is a Virtualization based security. HVCI and VBS provide stronger protections against malware trying to exploit the Windows Kernel, and it improves the thread model of Windows. VBS leverages the Windows Hypervisor to create an isolated virtual environment and HVCI protects this Virtual environment. This makes it difficult to run the malicious program to use low-level drivers to hijack your computer. Memory integrity is designed to prevent attacks from inserting malicious code into high-security processes. By default, in Windows 10/11 this Memory Integrity is enabled, if you want you can disable the Memory Integrity. Memory Integrity is part of the Core Isolation feature, to enable Memory Integrity your system must meet the requirements for standard hardware security, your device should have the following features to support memory integrity.
- TPM 2.0
- Security boot Enabled
- DEP
- UEFI MAT
If you are looking for a way to enable or disable Memory integrity, then this article will guide you to Enable or Disable Memory Integrity in Windows 11.
Related: Fix Memory Integrity Can’t be turned on in Windows 11
Enable or Disable Memory Integrity in Windows 11:
Memory Integrity is a security feature that comes along with Windows Security(Windows Defender), By default, Memory Integrity is enabled in Windows 11, to disable this feature follow the below-mentioned steps.
Enable or Disable Memory Integrity:
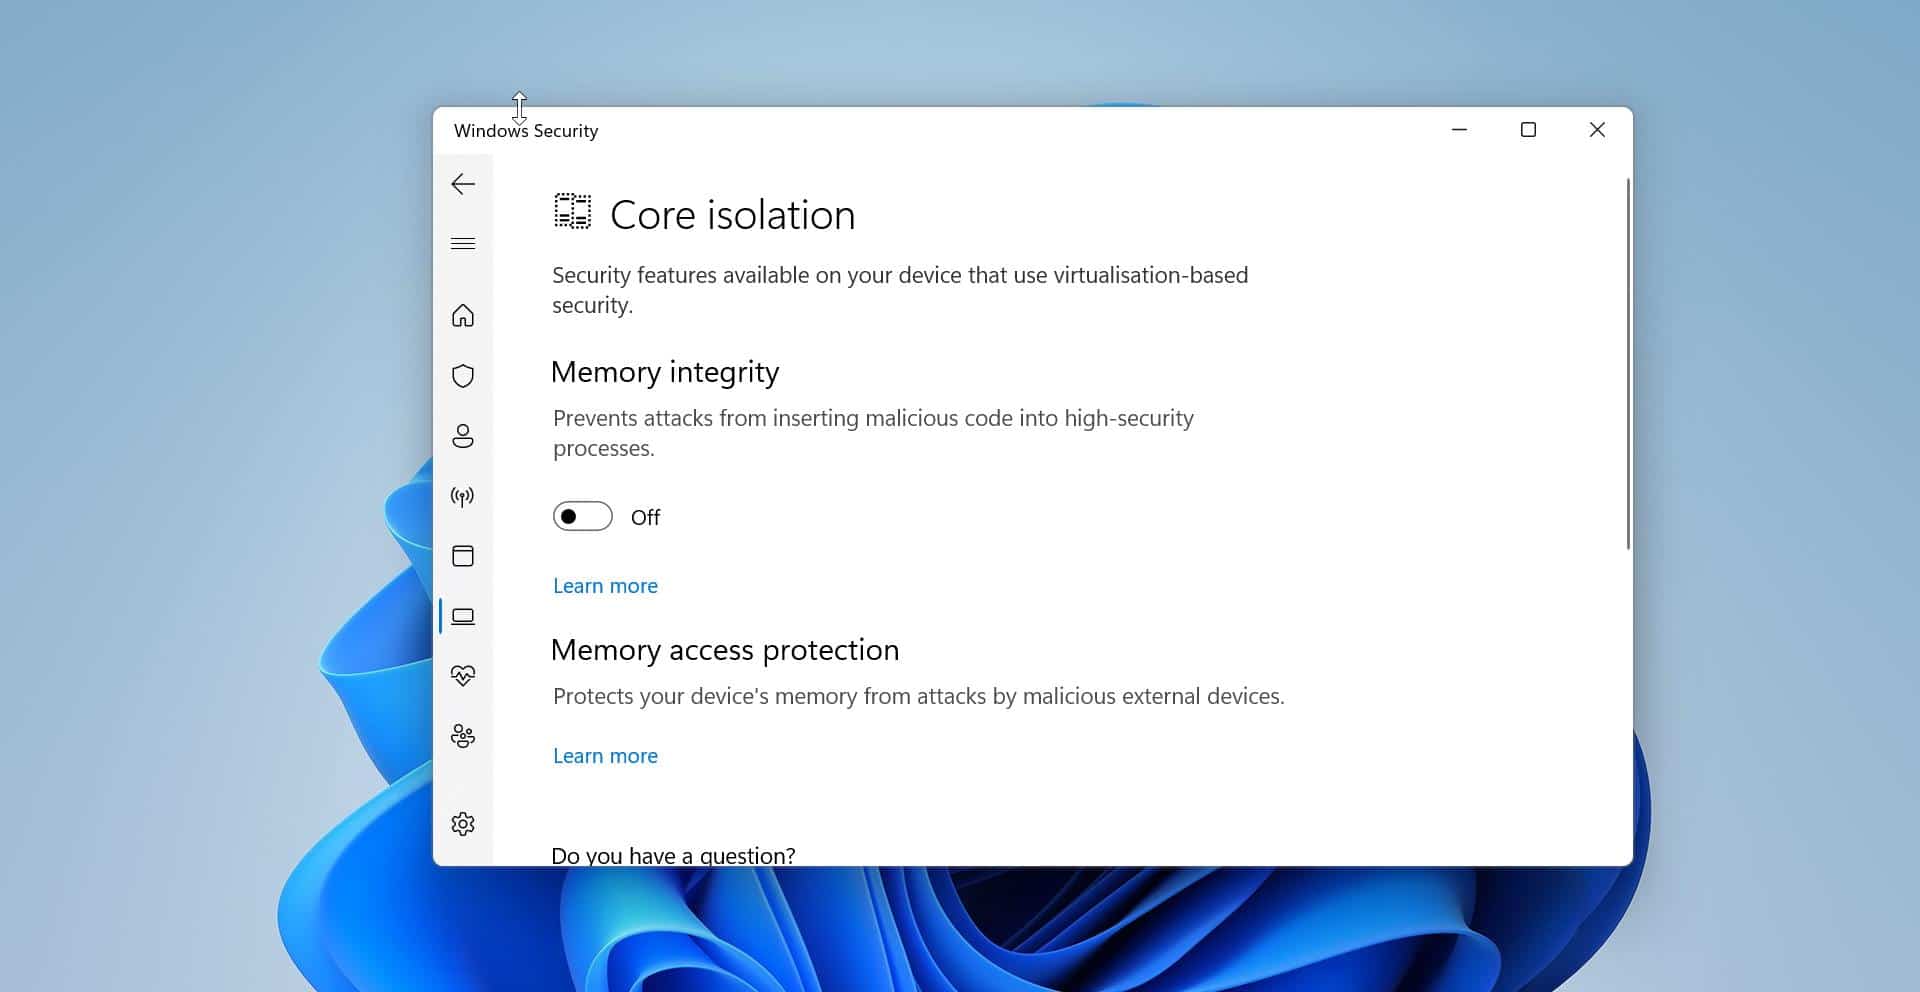
Open Windows Security, click on the Start Menu, and search for Windows Security.
From the left-hand side click on the Device Security.

Under Device Security, look for the Core isolation and click on Core isolation details.

Under Core Isolation, Turn off the Toggle button of Memory integrity.

If you want to enable just follow the same steps above, and just Turn on the Toggle button of Memory Integrity.
Using Registry Editor:
Note: Modifying the Registry is risky, and it causes irreversible damage to your OS Installation Follow the steps correctly. Friendly advice Before Modifying Registry Creating Restore Point is recommended.
Open the Run command by pressing Windows + R and type Regedit and hit enter, this command will open the Registry Editor Console.
Now navigate to the following Registry path.
Computer\HKEY_LOCAL_MACHINE\SYSTEM\CurrentControlSet\Control\DeviceGuard\Scenarios\HypervisorEnforcedCodeIntegrityFrom the left-hand side click on the HypervisorEnforcedCodeIntegrity Registry Key and from the right-hand side look for the DWORD named Enabled.
Double Click on the Enabled DWORD and set the value as follows.
To Disable Memory Integrity: 0
To Enable Memory Integrity: 1

Click on OK and Close the Registry editor, Restart the system once.