Disabling the LAN adapter for some reason is ok but usually, we use device manager or windows 10 setting to disable. But today here I am going to show how to disable LAN connection from CMD and you can create a batch file to make it easy for your use. To use this command, you need admin privileges. Let’s Jump into the steps directly.
Steps:
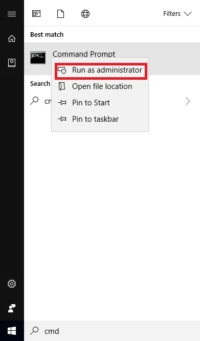
- Open command prompt in elevated mode or press Windows + x and select command prompt admin and hit enter.
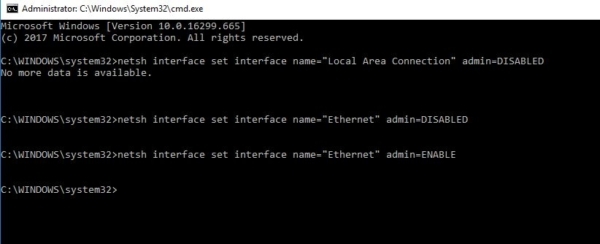
- Run the below mention command
netsh interface set interface name=”Local Area Connection” admin=DISABLED
- Before running this command verify the interface name as per your system network configuration. To check this, go to control panel and search for network connection. Here all the network adapters are listed out. Pick the Name of the adapter which you want to disable.
Or
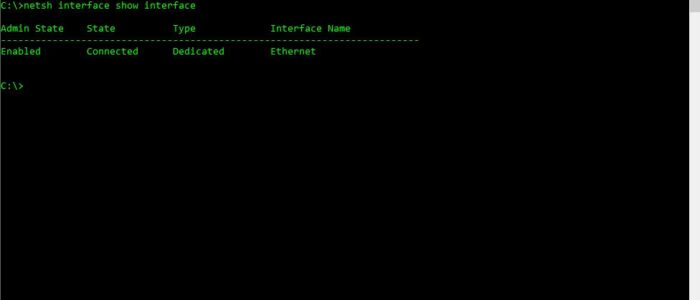
- You can type the below mention command to verify the name and status of the network adapters.
netsh interface show interface
- Copy the command and paste in the command prompt that’s all now the network adapter is disabled. Now you may open ‘Network connections’ and confirm that the connection is disabled.
How to enable The Network adapter using cmd?
- Open the command prompt in admin mode and type the below mention command.
netsh interface set interface name=”Local Area Connection” admin=ENABLE
- This command will enable the adapter.
How to make this command as a batch File?
- Open notepad and paste the below-mentioned command.
TO DISABLE THE NETWORK ADAPTER:
@echo off
netsh interface set interface name=”Ethernet”
admin=DISABLE
netsh interface show interface
PAUSE
TO ENABLE THE NETWORK ADAPTER:
@echo off
netsh interface set interface name=”Ethernet”
admin=ENABLE
netsh interface show interface
PAUSE
- Copy the command and paste it in notepad safe it as netsh.bat in desire location.
- Now right-click on the batch file and choose to run as an admin. Now you can use it for easy use.

