Dots per inch (DPI, or dpi) is a measure of spatial printing or video dot density, in particular the number of individual dots that can be placed in a line within the span of 1 inch. The lower DPI will make the Icons and letters smaller the Higher the DPI the bigger the DPI and icons. The default DPI setting of windows 10 is 96 DPI. So in this article, I am going to show how to change DPI scaling level
Change DPI Scaling Using Registry Editor:
- Open Registry Editor by pressing Windows + R key combination, type in Regedit, and press Enter.
- The User Access Control will prompt press Yes to continue.
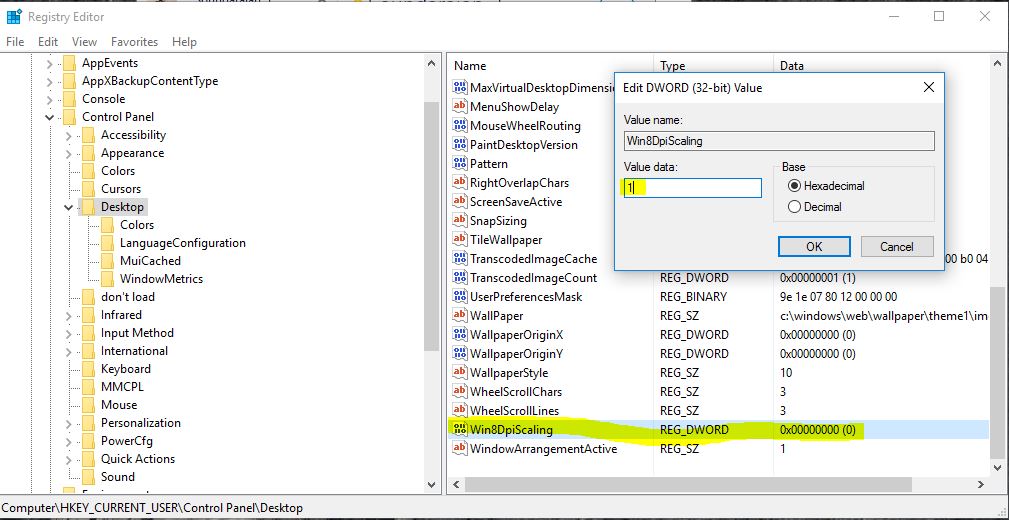
- Go to HKEY_CURRENT_USER\Control Panel\Desktop
- In the right-side pane, look for a Win8DpiScalingand set the value to 1 and close Registry Editor.
- Restart your computer.
Change DPI Scaling Using Windows Settings:
- Open Settings and click on the System
- Alternatively, right-click on an empty area on your desktop and select Display.
- In System, settings screen click on Display option from the left side.
- Under Change the size of text, apps, and other items: 100% (Recommended), move the slider left or right to the DPI percentage you want to set for that display.
Using Control Panel:
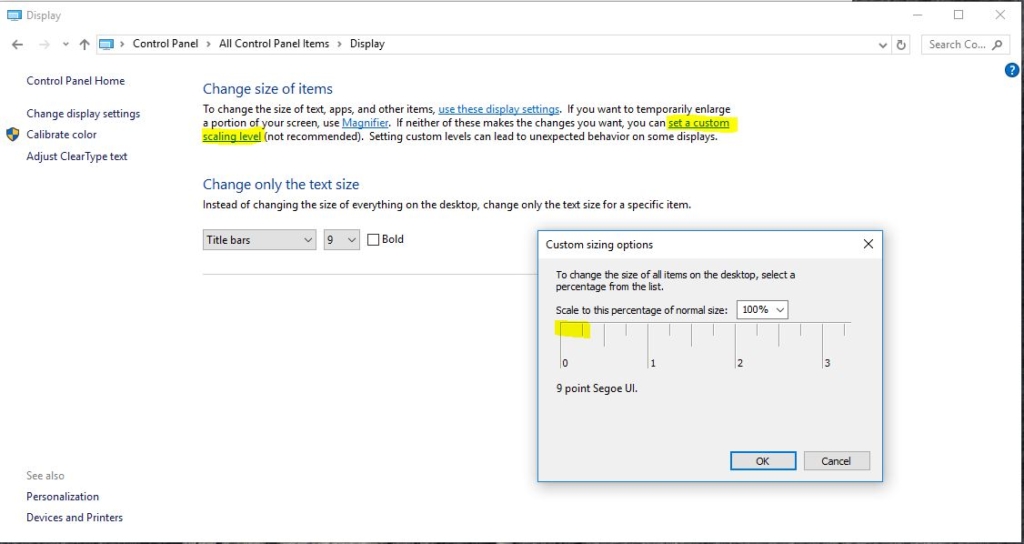
- Open the Control Panel (icons view) and select Display.
- Under Change size of items, click on the set a custom scaling level
- Drag the ruler left or right to the scaling percentage you want.
- Alternatively, select the scaling percentage you want in the drop-down menu.
