Recently one user reported that he faced an issue while installing Postgresql in Windows 11, during the installation he received the following error “No Mapping between account names and Security Id was done”. User mentioned that he recently reset his password, user tried to create a new user account and tried to install the software, but still the same error repeated. If you are receiving a similar error, then this article will guide you to fix No Mapping between account names and Security Id was done error in Windows 11.
Fix No Mapping between account names and Security Id was done error:
Follow the below-mentioned resolution method to fix No Mapping between account names and Security Id was done error in Windows 11.
Solution 1: Modify the Registry Value:
Open Run command by pressing Windows + R and type regedit and hit enter, this command will open the Registry Editor console.
Now navigate to the following registry path.
HKEY_LOCAL_MACHINE\SOFTWARE\Microsoft\Windows NT\CurrentVersion\Winlogon\GPExtensions\{827D319E-6EAC-11D2-A4EA-00C04F79F83A}On the right-hand side pane look for the ExtensionDebugLevel DWORD, double-click on it, modify the DWORD, set the Value as 2, and click OK.
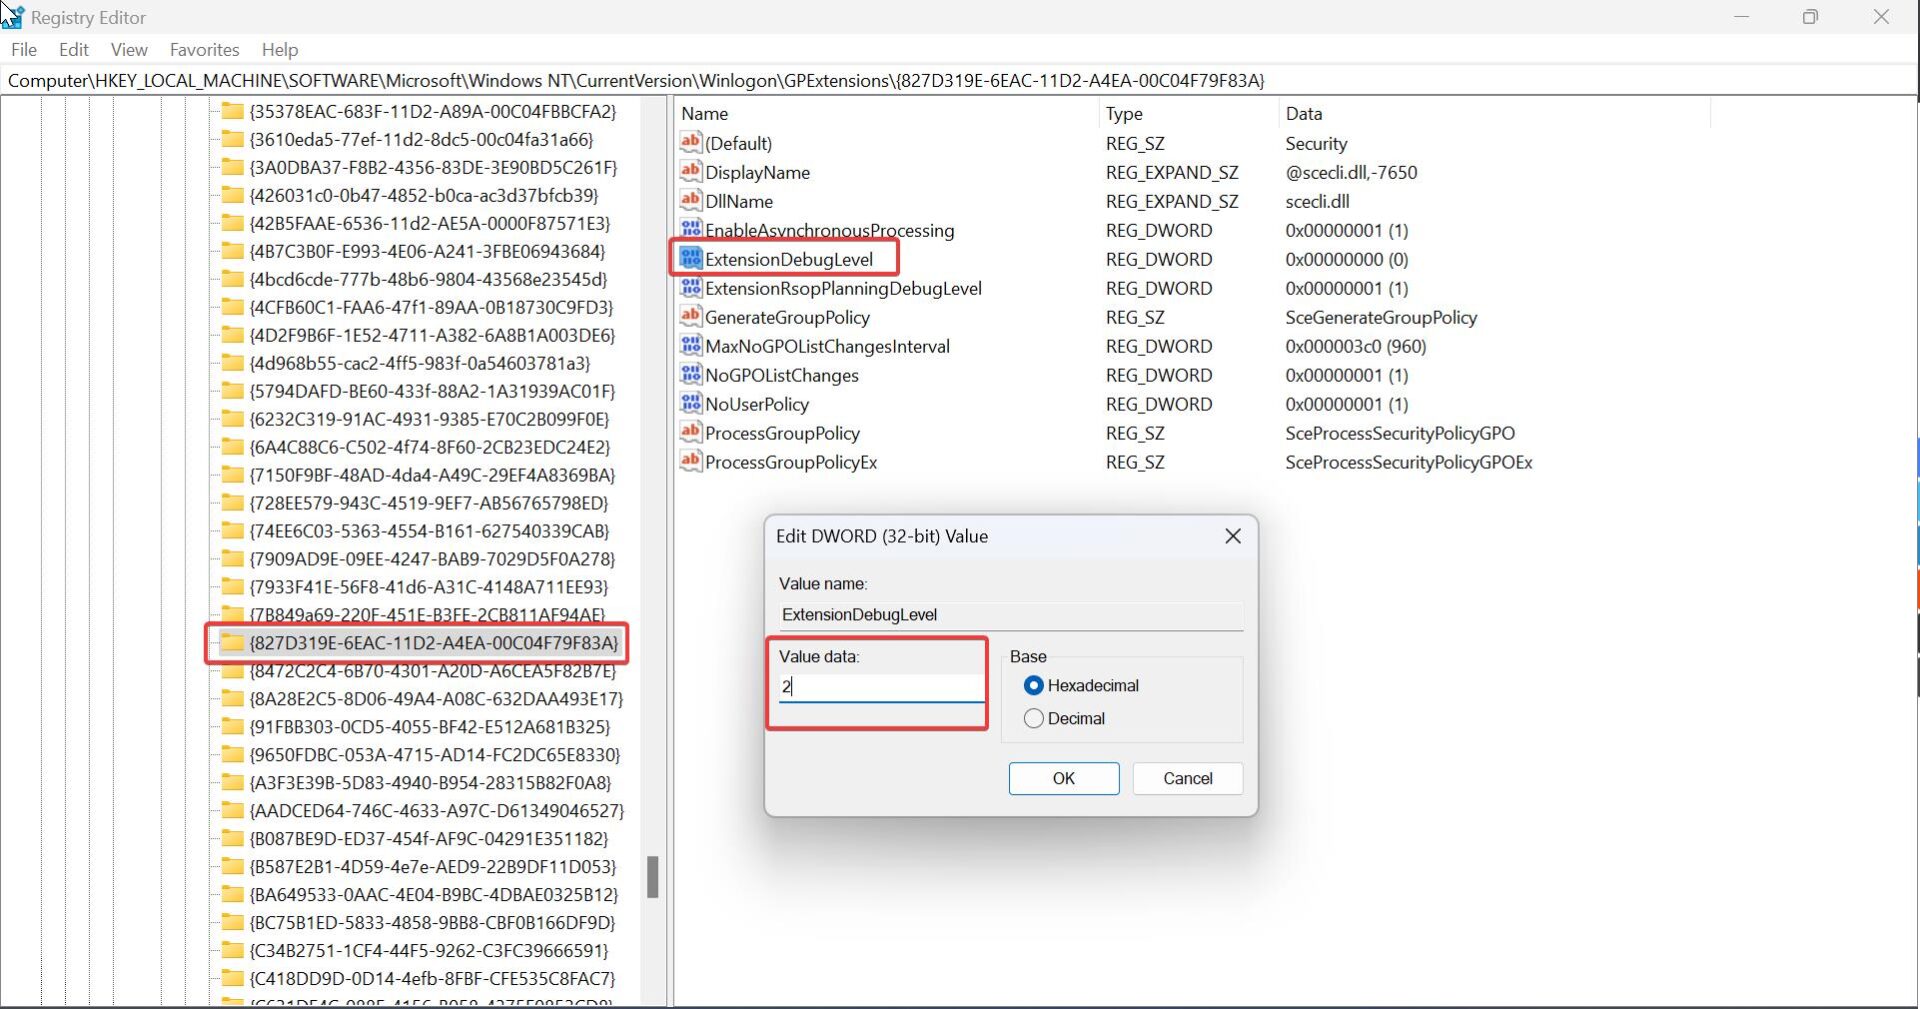
Close the Registry Editor and restart the system once. This will enable the Log File, next, we need to find the problematic user account. Mostly this error will occur if you change the username in the control panel, then sometimes there may be a chance it’s not updated in the Registry Editor, so we need to verify the user profile details in the Registry editor.
Solution 2: Verify Username in Registry Editor
If you are getting the error message while opening the Library folders (Documents, Music, Videos, etc.), then note down the SID, On the error window you can find the SID of your User account, noting down the SID will save some time during the troubleshooting. If you didn’t note down the SID value then no issue just follow the steps below.
Open run command by pressing windows + R, Type regedit, and hit enter In the registry editor navigate to the below-mentioned path.
Computer\HKEY_LOCAL_MACHINE\SOFTWARE\Microsoft\Windows NT\CurrentVersion\ProfileList\
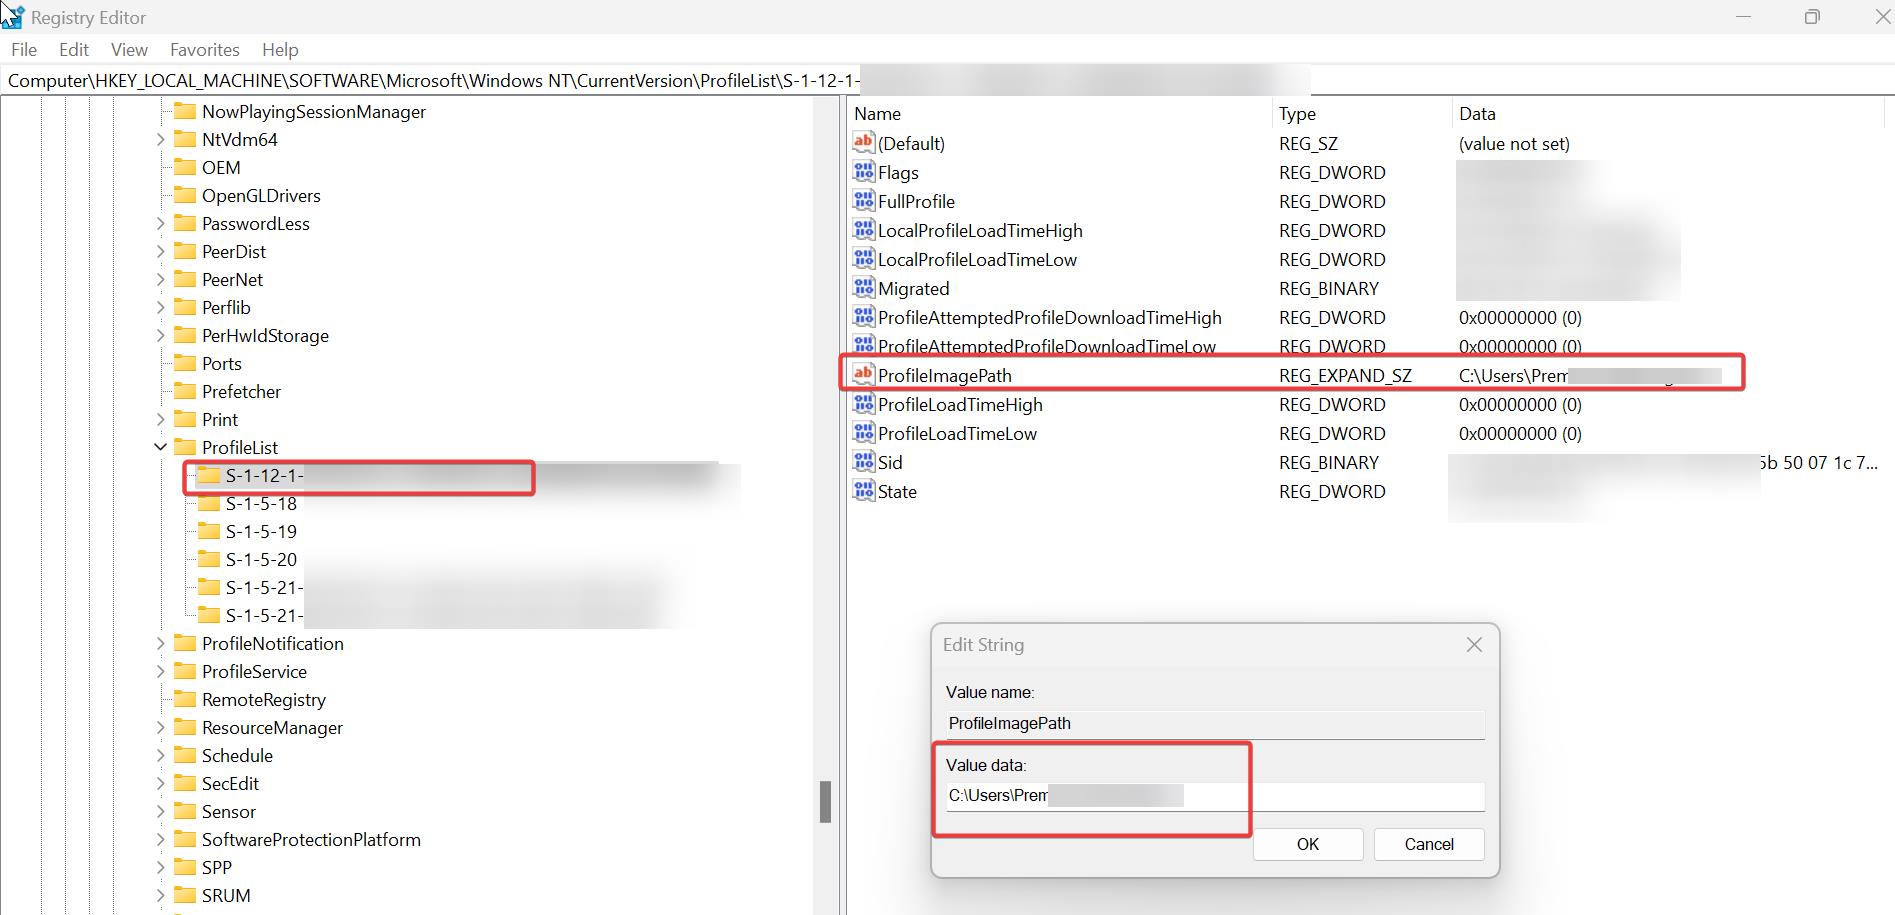
From the left-hand side expand the ProfileList and here you can see a list of SID Click on each entry until you see the PROFILE IMAGE PATH that matches your profile name.
Double-click on the ProfileImagePath String value and enter the new username and click on OK.
Restart your computer once.
Solution 3: Delete your userprofile and recreate
If none of the methods work then use this method as a final solution, Delete the current profile you are using now, Note: Make sure you have taken the data backup, and follow this link to Delete the User Profile. Once you delete your user account next create a new user profile, if the system is domain joined then after deleting the old profile, restart your system once and log in with your Microsoft account credentials, this will automatically create the user profile.


