Microsoft is finally released the much-rumored Windows 11 at its event which is held on 24th June 2021, and it really included a lot of new features. It looks really promising in terms of Visual changes and feature sets. One of the most awaited and popular features was the Windows 11 new start menu. Along with a centered taskbar, a brand-new Microsoft Store, and moreover Android app support added more expectations to Windows 11. Most of the users are already tried Windows 11 before the launch itself, but many users waited for the official launch. Microsoft announced at its event last night, that you can install Windows 11 on your PC right away if your system passes the eligibility check. And Microsoft released the Minimum system requirements for Windows 11 and the PC Health check-up tool to check the eligibility. Many users tried to upgrade their PC bypassing the eligibility, but for most of the users the PC Health Check-up tool returned an error “This PC can’t run Windows 11”. Even though you have genuine windows 10, if you are still facing this issue, then this article will guide you to Fix Running Windows 10 but Can’t run Windows 11.
Before proceeding with the topic, first you need to understand, the Upgradation to Windows 11 is not automatic, we are updating our Windows 10 manually. Microsoft has revealed that it will release the first Insider Preview build for Windows 11 next week. If you want automatic updates from Windows 11 then you need to signup for Windows Insider Program right away. If you want to Upgrade manually then follow the below-mentioned steps.
Check Minimum System Requirements for Windows 11
- Processor: 1 gigahertz (GHz) or faster with 2 or more cores on a compatible 64-bit processor or System on a Chip (SoC)
- Memory: 4 GB RAM
- Storage: 64 GB or larger storage device
- System firmware: UEFI, Secure Boot capable
- TPM: TPM Trusted Platform Module (TPM) version 2.0
Before proceeding make sure you have enabled and upgraded the TPM version 2.0. follow the steps in the video to check and upgrade the TPM 2.0.
Related: How to Switch back to Windows 10 start menu in Windows 11?
Run the PC Health Checkup:
Download the PC Health Checkup from the Microsoft Official Blog.
Install it and Run as administrator.
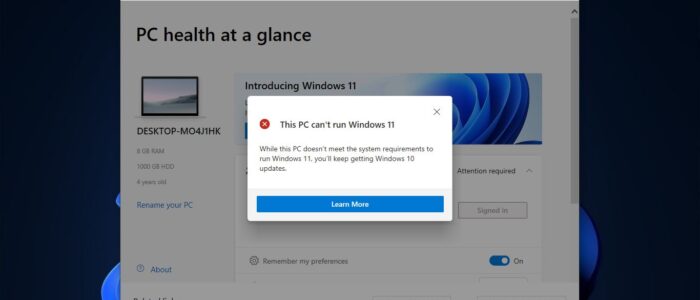
Now, under Introducing Windows 11 click on Check now. This tool will help you to check your system is eligible for Windows 11 upgradation.
For most of the user this tool has returned the This PC can’t run Windows 11 error.
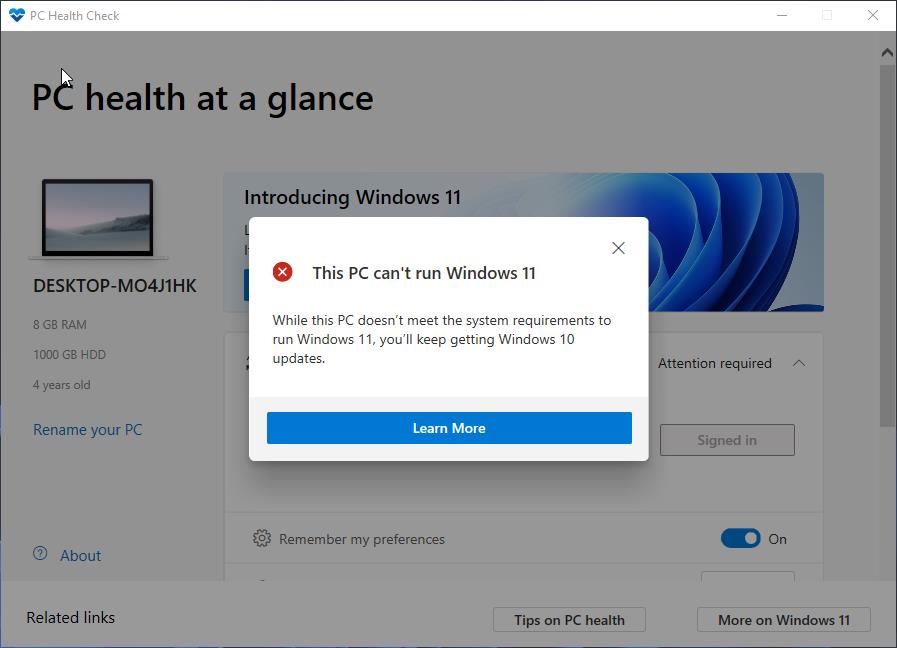
To fix this issue, we need to check two mandatory checkpoints, first the Boot mode, and the second one TPM enablement.
Check Boot Mode:
To install Windows 11, the Boot Mode should be in UEFI mode, if you installed your Windows 10 operating system in legacy Boot mode then you are not eligible for Windows 11 upgradation. First, check the boot mode, follow the below-mentioned steps to check the boot mode.
Click on Windows search and type System Information and click on it.
Under System Information, look for the BIOS Mode, the BIOS mode should be UEFI if you have legacy boot mode. Then you need to reinstall the Operating system by enabling the UEFI boot mode.
TPM enablement:
This is the important check to perform, if you are a corporate user then you no need to worry about TPM, because corporate users use encrypted computers or laptops, The TPM was enabled by default in those systems. But if you are using a personal laptop then you need to confirm the TPM status.
If TPM is not enabled on your laptop or Desktop then follow the below-mentioned steps to enable it.
First Restart your PC or Laptop, then press the designated boot menu key, for HP its F10, for Dell its F12.
In Boot menu go to the Security section or Authentication tab, depends on your OEM.
Locate Secure Boot option and Enable it.
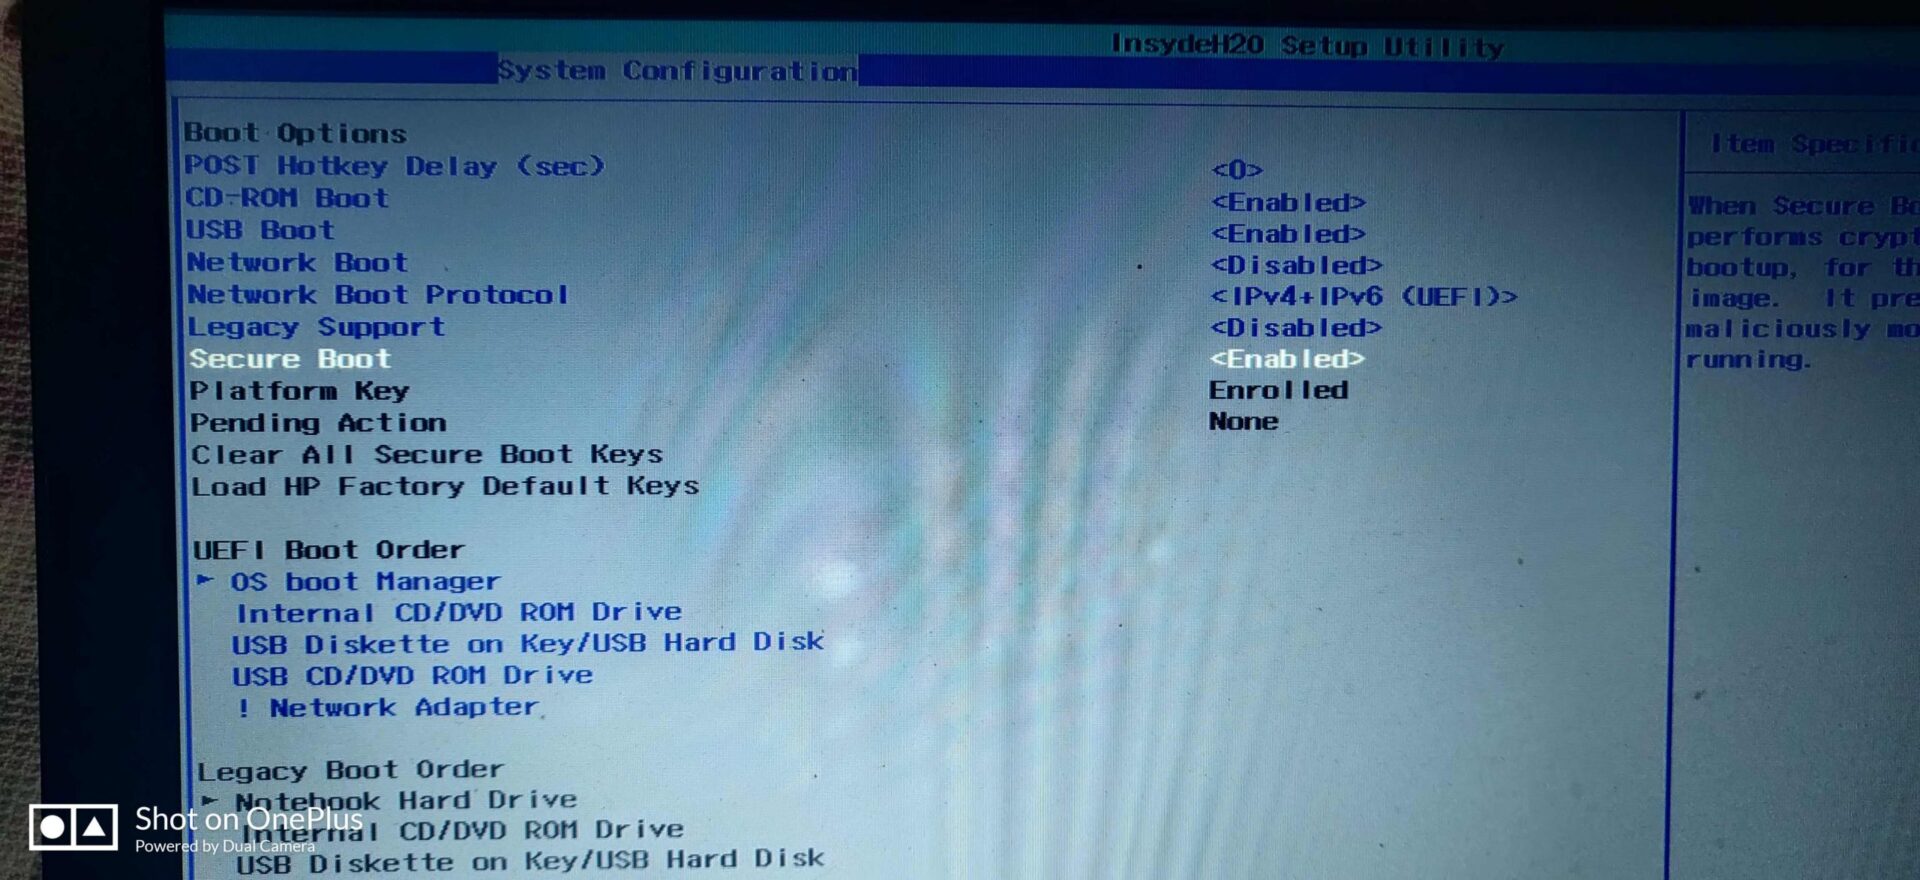
Once you enabled the secure boot next Locate the TPM state and Enable it.
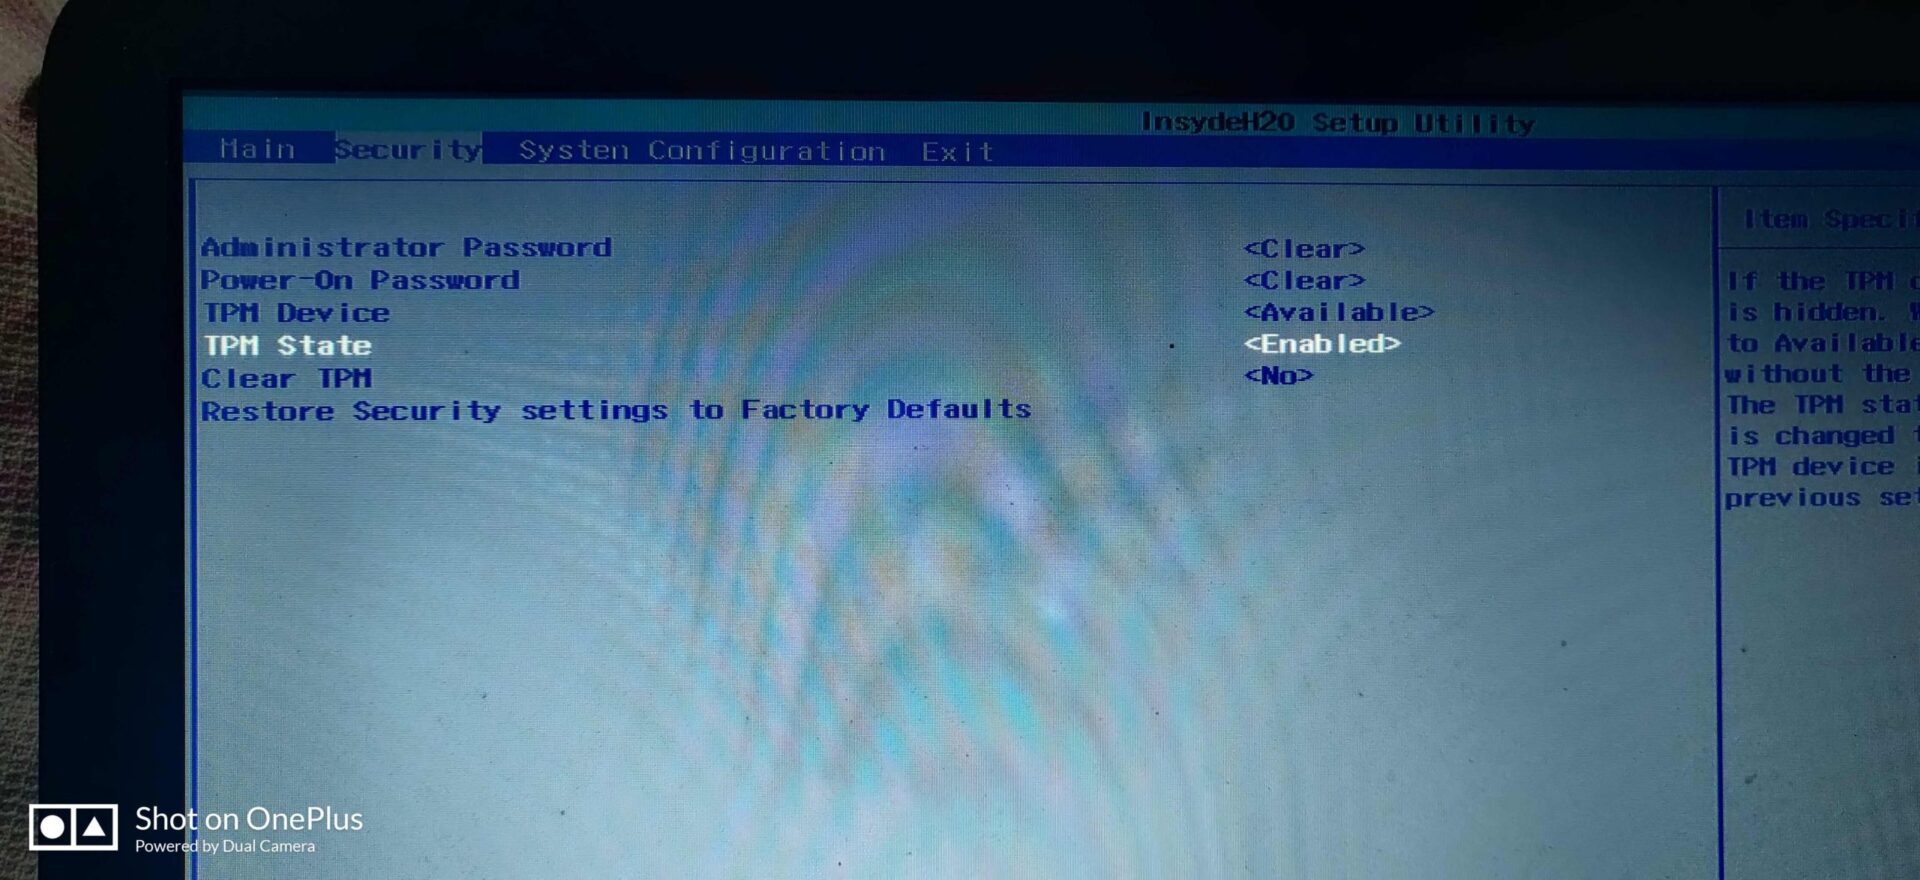
Save the changes and Exit from the Boot menu.
Restart your PC and run the PC Health Checkup tool. Mostly this will fix This PC can’t run Windows 11 Error.

