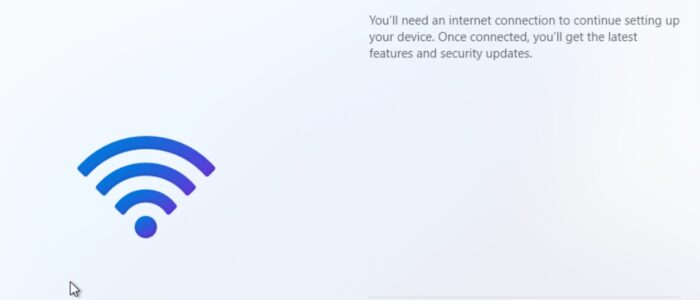
You can get to Windows 11 newer versions via two methods, the first method is by updating your existing Windows version or by installing the latest updated Windows versions from scratch. In the Second method, if you have to cross different stages of installation, the Installation wizard will automatically take you to the stages, while crossing the second stage of installation Windows will ask you to connect to the internet, you can choose the network and connect to internet, or you can simply press I don’t have internet connection, so that you can skip that option. However, some users reported that they cannot see the skip option. The only way to proceed further with the installation is to connect to the internet, but sometimes while connecting to the internet, the installation will get stuck at the “Let’s connect you to a network” screen. If you face a similar issue while installing Windows, this article will help you fix Stuck on “Let’s Connect You to a Network” in Windows 11.
Fix Stuck on “Let’s Connect You to a Network” in Windows 11:
Some users reported they also face difficulties connecting to the internet, and there is no internet option to skip this option. And while attempting to open the command center, it just won’t open. Follow the below-mentioned resolution methods to fix this problem.
Solution 1: Check the Wifi card on Laptop or Computer
Once you receive this error, in the first place check your Wireless card once, check if it’s connecting to some other network. Turn on your mobile Hotspot and try to connect with that network, or if you have any other broadband connection try to connect. If it’s still not connecting and showing the same error, then proceed with the next resolution method.
Solution 2: End the Network Connection Flow Process
To resolve this issue, first, we need to bypass “Let’s connect you to a network”, to bypass this screen, we have to end the Network connection flow process from the task manager.
Press Shift + F10 on the “Let’s connect you to a network” page, this will open the command prompt on that page.
Next type taskmgr in command prompt. This will open the Command prompt.
Click on the Process tab and find the Network Connection Flow Process, right-click on it, and choose End Task.
Once you end the process, you will enter an interface to create a new account, you can proceed with the on-screen steps to complete the Installation process.
Solution 3: Use OOBE Command
Out-of-Box-Experience is the setup process of installing or performing the initial configuration of the Windows Operating system, you can Notice this OOBE setup process when turning On a New PC or laptop for the first time, or While installing Windows operating system, Let’s connect you to a network screen is part of the OOBE. If you are stuck on that screen, you can use an OOBE command to bypass that screen and proceed with the Windows Installation. Follow the below-mentioned steps to bypass the screen.
Press Shift + F10 on the “Let’s connect you to a network” page, this will open the command prompt on that page.
Type OOBE\BYPASSNRO and hit Enter, this will restart the computer.

Follow the Onscreen instructions after the restart to complete the Windows Setup.
The Installation Wizard will start from the beginning, once you reach the “Let’s connect you to a network” screen again, you’ll see the “I don’t have internet” option. Click on it and skip that screen.
On the next screen, click on Continue with Limited Setup.
Accept the license agreement and create a local account to finish the installation process.
Solution 4: Create Local User Account
The final option is to create a Local User Account, this will automatically bypass the “Let’s connect you to a network” screen. Here we are going to use the cmd to create a Local User account. Follow the below-mentioned steps to Create a Local user account using Command Prompt.
Press Shift + F10 on the “Let’s connect you to a network” page, this will open the command prompt on that page.
Open the command prompt and type in “net.exe user PreferredUserName /add”, then hit Enter. This command adds a new user with the username you prefer.
Now, type in “net.exe localgroup administrators PreferredUserName /add” and press Enter. This step adds the user to the administrator’s group.
Change the directory by typing “cd OOBE” and pressing Enter. This takes you to the OOBE (Out of Box Experience) directory.
Enter “msoobe.exe &&” and press Enter. This command helps in completing the setup.
Finally, type “shutdown.exe -r” and hit Enter. This will restart your computer.
You may get a prompt message saying the username or password is incorrect, Click on OK and choose the right account, and then login.
Read Also:
How to Skip Let’s connect you to the Network Page in Windows 11?