Microsoft announced to Install or Upgrade Windows 11 TPM is very mandatory, TPM will give Windows 11 system a baseline of hardware security. So all Windows 11 PCs support Device Encryption which increases the overall security of your computer. To Install Windows 11 you need to enable the TPM on your PC, First, you need to check whether you PC is having TPM or not. If not then you can bypass the TPM security check and then install Windows 11. So why Windows 11 require TPM. As per the Microsoft blog post “PCs of the future need this modern hardware root-of-trust to help protect from both common and sophisticated attacks like ransomware and more sophisticated attacks from nation-states. Requiring the TPM 2.0 elevates the standard for hardware security by requiring that built-in root-of-trust,”. So Windows 11 includes a new TPM Diagnostics tool, to query a TPM for stored information.
TPM Diagnostics tool or TpmDiagnostics.exe is an optional feature that lets you to find out all the information about the Trusted Platform Module Chip. This is a command-line tool, you can get this tool as an optional feature in Windows 11. This article will guide you to Enable TPM Diagnostics Tool in Windows 11.
Related: How To Upgrade or Degrade TPM using DOS Environment in DELL?
Enable TPM Diagnostics Tool in Windows 11:
Windows 10/11 by default include Trusted Platform Module Management Console (tpm.msc), using tpm.msc you can find the basic information about the TPM, and using this tool you can clear the TPM.
Using the TPmDiagnostics.exe tool you can get more information about TPM, including Windows Attestation Identity keys, Endorsement Key certificates, other keys stored in the TPM, boot counters, information about tasks that are running, information about the TPM, and etc.
Open Windows Settings by pressing Windows + I and then from the left-hand side click on the Apps and from the right-hand side click on the Optional features.

Under Optional Features > Add an optional feature, Click on View features.
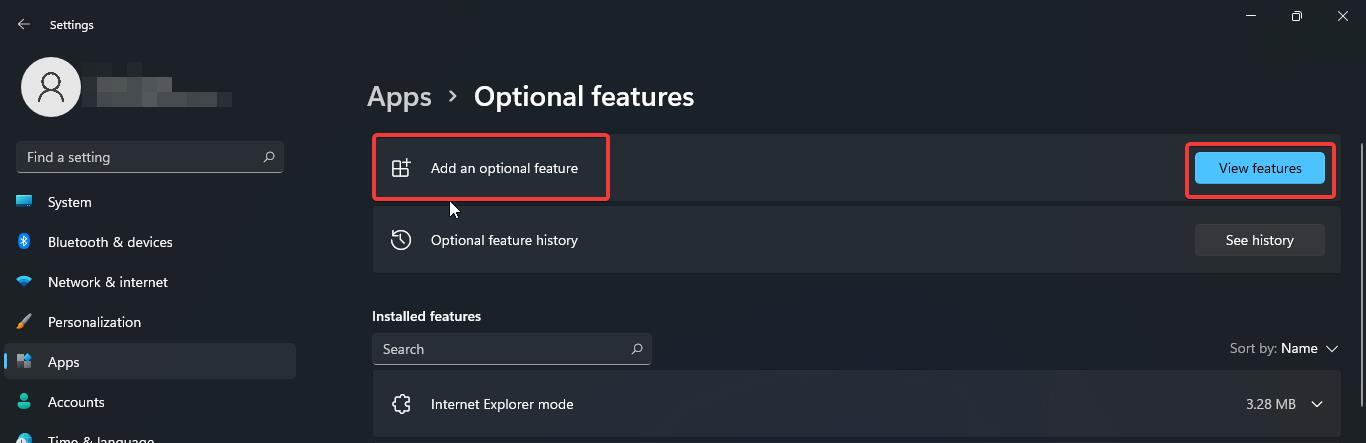
Now Search for “TPM diagnostics” and click on the TPM diagnostics tool and then install.

Once the installation process is completed successfully, just open the Command Prompt in elevated mode.
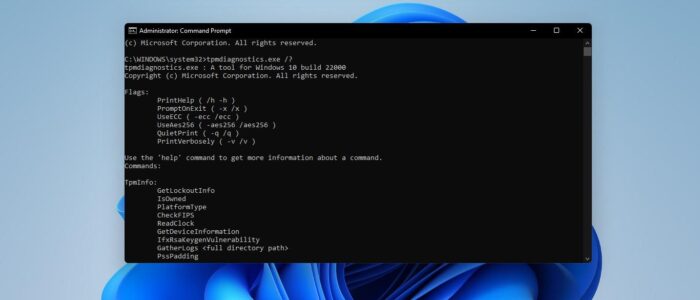
Now you can enter the following command to get all the commands that can use in the tpmdiagnostics tool.
tpmdiagnostics.exe /?

This command is a help command, using this command you can get all the commands that you can use in the tpmdiagnostics tool.
So, most of the users check their TPM version, you can use the following command to get the TPM version and all the details about the TPM chip.
tpmdiagnostics.exe getdeviceinformation
This command will display the following information about the TPM Chip.

If you want to uninstall the TPM chip, just follow the same steps above and click on uninstall to remove the TPM diagnostics tool.
Read Also:
How to Clear TPM in Windows 11?
Fix Your computer’s Trusted Platform Module has malfunctioned error code C0090016