Microsoft has recently added a new feature named Printer Protected Mode to Windows 11, which is available in Windows Insider Builds, but soon this feature will be rolled out to the Stable release of Windows 11. This article will guide you to Enable Windows Printer Protected Mode in Windows 11.
What is Printer Protected Mode?
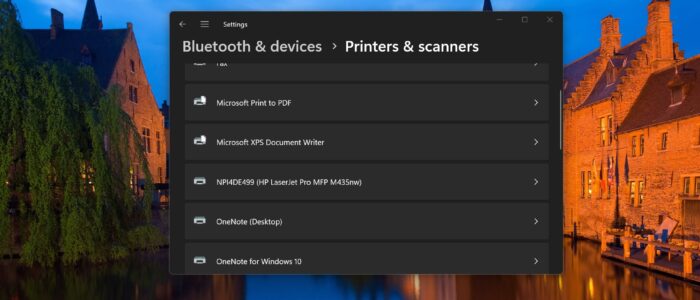
Windows Printer Protected Mode (WPP) is a new feature recently introduced in Windows 11, which allows you to print using the Windows modern print stack i.e. Driverless Printing. This feature aims to bring more security and avoid third-party traditional printer drivers. It enhances the security of the printing process, by isolating the print spooler and settings from the rest of the operating system, this makes it more difficult for malicious individuals to exploit vulnerabilities and compromise your computer. Once you enabled the Printer Protected mode, it will block the third-party print drivers, which can be a source of vulnerabilities and this feature only allows Mopria-certified printers for now. Most of the Printer brands, like HP, Canon, Epson, etc., support WPP, but this feature won’t support older models. Check your printer is Mopria certified by visiting the official Mopris page.
Enable Windows Printer Protected Mode in Windows 11:
This feature is available on Windows 11 build 26016 in the Canary Channel, and for now, only Windows 11 Pro users can access this feature. By default, this feature is disabled, which means you can install any third-party printer driver when this feature is disabled. Once you have enabled WPP, you can only set up Mopria-certified printers. Follow the below-mentioned methods to Enable Windows Printer Protected Mode.
Enable WPP using Group Policy Editor:
Open Run command by pressing Windows + R and type gepedit.msc and hit enter, this command will open the Group Policy Editor.
Now navigate to the following path.
Local Group Policy > Computer Configuration > Administrative Templates > Printers
From the left-hand side click on Printers and from the right hand side pane look for the policy named Configure Windows Protected print.
Double-click on the policy and open the Policy settings.
Now set the Policy to Enabled to enable the Windows Protected Print Mode.
To turn off the WPP, follow the same steps and set the Policy to Disabled or Not Configured.
Using Registry Editor:
Open Run command by pressing Windows + R and type regedit and hit enter, this command will open the Registry Editor console.
Now navigate to the following registry path.
HKEY_LOCAL_MACHINE\SOFTWARE\Policies\Microsoft\Windows NT\Printers\WPP
From the left-hand side click on the WPP registry key and from the right-hand side look for the following DWORDs, Double click on each DWORD and set the Value data as mentioned below to enable the WPP.
EnabledBy – Set value data 2
WindowsProtectedPrintGroupPolicyState – Set value data 1
WindowsProtectedPrintMode – Set value data 1
WindowsProtectedPrintOobeConfigComplete – Set value data 1

To Turn off the WPP, modify the above-mentioned DWORDs and set the value date to 0, this will disable the WPP.
Read Also:
FIX Deleted Printer Keeps Reappearing In Windows 10/8/7?