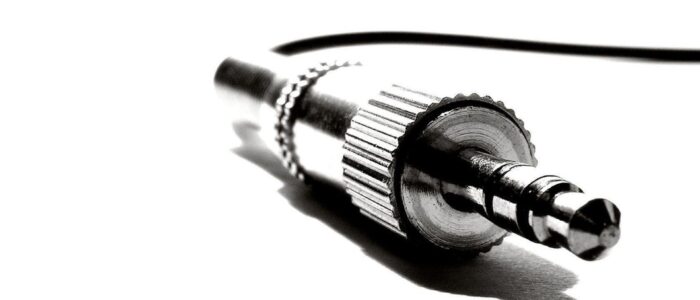
Audio Jack also knows as the Headphone jack is a small round connector for accepting the pin-shaped plug from a standard pair of music headphones. Audio Jack is available on almost all devices like Computers, laptops, Music devices, and Mobile phones. We can connect a variety of headphones, headsets, and Microphones in Audio Jack. Most of the laptop, computers and Mobile Phones are comes with the 3.5mm audio jack. There are a lot of Possible reasons for Not working audio jack. If you are using windows 10 laptop or computer then follow the below possible solutions to fix Audio Jack is not working issue on Windows 10 laptop/Computer.
Table of Contents
Fix Audio Jack is not working in windows 10
Solution 1: Check any Physical Damage in Audio Jack
Solution 2: Check BIOS settings
Solution 3: Restart windows sound services
Solution 4: Update the Audio Drivers
Solution 5: Reinstall the Audio Drivers
Solution 6: Recreate User Profile
When you connected your Headphones in audio jack and you didn’t hear any sound through headphones, or you are hearing sound but Mic is not working. Then this article will guide you to fix these types of issue, Let’s see above mentioned solutions in detail.
Solution 1: Check any Physical Damage in Audio Jack
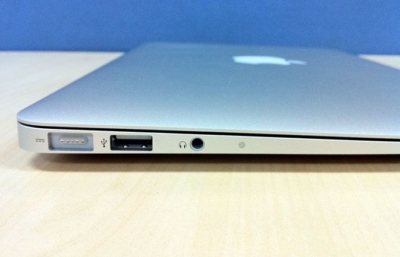
The first Solution is to check the Audio Jack Physically, you can find a small round hole at the corner of the laptops, or if you are using computer then you can find the audio jack at front of the System. Check if any thing is blocking the audio jack, or check for any damage. If everything is fine proceeding to the next solution.
Solution 2: Check BIOS settings
Using BIOS you can configure and customize all the hardware inside your PC or laptop using wide range of options, you can enable the front panel audio jack using BIOS. Follow the steps below to enable the audio jack.
First Go to BIOS settings, based on your laptop or motherboard manufacturer the BIOS key will be different, google it and find your BIOS key.
Go to the “Advanced” BIOS section.
Go to the “Onboard” or “Device Configuration” option by pressing “Enter”. The sound settings are typically under “Audio Controller” or any other similar sound-related configuration.
Press “Enter” to enable or disable the sound setting at hand. Note that such options vary by motherboard, although these are the typical settings programmed into a computer BIOS.
Press F10 to save and exit the new settings. Restart the system once and check the front panel audio jack is working or not.
Solution 3: Restart windows Audio services to fix Audio Jack is not working

Windows audio services manages audio for windows-based programs, If this service is stopped audio devices and effects will not function properly. If this service is disabled any services that explicitly depend on it will fail to start. Check and restart this audio service once.
Open Run command by pressing windows + R and type services.msc and hit enter this will open the service management console.
Now Scroll down and search for Windows Audio service, Right click on windows audio service and choose restart, to restart the service.
Solution 4: Update the Audio Drivers

Device Driver is a group of files that enable one or more hardware devices to communicate with the computer’s operating system. With corrupted hardware device drivers, the system will send incorrect data to the devices this will lead the device to work improper. If the appropriate driver is not installed or updated, the device may not function properly, Update the drivers to make the device work perfectly.
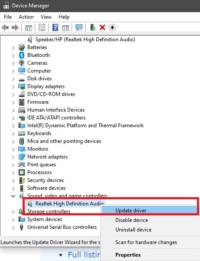
Open Run command by pressing windows + R and type Devmgmt.msc this will open the device manager.
Check for Audio inputs and outputs, expand it. Check any yellow exclamation mark. Right click and update the driver.
And find Sound, Video and game controllers, expand it, you can find the audio driver, Right click on the audio driver and choose update driver.
Currently I am using Realtek High Definition Audio Driver, to update this Right click on it and Choose Update the driver.
Once the driver is updated successfully, restart the system once check the issue is still there or not.
Solution 5: Reinstall the Audio Drivers to fix Audio Jack is not working

Open Run command by pressing windows + R and type Devmgmt.msc this will open the device manager And find Sound, Video and game controllers, expand it, you can find the audio driver, Right click on the audio driver and choose Uninstall device.
Now you will get another popup, with the warning message, Check the box Delete the driver software for this device. And choose Uninstall.
Note: This option will completely uninstall the device drivers and make sure you have downloaded your laptop or computer manufacturer audio drivers from their official site. After the re-installation restart the system once and check the audio jack is working fine or not, mostly this method will fix the issue.
Solution 6: Recreate User Profile
The final solution is to recreating user profile, This issue may also occur due to the corruption of the user profile, recreating user profile will fix the issue. Find the Procedure here.