VMware Workstation is a free and open-source hypervisor for x86 virtualization, VirtualBox helps users to create and run multiple VMs (Virtual Machines). VirtualBox supports Windows, Linux, or macOS as its host OS. Installing and configuring VirtualBox is easy and when configuring VirtualBox users can specify the CPU Cores, RAM, and Disk Space to the VM. VirtualBox allows you to modify the Virtual Machine settings, you can increase or decrease the CPU cores, RAM size, and HDD Size. During the VM creation, the setup wizard will ask you to specify CPU, RAM, and HDD Size. You can specify the Virtual HDD size as per your requirement, if you want more space on your Virtual HDD size later you can increase it, Virtual Box allows you to increase the HDD using two different methods. This article will guide you to Increase the Disk size in VM Virtual Box.
Increase the Disk size in VM Virtual Box:
You can Increase the Virtual HDD Size in the VM Virtual box using two different methods, VirtualBox 6 added a graphical option for resizing virtual disks.
Method 1: Using Virtual Media Manager in VirtualBox:
Launch VM VirtualBox, click on the File menu, and choose Virtual Media Manager.

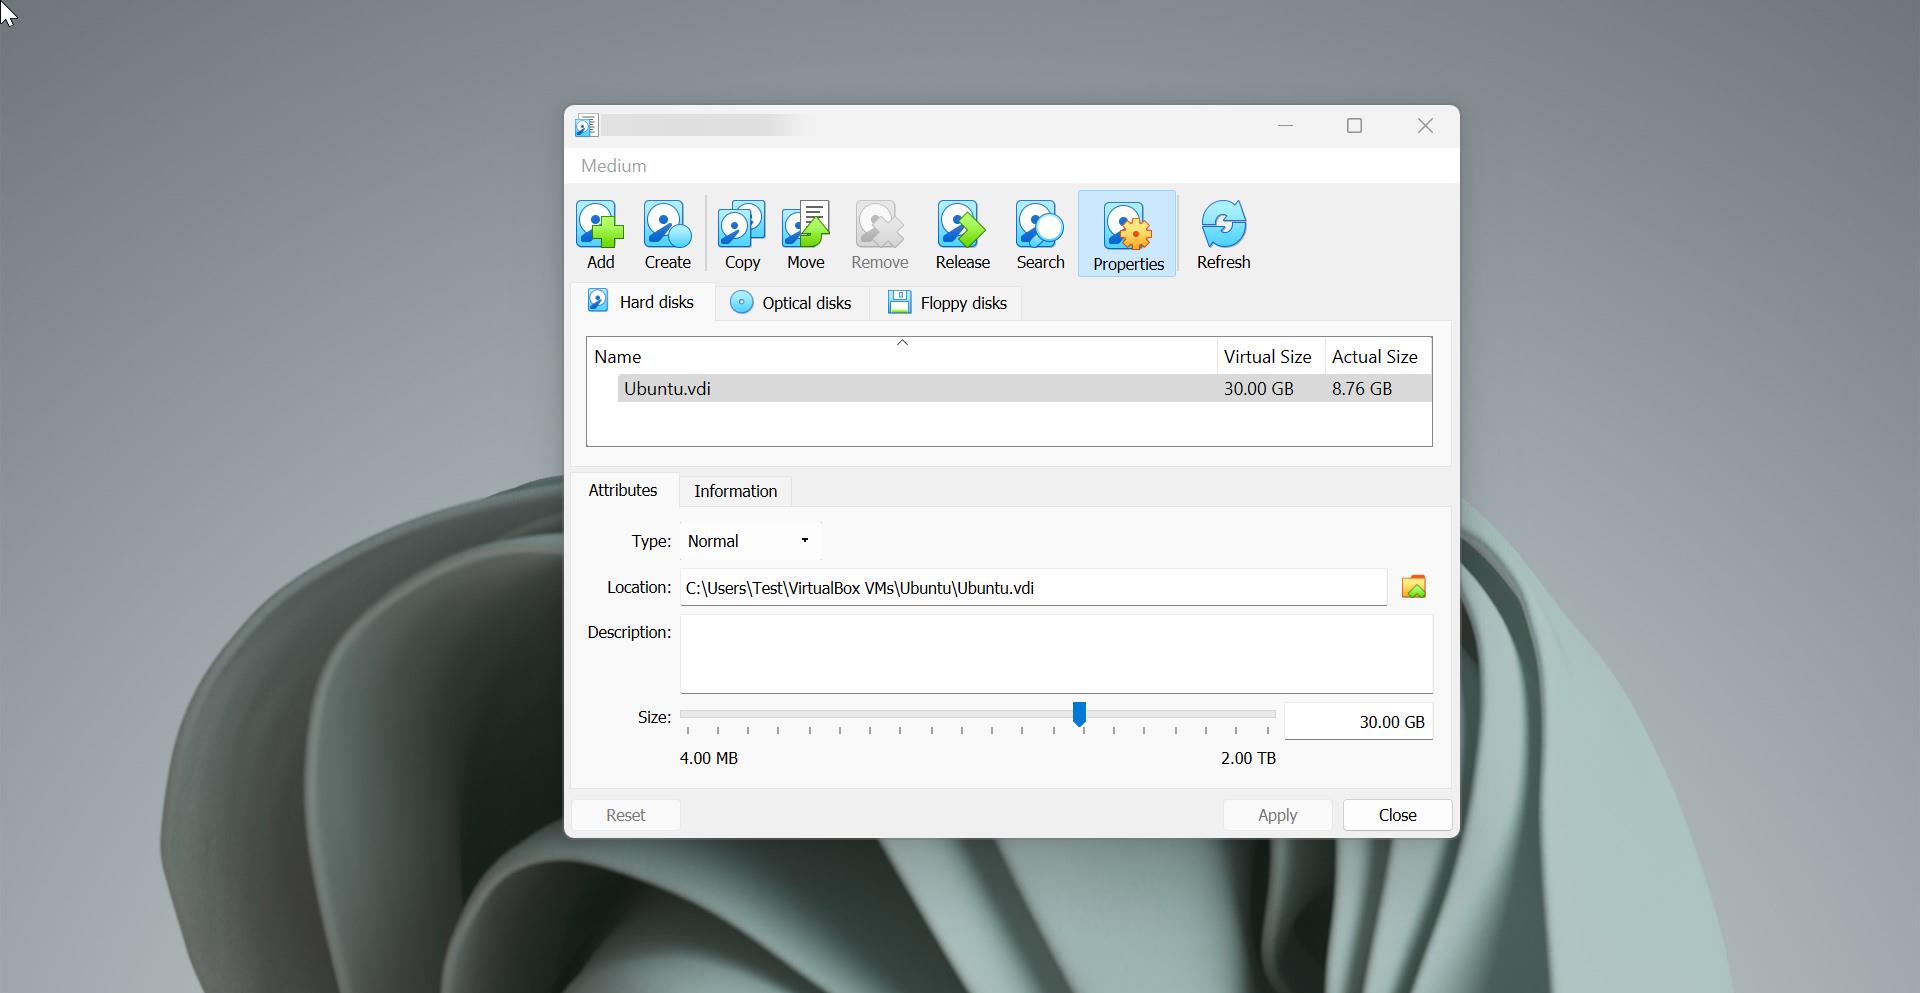
Under Virtual Media Manager, click on the vdi and choose Properties.
Under the Properties section, click on the Attributes tab and Increase the HDD size using the slider.

Click on Apply and OK.
This Setting will increase the size of the Virtual Hard disk, but still, you have to enlarge the partition size from inside the VM operating system. The partition size will remain the same even after you increase the disk size. You can see the free space inside the VM, go to disk manager on your VM and increase the Partition size.
Method 2: Using Command Prompt:
You can also use the command prompt to increase or decrease the Virtual Hard disk size in VirtualBox. Before proceeding make sure you have shutdown the VM’s and ensure the state is set to Powered Off.
Next, Open the command prompt, click on the start menu and search for the Command prompt and launch it. Run the following command.
cd "C:\Program Files\Oracle\VirtualBox"
This command will navigate to the VirtualBox installation path, next type the following command to increase the Virtual Hard disk size.
VBoxManage modifyhd "C:\Users\Test\VirtualBox VMs\Ubuntu\Ubuntu.vdi" --resize <Size of the HDD>Get the vdi path for which you need to increase the HDD size, mostly all the vdi’s are by default located in the following path C:\Users\Test\VirtualBox VMs.
Once you copy-pasted the vdi path in the command, next enter the HDD size in MBs. 81920 MB is equal to 80 GB, enter the size in MB after the –resize in the command.
So the actual command would look like this,
VBoxManage modifyhd "C:\Users\Test\VirtualBox VMs\Ubuntu\Ubuntu.vdi" --resize 81920If you are using VirtualBoc 6.0+, then you may need to use the following command instead.
VBoxManage modifymedium disk "C:\Users\Test\VirtualBox VMs\Ubuntu\Ubuntu.vdi" --resize 81920
As i mentioned above this command only increase the Virtual Hard disk size, it won’t increase the Partition size. To increase the partition size, you can follow the steps from this link.
Read Also:
Fix Copy-Paste is not working in VirtualBox Oracle
How to Enable File transferring in VirtualBox Oracle?
Fix Virtual machine could not be started because the hypervisor is not running