RSAT or Remote Server Administration Tools is a package of server management tools that you can install in Windows 11 or Windows 10. RSAT allows you to run snap-ins and tools on a remote computer to manage features, roles, and role services. RSAT offers a number of tools like Server Manager, Active Directory Users & Computer, The Active Directory PowerShell module, Group Policy Management, Etc. RSAT is a very important tool for IT admins, in this article, I am going to show you how to install Active Directory in Windows 11. Active Directory (AD) Directory service which is developed and managed by Microsoft for Windows domain controller. The active directory was included in most of the windows server Operating systems. There are totally five types of services in AD. Windows 11 offers you to install RSAT Active Directory using Windows Settings.
Related: How to Install Active Directory AD in Windows10?
Roles of Active Directory Users and Computers
- Managing Users
- Managing Groups
- Managing Computers
- Managing Domains
- Managing Organizational Units
- Troubleshooting Active Directory Users and Computers
- Resources for Active Directory Users and Computers
- User Interface: Active Directory Users and Computers
Install RSAT Active Directory in Windows 11:
In Windows 11 you can install RSAT AD DS using the settings app, RSAT is available as an optional feature. So you can install AD easily without downloading separately. This feature is not available for Windows 11 Home editions.
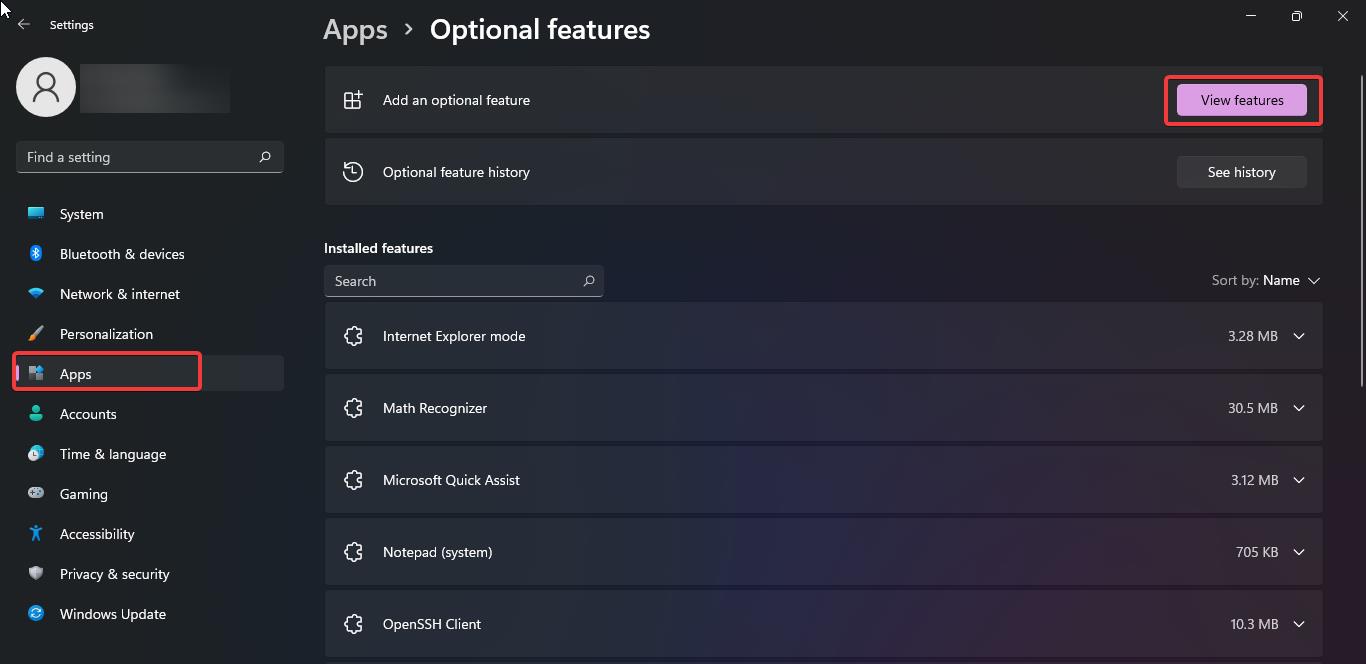
Open Windows Settings by pressing Windows + I and go to Apps > Optional features.
Under Optional Features click on View features.
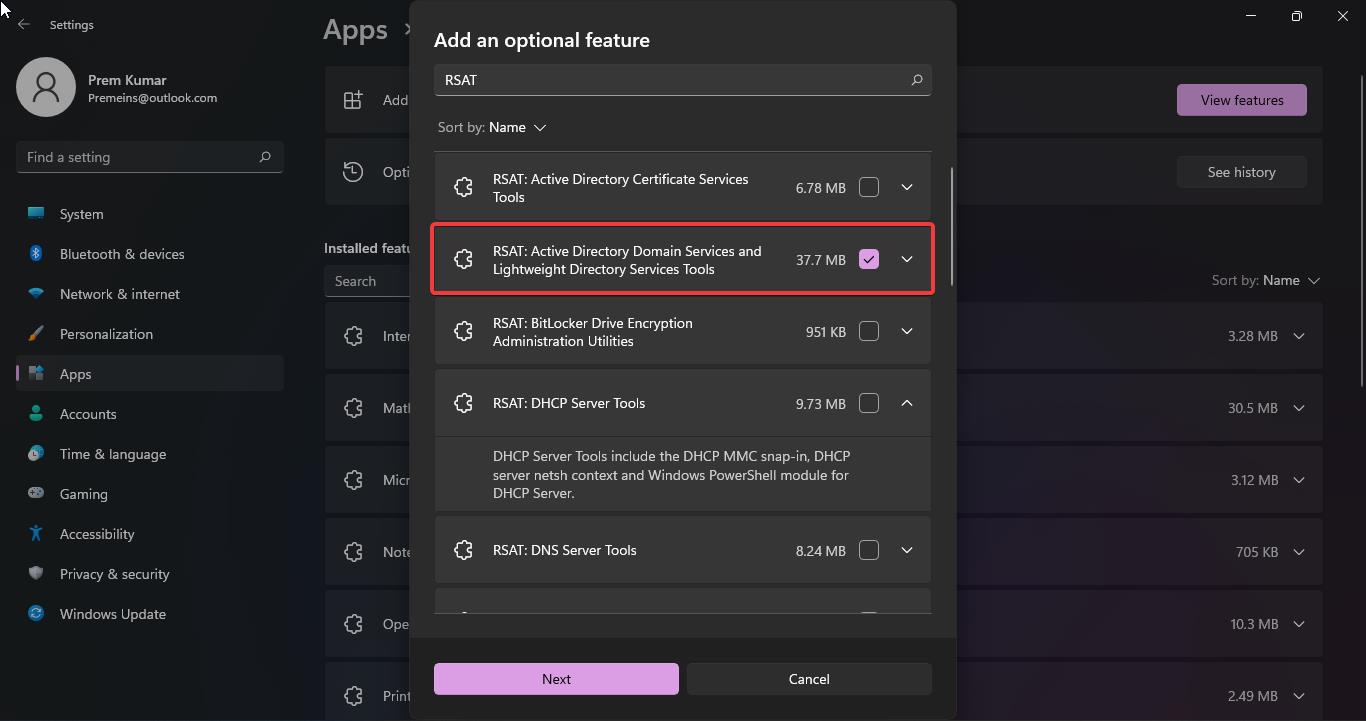
Now search for RSAT Active Directory and click on Next.
Choose the RSAT features you want and click on Install, this will install the features.
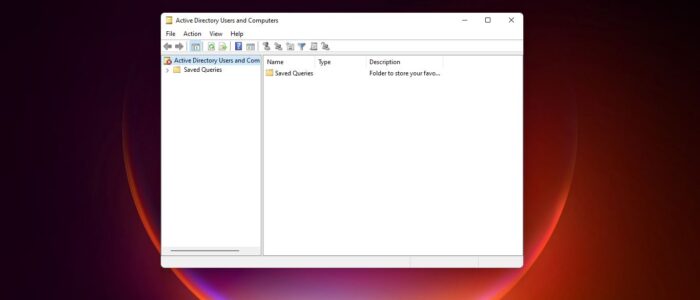
Once you Installed the Active Directory feature, then open the run command and type dsa.msc, and hit enter.
This command will open the Active Directory Users and Computers. If you want to uninstall the Active Directory, just follow the same steps above and under the optional feature choose the RSAT: AD DS and choose remove.

Thank you!
Thanks!
November 24, 2021 at 2:07 PM
Thanks !
Thank you.
Thanks man, easy steps to follow. It worked!
I don’t have RSAT in the optional features. Its just not there.
I don’t have RSAT in the optional features. It’s just not there.???
what should I do? any answer should be highly appreciated
THANK YOU!!!