If you are new to Mac then at first, you’ll face lot of difficulties in adopting to Mac operating system, this includes Taking Screenshots on Mac. Taking Screenshots is a very basic and simple task, like Windows, Mac offers different methods to take Screenshots, you can use the Keyboard Shortcuts, Touch bar, or built-in Tools, or you can use any third-party applications to capture your Mac’s screen. This article will guide you to Take Screenshots on Mac using Different Methods.
Take Screenshot on Mac using Different Methods:
The Following methods works on all versions of Mac operating systems, If you don’t want to use third-party applications, then you can use the other methods.
Take Screenshot in Mac using Keyboard shortcut:
Mac offers Keyboard shortcuts to take screenshots on nearly all your Mac Devices, and by default Mac OS comes with the inbuilt screenshot app to take screenshots, also there are a lot of third-party Screenshot apps available in the Apple store. In this article, we have mentioned all types of methods to take screenshots on mac. At the end of the post, you’ll get a solid understanding of how to take screenshots in Mac.
Method 1: Using Keyboard Shortcuts
As like Windows, on Mac you can use keyboard shortcuts to take screenshots, these shortcut keys nearly works in all your mac devices including MacBook Laptops, iMac all-in ones, or Mac mini and Mac studio desktops. Using Keyboard shortcuts, you can quickly take screenshots of your entire screen, a screen section, or even a specific window.
To Capture the Entire Screen:
Press and hold the Command (⌘) + Shift + 3 Keys at the same time, this Keyboard shortcut will take a screenshot of your entire screen and save it on your Desktop.
To Take Partial Screenshot:
Press and hold the Command (⌘) + Shift + 4 keys at the same time, this keyboard shortcut will take Partial screenshot.
Once you press the key combination, your mouse cursor will become a crosshair. You can drag and select the area which you want to capture. Release the mouse button to take a screenshot after selecting the area.
By default, the screenshot will save on your Desktop.
To Capture a specific Window:
First, open the Window that you want to capture.
Press and hold the Command (⌘) + Shift + 4 and Space bar keys at the same time.
Once you press the key combination, your mouse cursor will become a camera icon. Simply click on the Minecraft window to capture the Window.
The image will automatically save to your Desktop.
Method 2: Using Touch Bar
If you are using Touch Bar MacBook Pro models, then you can take screenshots using the Touch Bar, Touch bar is a feature on certain Mac models, it is a thin touchscreen display that replaces the traditional functional keys at the top of the keyboard. It provides you with a dynamic interface that can change depending on the application you’re using. It allows you to take screenshots and record the screen on Mac quickly. By default, the screenshot feature is not added to the Touch bar, but you can add the Screenshot feature to the Touch bar.
Open System Preferences and search for “Customize Touch Bar or Control Strip” and open it, click on Customise Control Strip.
Drag the Screenshot button to the Touch Bar. Once you add the screenshot button, you can capture a selected portion, a window, or the entire screen. The Screenshot will be saved to the Desktop.

How to Take Screenshot of Touch Bar?
To take a Screenshot of the Touch bar, you can use the following Shortcut Key combination, Press Command + Shift + 6, to capture the entire Touch bar, the screenshot will automatically saved to your Desktop.
Method 3: Using built-in Screenshot menu
By default, the Screenshot menu is built-in on macOS Mojave and later, It allows users to take screenshots and record the screen of their Mac Quickly. You can search for screenshots in the Mac Spotlight, you can easily access the built-in screenshot app and take screenshots.
You can also use the keyboard shortcut to access the screenshot menu, Press the “Command (⌘) + Shift + 5” Keys on your keyboard to open the screenshot menu.
Once you press the screenshot menu shortcut key, the menu will appear at the bottom of the screen. It has several options for taking a screenshot on Mac, including capturing the entire screen, a specific window, or a selected area.
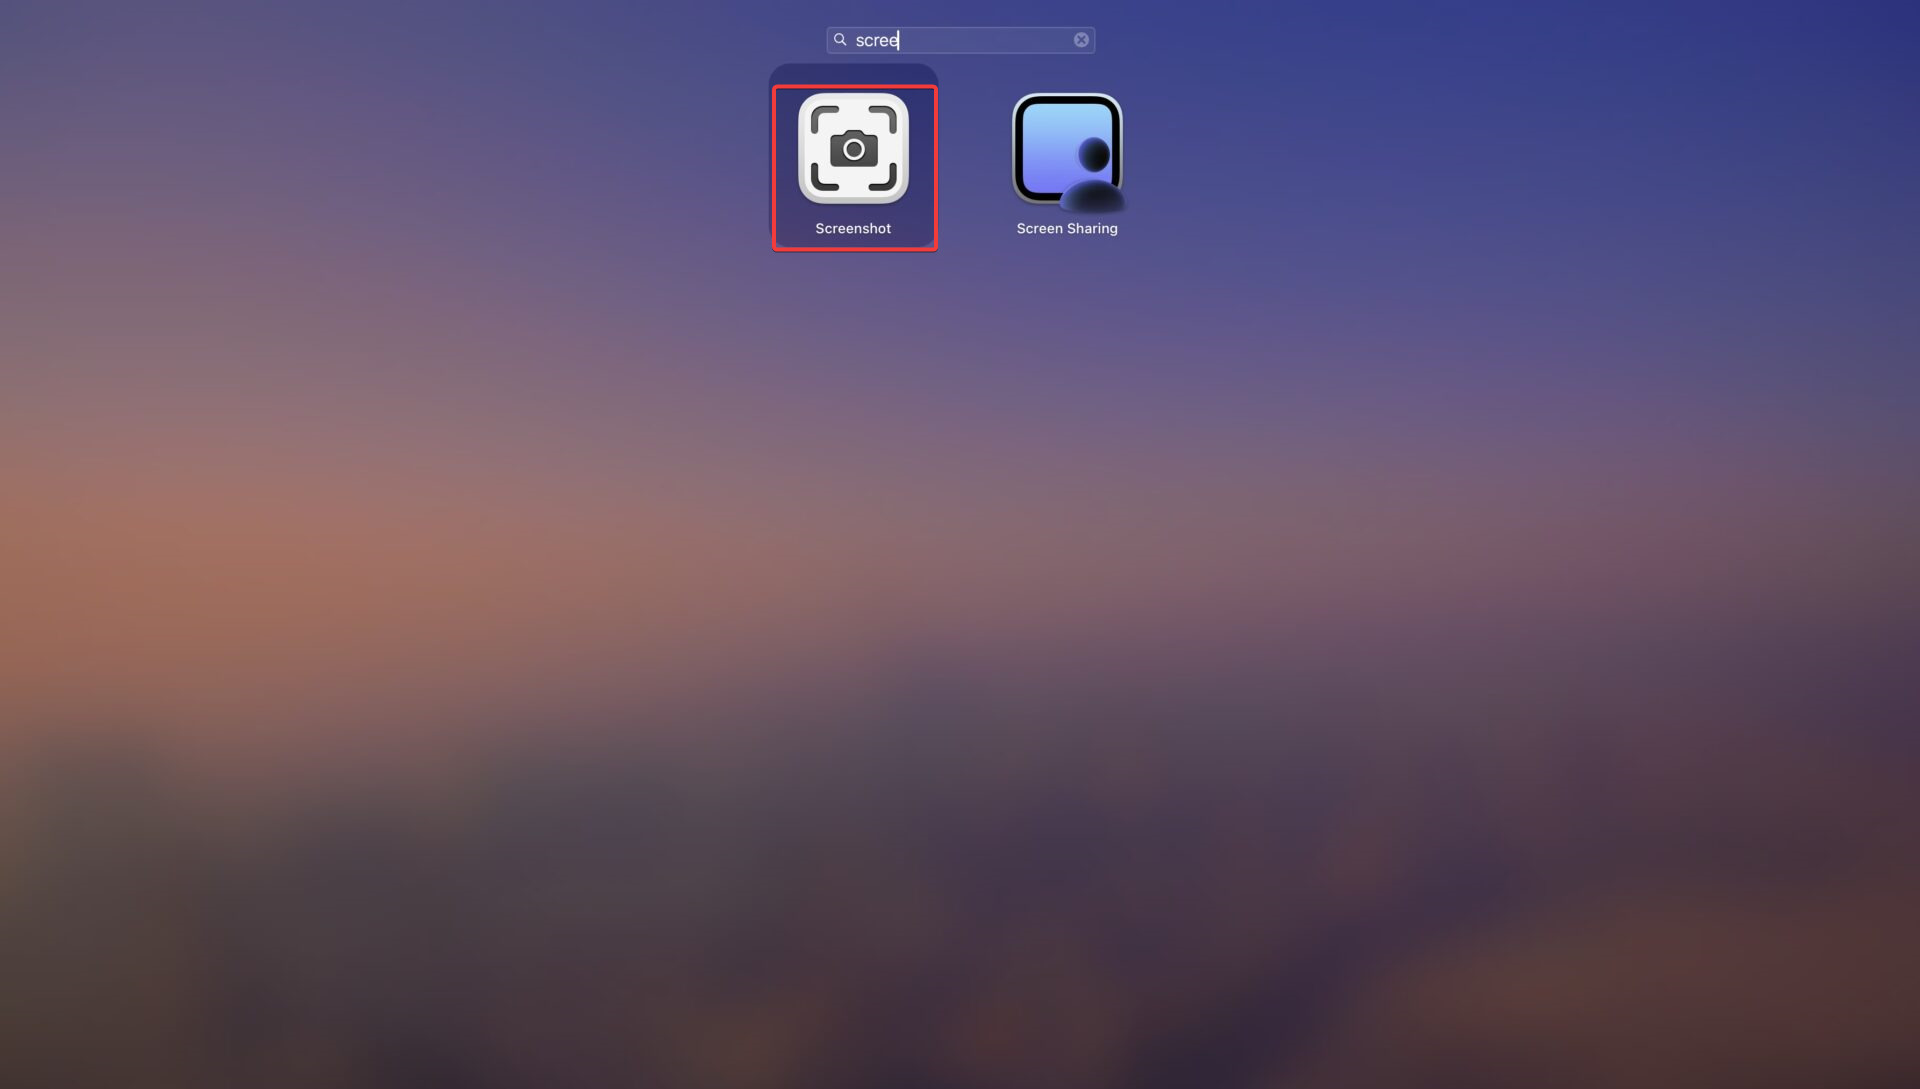
Choose the option based on your requirement, all the captured screenshots will saved on your Mac Desktop.
Method 4: Using Mac Preview
Mac Preview is a built-in app on Mac that allows you to view and edit a wide range of file types, including images, docs, PDFs, and images. Like Keyboard shortcuts and screenshot menu, Preview allows you to capture screenshots from the entire screen, a selected area, or a specific window. The main advantage of Mac preview is, it allows you to name the screenshot and choose the location to save the file.
First, make sure you’ve got the window or screen ready for capture.
Next, open up the Preview app on your Mac. Head to the File menu, then click on Take Screenshot. Choose either From Selection, From Window, or From Entire Screen based on what you’re aiming for.
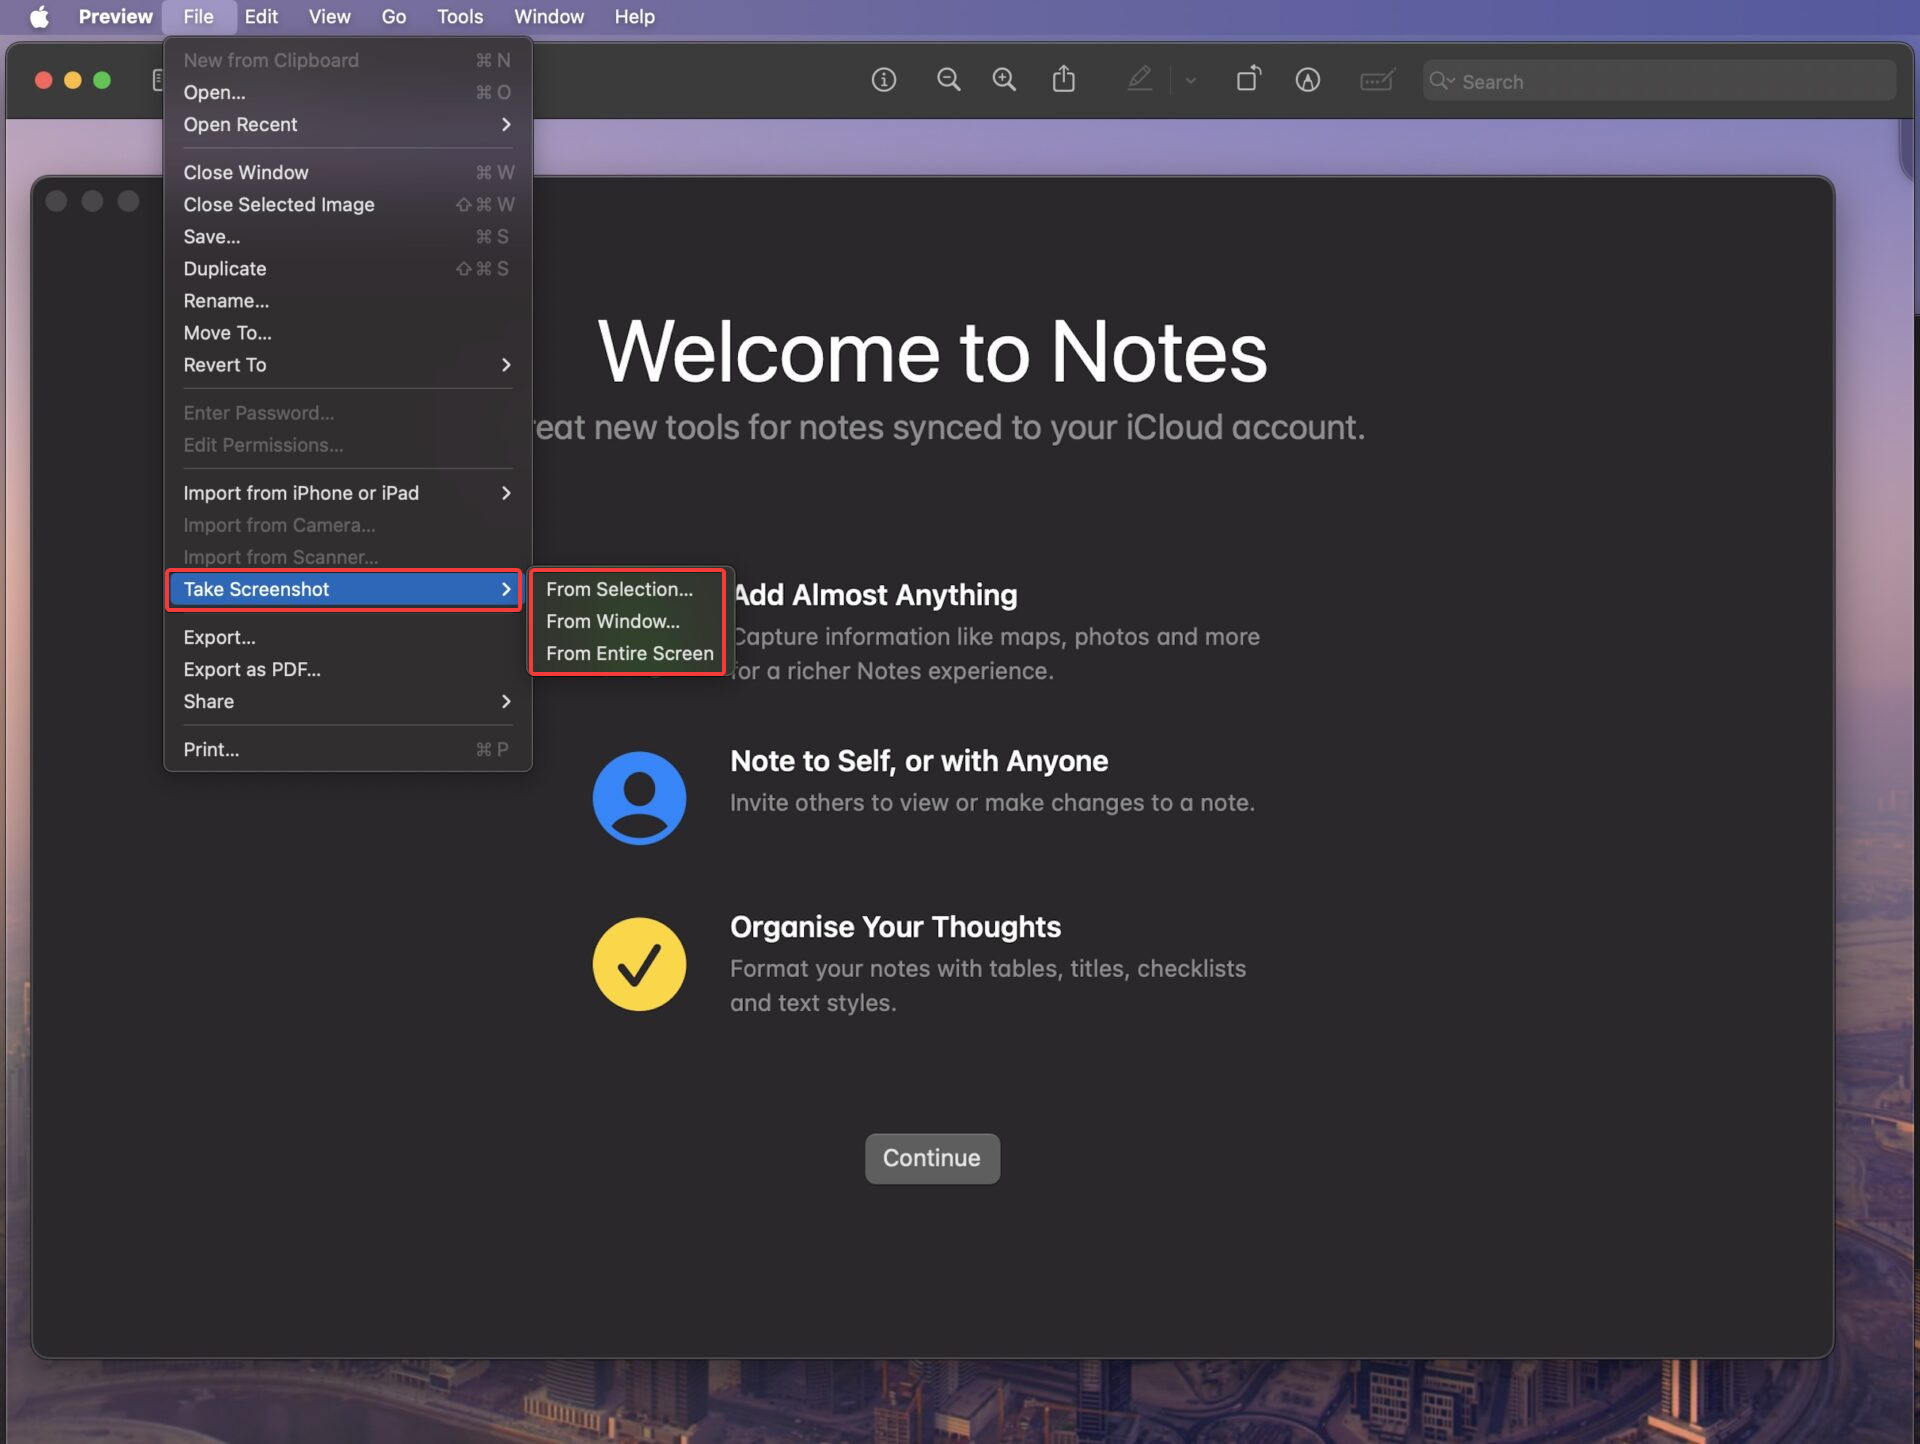
After snagging the screenshot, you’ve got some room to play. Edit it by cropping, tweaking colors and contrast, or throwing in some annotations. Next, save the file in your preferred location.
Read Also:
How to change the MAC screenshot default format using Terminal?
What are the different methods to take screenshots on a Mac?
There are several methods to capture screenshots on a Mac, including using keyboard shortcuts, the Grab utility, and the Screenshot app.
What is the primary keyboard shortcut for taking a screenshot on a Mac?
The primary keyboard shortcut for capturing a screenshot on a Mac is Command (⌘) + Shift + 3. This captures the entire screen.
How can I capture a specific area of the screen on a Mac?
To capture a specific area, use the keyboard shortcut Command (⌘) + Shift + 4. After pressing this shortcut, you can select the desired area using a crosshair cursor.
What is the Grab utility, and how can it be used for screenshots on Mac?
Grab is a built-in utility on Mac that allows you to take screenshots. You can find it in the “Utilities” folder within the “Applications” folder. It provides options for capturing the entire screen, a specific window, or a selected area.


