In Windows Jump Lists is first introduced in Windows 7, Jump Lists allow users to see their recent documents in a program that is pinned to your taskbar. For example, by default, the Windows File Explorer is pinned to Taskbar, If you open lot of folders, you can see all the folders in the same file Explorer icon on the Taskbar. To view the jump list, right-click any program icon in the taskbar. This will brings up a list of recently modified documents in that program. If you don’t want this feature, then you can disable Jump Lists. This article will guide you to disable Jump Lists in Windows 10.
Disable Jump Lists in Windows 10:
You can disable Jump Lists in three different methods, Let’s see the methods one by one in detail.
Using Windows Personalization settings:
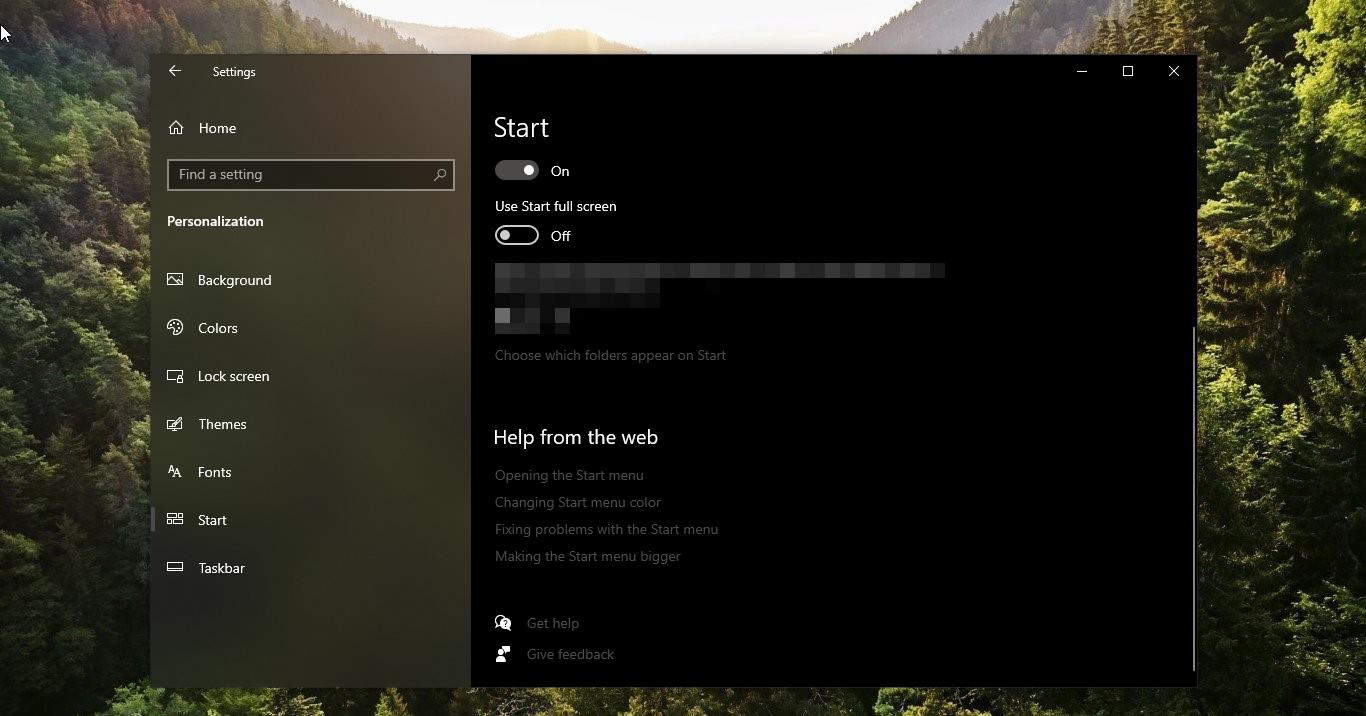
Right-click on the Desktop and choose Personalize, Under Personalization, click on the Start.
Under Start, Turn off the toggle button of Show recently opened items in Jump Lists on Start or the taskbar and in File Explorer Quick Access.

Once you turn of this settings, Jump lists will be disabled. If you want to start over, just turn on the toggle Button.
Using Group Policy Editor:
Open Run command by pressing Windows + R and type Gpedit.msc and hit enter. This command will open the Group Policy Editor.
Now Navigate to the following path.
Computer Configuration > Administrative templates > Start Menu and Taskbar
From the left-hand side click on the Start Menu and Taskbar, and from the right-hand side look for the policy named, “Do not keep history of recently opened documents”.
Next, double click on the policy and choose Enabled. Enabling the Policy will disable the Jump Lists from the Taskbar.

If you want to Turn on again, set the policy to Not configured or Disabled.
Using Registry Editor:
Note: Modifying the Registry is risky, and it causes irreversible damage to your OS Installation Follow the steps correctly. Friendly advice Before Modifying Registry Creating Restore Point is recommended.
Open Run command by pressing Windows + R and type Regedit and hit enter, this will bring the Registry editor console.
Now Navigate to the following path
HKEY_CURRENT_USER\Software\Microsoft\Windows\CurrentVersion\Explorer\Advanced
From the left-hand side click on the Advanced Registry Key and from the right-hand side look for the DWORD named “Start_TrackDocs”.
Double click on the Start_TrackDocs DWORD and set the value of 0.

Click on Ok and Close the Registry Editor.