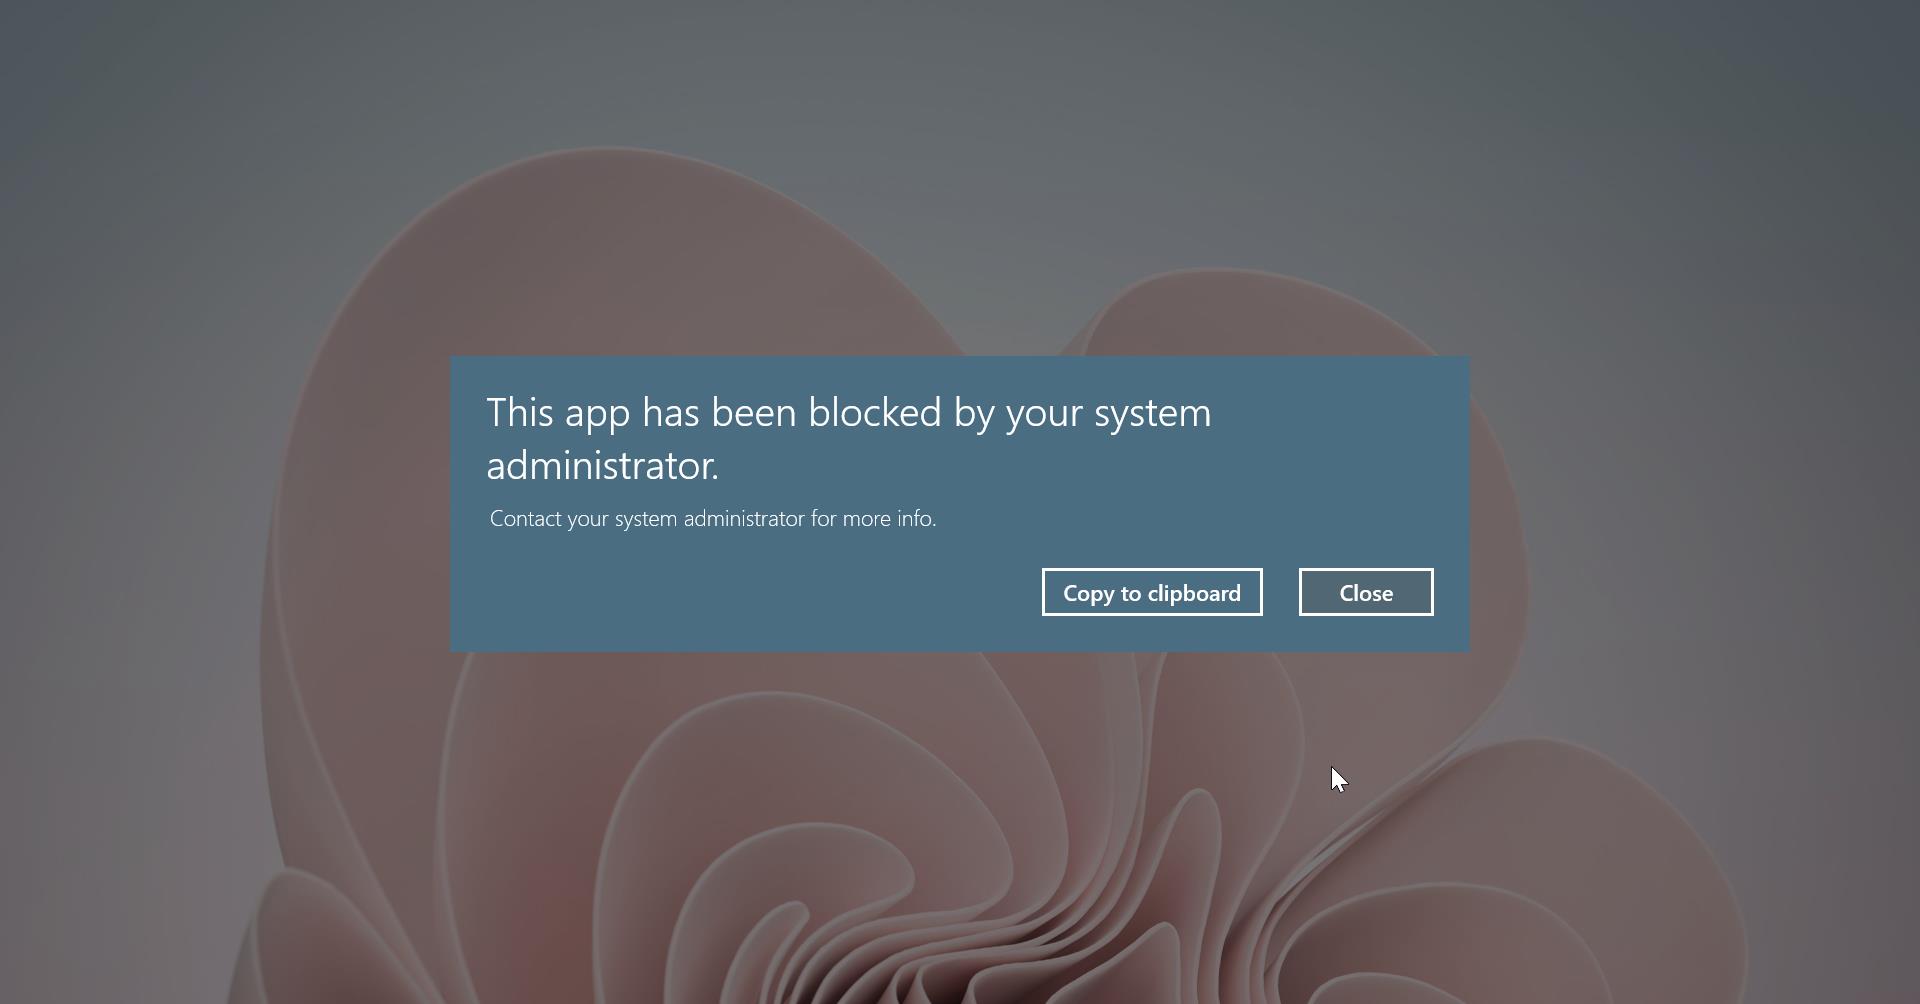
Warning messages are defined as a modal dialog box that alerts the user of a condition that might cause a problem in the future. These warning messages may be Notification, in-place messages, and balloon alerts. Usually, in windows operation system we may get a lot of warning messages depends on our activity, A typical warning message alerts users about a valuable asset, such as important financial or other data, System access or integrity, privacy or control over confidential information, and user’s time. At the end of the dialog box, it asks users to proceed with an action, some type of warnings presented as confirmations to proceed to close the particular activity. In This windows guide, we will discuss about one of the typical warning messages. Windows Security Messages These files might be harmful to your computer.
If you open any Potentially unsafe file from a Network drive on your computer, you may get this error. This error may depend upon the type of connection established with the server and the type of the file being accessed to be moved to the local drive or executed locally. While copying any data from your mapped network drive or server you will get this warning message from windows. This seems to be not a big issue, when you copy files occasionally but when you want to transfer data very frequently then it’s a quite annoying thing. You can disable this message These files might be harmful to your computer by configuring the network drive in a different way. Follow the below-mentioned steps to disable these warning messages. These steps work for windows 7, windows 8, and Windows 10.
Two methods to Disable this message These files might be harmful to your computer Warning Message.
Using Internet Options Using Group Policy Editor The easy and quickest way to disable this warning message is via the Internet Option. You can find the internet option from the control panel, or you can also find this option from internet explorer.
Using Internet Option.
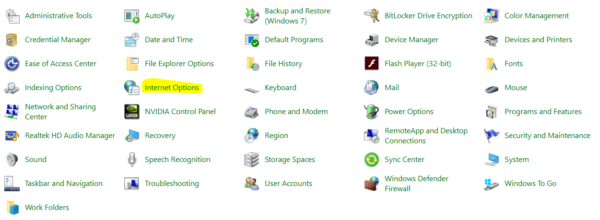
- Open run command by pressing Windows + R and type control, Hit enter.
- This will open the control panel, Now search for the Internet option, Click on it.
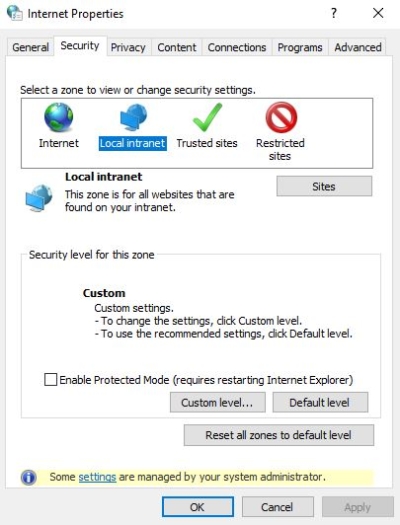
- You will get the internet properties windows, navigate to the Security tab. Click on the Local intranet and click on the sites button.
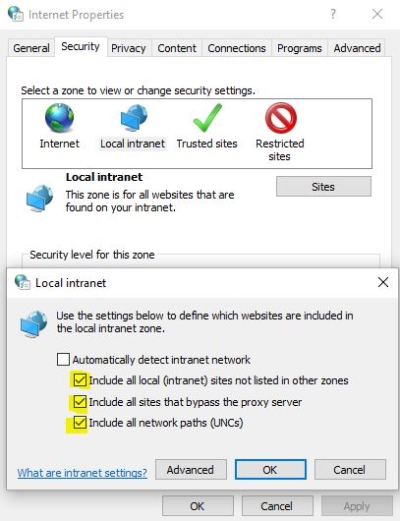
- Now you will get one pop up, make sure that the option for Include all network paths (UNCs) is checked.
- Click on Ok and close the Internet Options.
Also, you can add your Shared Drive address in the Local Intranet advance option. Windows will treat any address added here as a Trusted address, so you won’t get any warning message.
- Open run command by pressing Windows + R and type control, Hit enter.
- This will open the control panel, Now search for Internet option, Click on it.
- You will get the internet properties windows, navigate to the Security tab. Click on the Local intranet and click on the sites button. Now you will get one pop-up, click on the advance option.
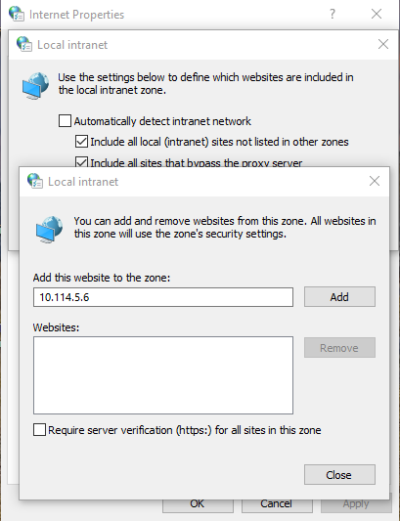
- Now again you will get one more Pop up for add this website to the Zone.
- Enter the share drive IP address and add it. Close the windows and click on OK.
- Restart the system once to make it effective. Now you won’t get the annoying Warning Popup.
Using Group Policy Editor
- Open run command by pressing Windows + R and type Gpedit.msc, Hit enter.
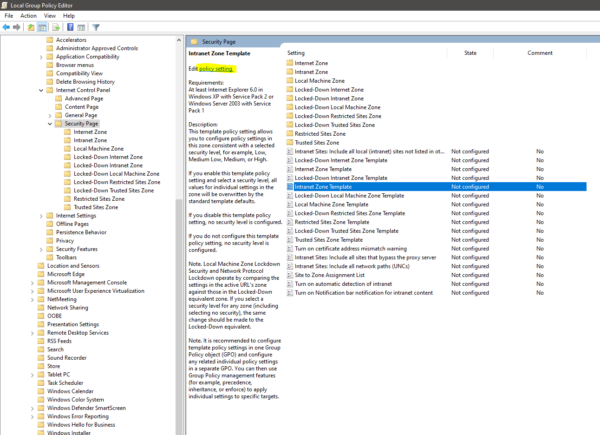
- This will open the group policy editor, now navigate to the following path.
User Configuration > Administrative Templates > Windows Components > Internet Explorer > Internet Control Panel > Security Page
- Click on the Security Page folder from the right-hand side panel look for the policy Intranet Zone Template.
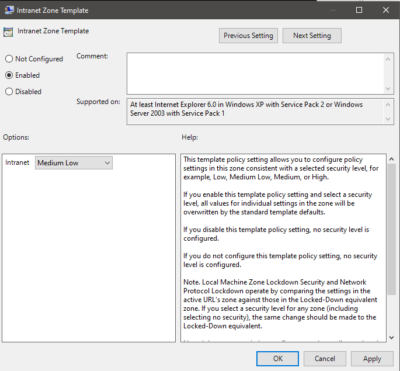
- Click on the Policy setting, and enable the Intranet Zone Template.
- From the Option Intranet drop-down menu select Low and click on apply and Ok.
Now go to the cmd and type gpupdate /force once the Policy is updated restart the system once.


