Microsoft Store is also known as the Windows Store, which is introduced in Windows 8 and well developed in windows 10 as the primary means of distributing Universal Windows Platform. By default, Microsoft Store App has installed in the windows 10 operating system. If you don’t have the App on your system, you can still access the Windows Store applications from the web version of the windows store. Microsoft store serves a lot of apps, it is a single distribution point for apps, console games, digital music, and digital videos. E-books. This is one of the most popular and very mandated app in windows 10.
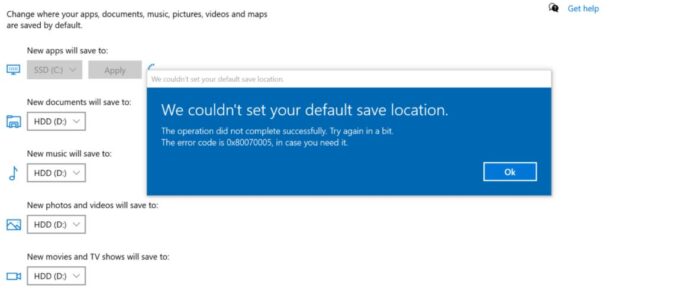
By default, Microsoft store downloads and installation path locations are hidden. But you can find the temporary folders in C:\Users\USER NAME\AppData\Local\Packages. These folders include all the temporary files and settings from Windows 10 Store and preinstalled apps, including Xbox, Calculator, Camera, and more. Also, Microsoft Store allows users to store the AppData of any application or game in separate locations. If you are downloading any big game then you need to store the AppData in a different location. But sometimes while setting up the default location you’ll receive an error like “We couldn’t set your default save location. Error code – 0x80070005”. This post will guide you to fix Couldn’t set default save location Error 0x80070005.
Couldn’t set default save location Error 0x80070005:
There are few possible reasons for this error, first one is if you are trying to set a default location to any external drive location. Then make sure it is properly connected and accessible.
The second reason is, the lack of folder permission, this is one of the common mistake. By default Microsoft store set default location in C drive. So C drive has all permission by default. If you are changing the location to any other drive then make sure it has full permission.
Change Default location in Administrator Account:
Once you encounter this issue, then reset the admin account and login to it and set the default location to the MS store from the admin account.
Rename the WindowsApps folder:
Open Windows Explorer by pressing Windows + E and click on the View > options.
Now you will get the folder options, then click on view tab and then check on Show hidden files, folders, and drives.
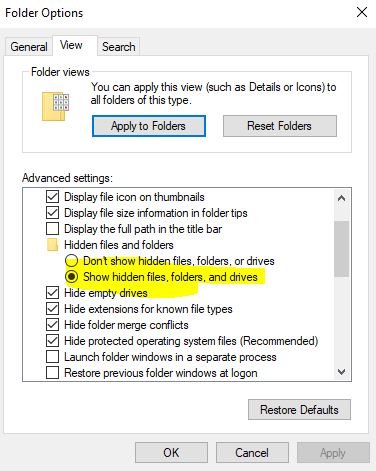
Then click on Apply and OK.
Now open the below mentioned location.
C:/Program Files
Now look for “WindowsApps” folder.
Right-click on the WindowsApps folder and rename it as WindowsAppsold.
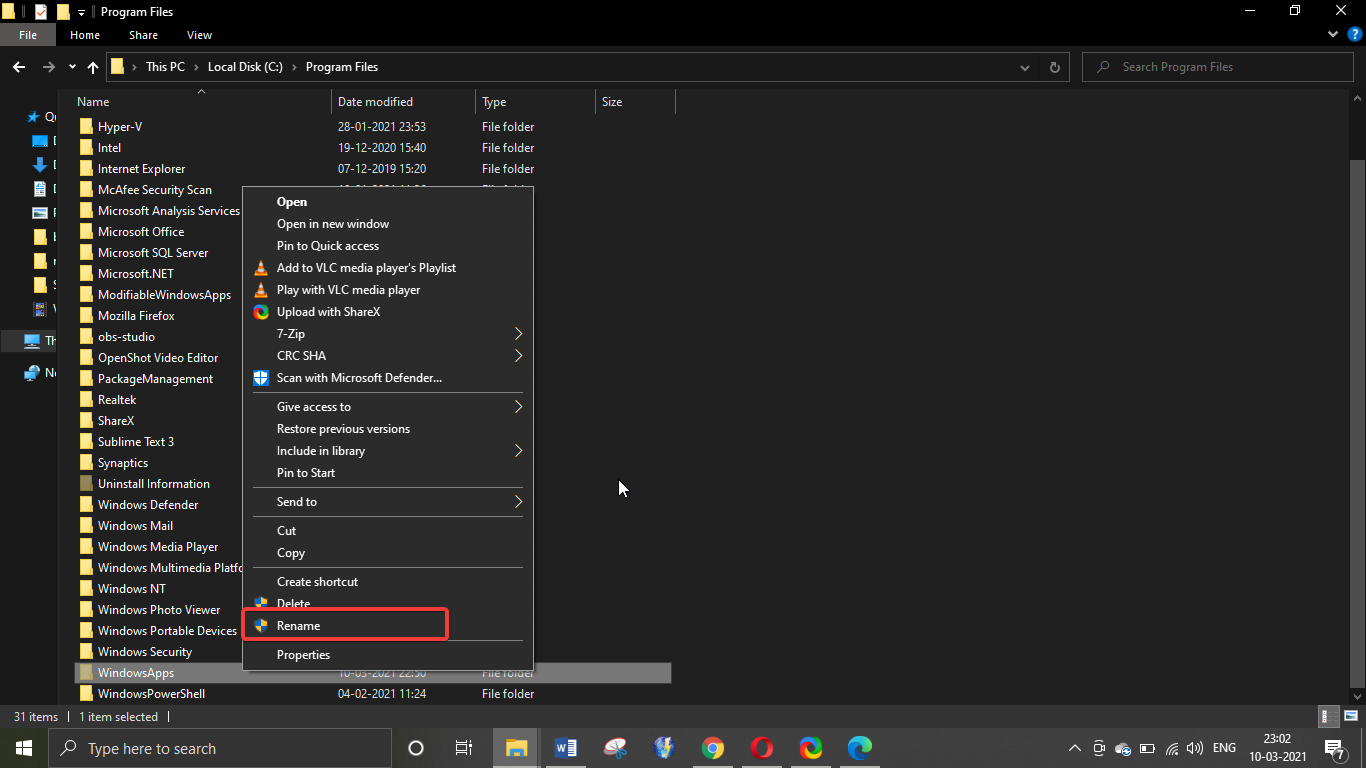
If you got any Pop-up click on Continue.
Close the File Explorer and then try to set the default location on the MS store.
Note: Sometimes you will get access denied error, if you got any access denied error then you need to restart the system in safe mode and then try to rename the WindowsApps folder.
Set Permission to WindowsApps folder:
Open Run command by pressing Windows + R and paste the below-mentioned address and hit enter.
C:\Users\%username%\AppData\Local
Open the Local folder and look for the “Packages” folder and click on “Properties”.

Click on the Security tab and then click on the Advanced.
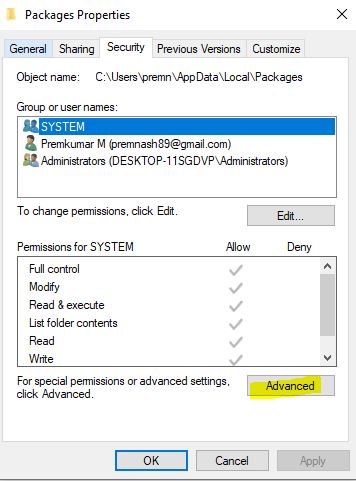
Under Advanced security settings click on the TrustedInstaller Change.

Now under select user or Group click on Advanced and then click on Find Now.
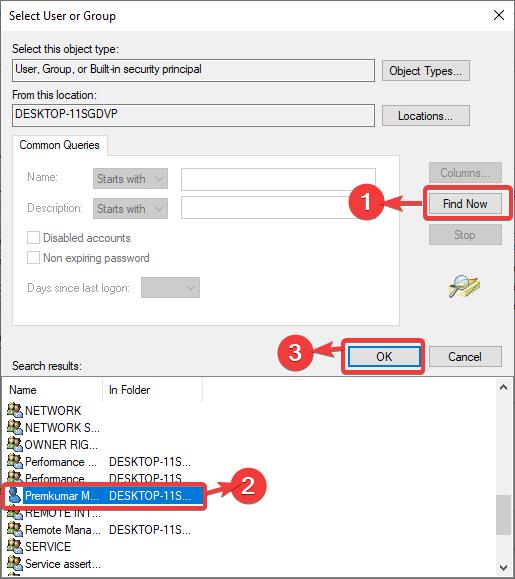
Now select your username or group you want to give permission. Click on OK.
Under Advanced security settings, check the Replace owner on sub containers and objects box.
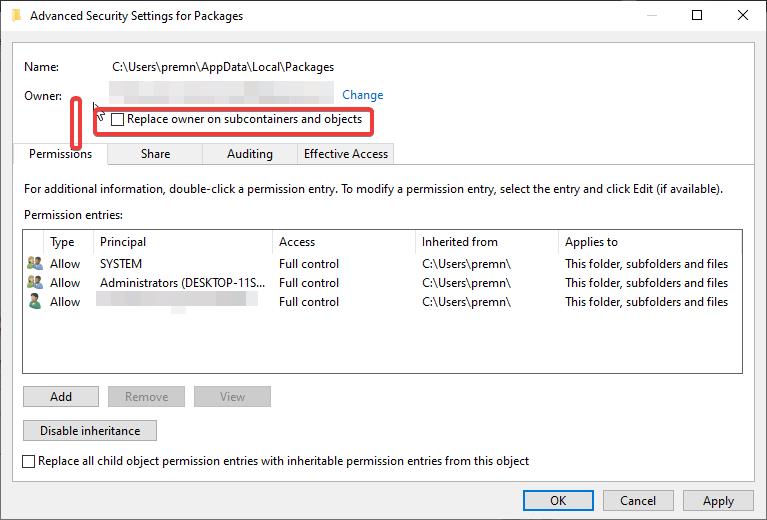
Click on Apply and OK.
Now you can give full control to the particular folder, Follow the same steps above to give permission for WindowsApps Folder.
Once you give permission to the folders now try to add the default location to the MS store.

