Recently Many users reported that they are facing issues while turning on the Battery Saver mode on their Windows 10 Laptop, while clicking on the Battery saver option from the battery slider nothing is happening and the Power option is not changing. In Windows 10 Laptop Battery saver mode conserves power and Prolong battery life. This mode will automatically turn on when the battery level is below 20 %, you can also increase or decrease this battery level percentage. If the system is in battery saver mode, some of the Windows features are disabled, and the screen brightness will be reduced. If you are experiencing the same issue with the battery saver, then this article will guide you to fix Battery Saver Not Working on Windows 10 Laptop.
Fix Battery Saver Not Working on Windows 10:
This article will guide you to fix the battery saver option not working issue, Follow the recommended solutions below to fix this issue.
Turn on the Battery Saver using Settings:
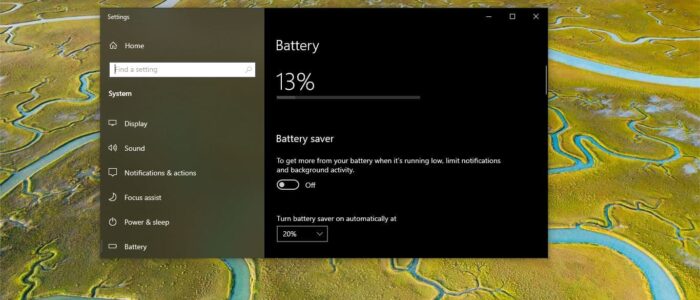
If you are not able to turn on the battery saver option using the battery slider from the battery icon, then you can enable the battery saver using Windows settings. This is the Workaround method to enable the battery saver.
Open Windows Settings by Windows + I and click on the System.
Under System Settings, from the left-hand side click on the Battery, and from the right-hand side, Under the Battery saver setting, click on the toggle button to enable the battery saver settings.
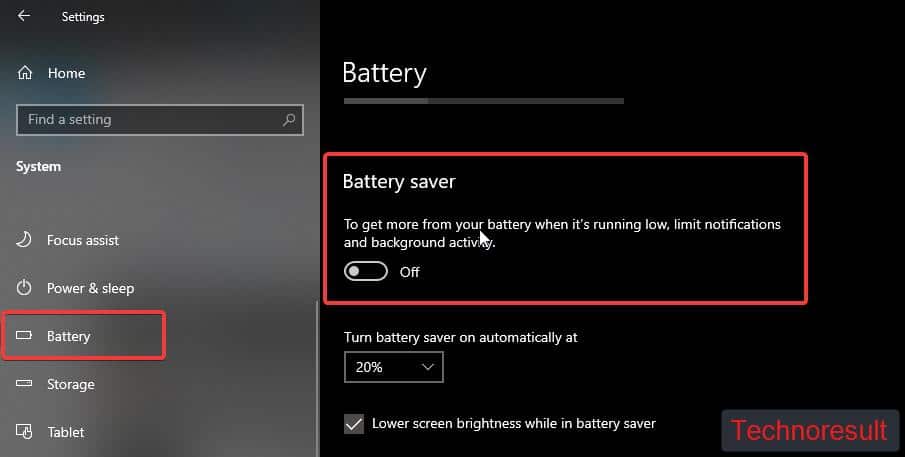
This will enable the battery saver settings on Your Windows 10 Laptop.
Run Power Troubleshooter:
Power Troubleshooter is a Windows-based built-in troubleshooting tool that is used to solve the Power related issue in Windows 10 laptops.
Open Windows Settings by Pressing Windows + I and choose Update & Security > Troubleshoot > Additional Troubleshooters.
Under Additional Troubleshooters settings click on the Power and click on Run the troubleshooter.
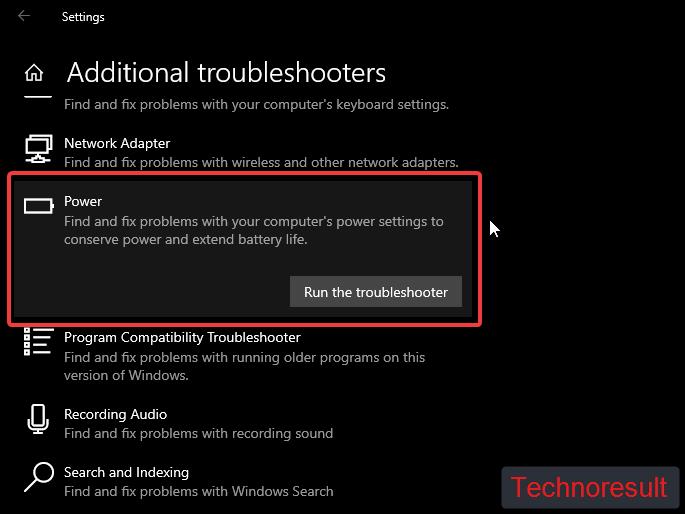
This will run the troubleshooter settings and fix the Power Related issue on your Windows 10 laptop.
Restore default Power Settings:
If you are still facing a battery saver issue, then try to restore default Power Settings. Follow the below mention steps to restore the default power settings.
Open Run command and type control panel and hit enter. This command will open the control panel.
Next, click on the Power Option and then choose Change plan settings of your current power plan.
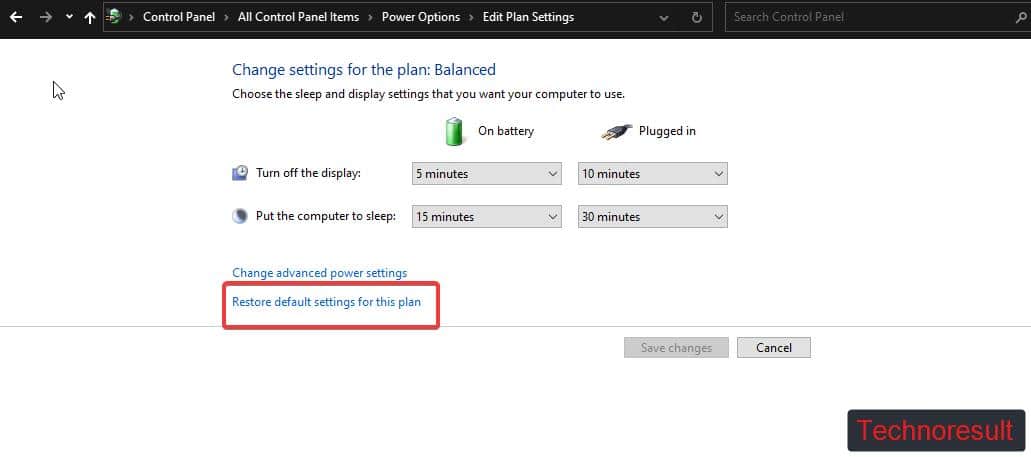
Now click on Restore default settings for this plan. This will restore your current Power plan. Mostly this will fix the issue.
Read Also:
Change Battery Performance using Powercfg in Windows 10
How to Check the Health of Your Laptop’s Battery in Windows: A Step-by-Step Guide

