SmartScreen filter is a built-in tool that automatically scans applications, files, downloads, and websites, and blocking the Known dangerous content, and warns you before you run unknown applications. Also, SmartScreen protects against phishing or malware websites and applications and avoids the downloading of potentially malicious files. If you are wondering how Microsoft Defender SmartScreen determines whether a site is potentially malicious. Then here is the answer for this, first Defender SmartScreen analyzes Visited web pages looking for indications of suspicious behavior. If the site contains any suspicious behavior then it will show a warning message. Also, it will check that the Visited sites are against a dynamic list of reported phishing sites and malicious software sites. If it finds any match then, Microsoft Defender SmartScreen will immediately show a warning message. By default, Microsoft Defender SmartScreen is enabled in Windows 10, and disabling it will potentially risk your system. But Sometimes you want to disable the SmartScreen feature to install third-party or untrusted Software. And sometimes you need to turn it off to access legitimate websites or links. This article will guide you to Disable SmartScreen Filter in Windows 10/11.
Related: Enable or Disable Microsoft Defender SmartScreen for Edge
Enable or Disable Microsoft Defender SmartScreen for Edge
Disable SmartScreen Filter in Windows 10/11:
And as I mentioned before SmartScreen filter act as a security layer on your system and we are not recommending disabling it permanently. In Windows 10/11 you can disable the SmartScreen filter in different methods.
Using Microsoft Edge:
In this method, we are going to see how to disable the SmartScreen filter only for the Edge web browser. So that you no need to disable it for the entire system and you can access all the legitimate websites and links using Edge.
Launch Edge web browser and click on the Menu icon, the three dots icon from the top-right corner.
Select the Settings option. Under Settings from the left-hand side click on Privacy, Search, and services.
And from the right-hand side, under Security, Turn off the toggle button of Microsoft Defender SmartScreen.
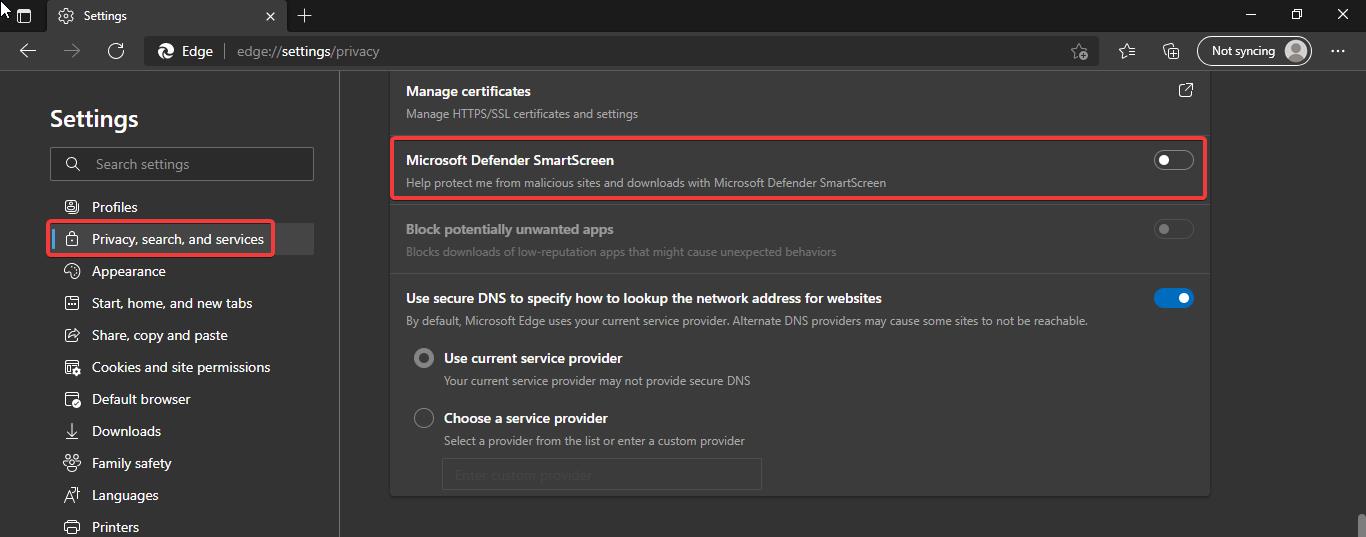
Then relaunch the edge browser once, so this will turn off the SmartScreen only for Edge, and you can access the websites that are blocked by SmartScreen Filter without completely disabling the security feature system-wide.
Using Windows Security Settings:
Open the Windows Security app from the Start menu, or search for Windows Security in the Search box.
From the Left-hand side click on the App & browser control, and from the right-hand side click on the Reputation-based protection settings. Click on it.
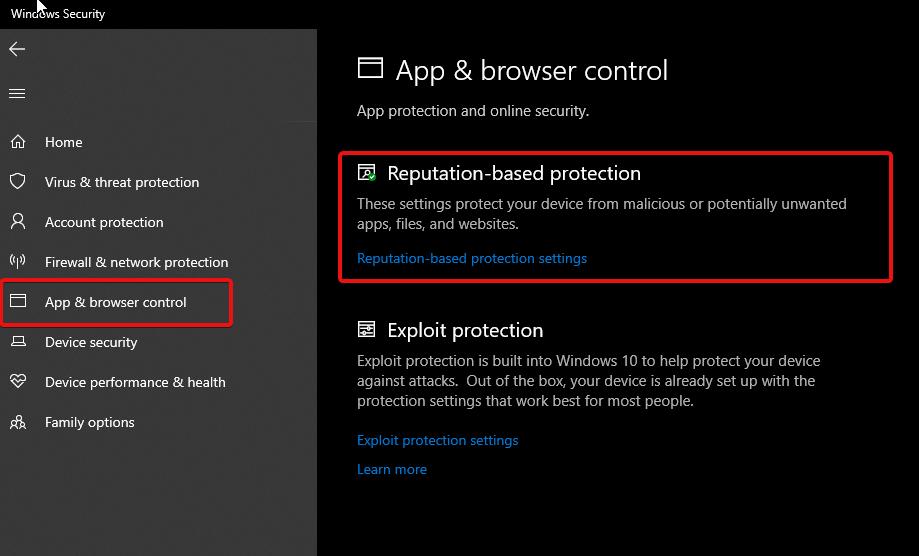
And under Reputation-based protection settings, look for SmartScreen for Microsoft Edge toggle button. Turn off the Toggle Button.

This will disable Microsoft Defender SmartScreen for Edge.
Using Group Policy Editor:
Open Run command by pressing Windows + R and type gpedit.msc and hit enter. This will open the Group Policy Editor.
Now Navigate to the following path.
Computer Configuration > Administrative Templates > Classic Administrative Templates > Microsoft Edge > SmartScreen settingsIf you are not able to find a path, then you need to install Group Policy Templates for Microsoft Edge.
Once you install Group Policy Templates, then navigate to the above-mentioned path.
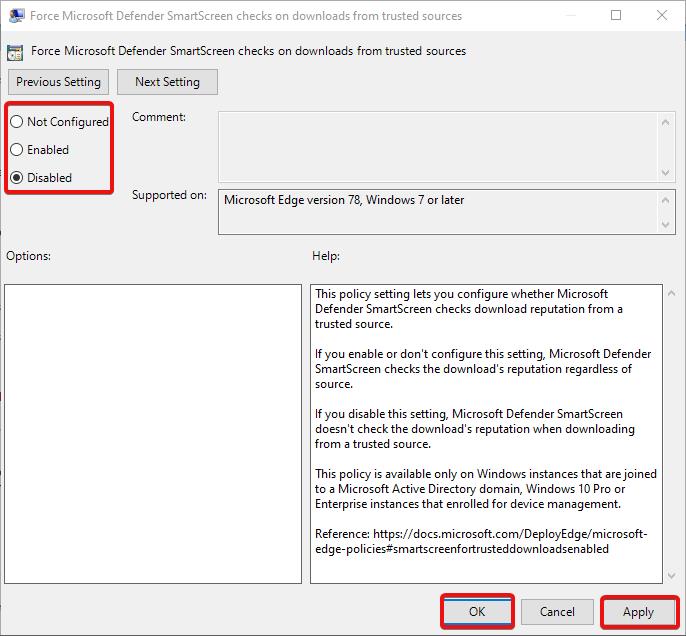
From the Left-hand side click on the SmartScreen Settings and from the right-hand side, Look for the Policy named Force Microsoft Defender SmartScreen checks on downloads from trusted sources.
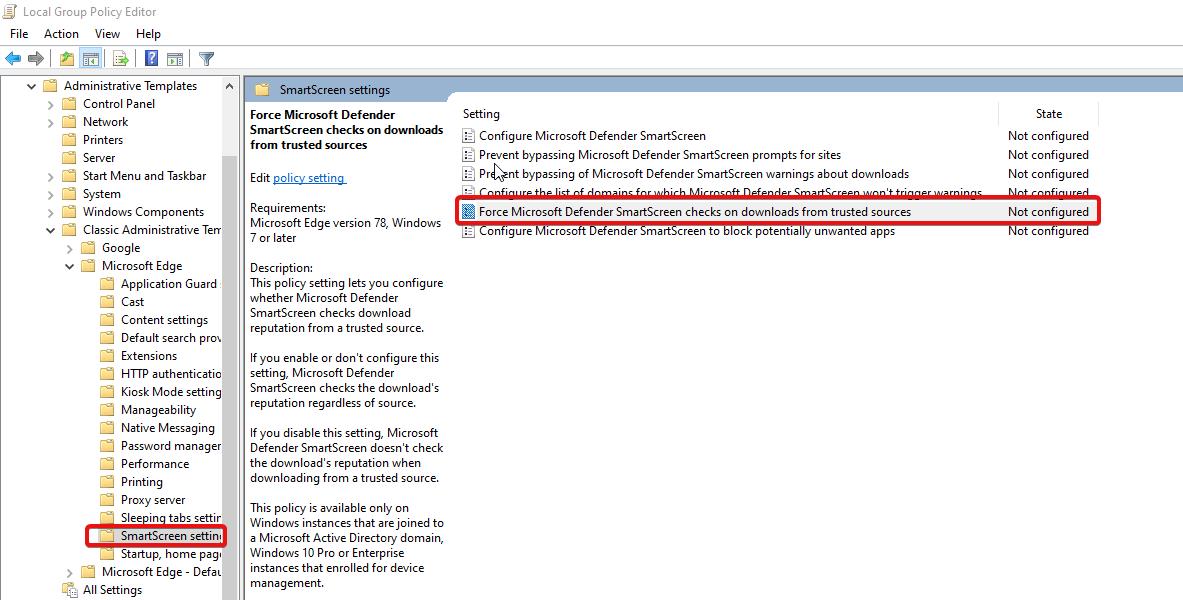
Double click on it and open the Policy settings and choose Disable if you want to disable the SmartScreen settings. Enable it back if you want the protection back.
Using Registry Editor:
Note: Modifying the Registry is risky, and it causes irreversible damage to your OS Installation Follow the steps correctly. Friendly advice Before Modifying Registry Creating Restore Point is recommended.
Open Run command by pressing Windows + R and type regedit and hit enter. This command will open the Registry Editor Console.
Now Navigate to the following path.
HKEY_LOCAL_MACHINE\SOFTWARE\Policies\Microsoft
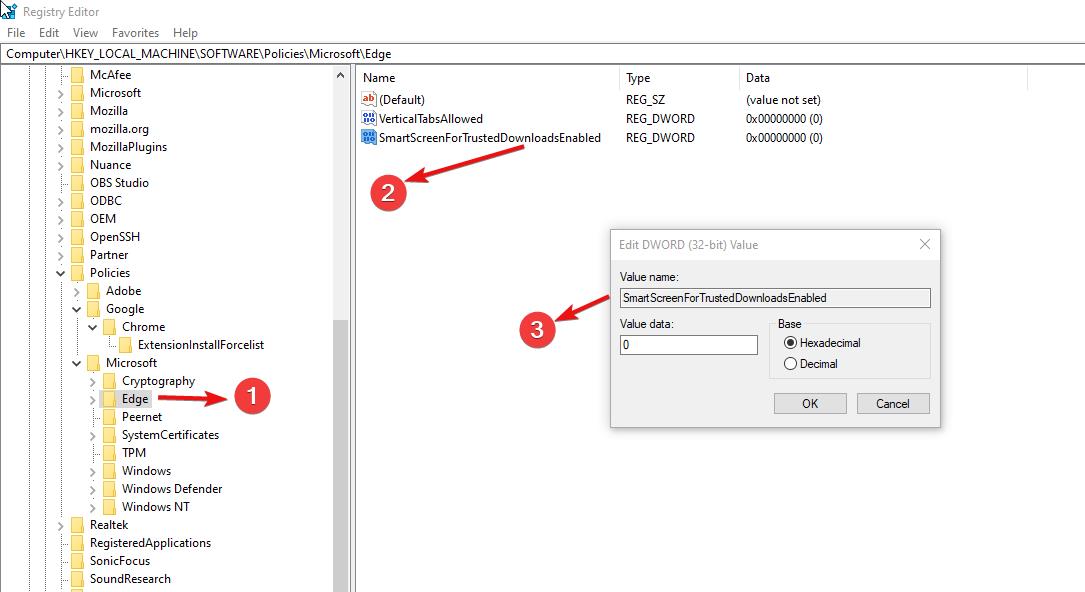
From the left-hand side, right-click on the Microsoft registry key and choose New > Key and name it as Edge.
Next right click on the Edge and Choose New > DWORD (32-bit) Value. And name it as SmartScreenForTrustedDownloadsEnabled.
Double click on the SmartScreenForTrustedDownloadsEnabled DWORD and set the value as mentioned below.
To Disable SmartScreen 0
To Enable SmartScreen 1
Click on Ok and Close the Registry Editor.
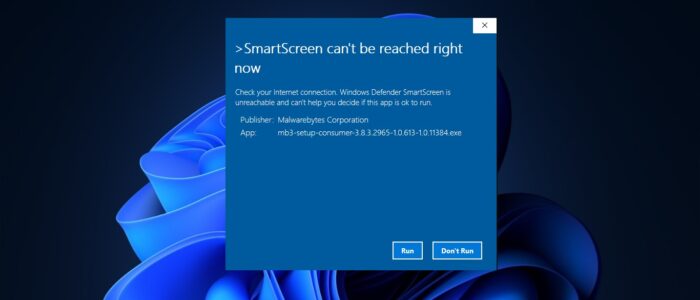
Read Also: Fix SmartScreen can’t be reached right now error in Windows 11/10

