Windows Firewall is Windows’s built-in security feature that guards against unauthorized network traffic on a user’s computer. Windows 11 has a built-in firewall called Windows Defender Firewall, that protects your computer from outside threats, intrusions, and harmful attacks by controlling incoming and outgoing network traffic. The native firewall acts as a barrier between the user’s computer and the internet, and it will monitor all inbound and outbound connections that travel across the user’s network connections. Firewall protects users against Viruses, spyware, worms, Trojan horses, and other malicious software. It regulates or restricts access to certain internet services, such as online games or peer-to-peer file-sharing networks. In Windows by default Defender Firewall is enabled, you can turn off or disable the Windows firewall using this method. This article will guide you to Disable Firewall in Windows 11.
Disable Firewall in Windows 11:
In Windows 11 you can disable Defender Firewall using Windows Security, Control Panel, Command Prompt, and even PowerShell.
Disable Firewall using Windows Security:
Open Windows Security, click on the Start menu, and open Windows Security.
From the left-hand side click on Firewall & network protection, and from the right-hand side, you can see three different networks. Domain, Private and Public Networks.
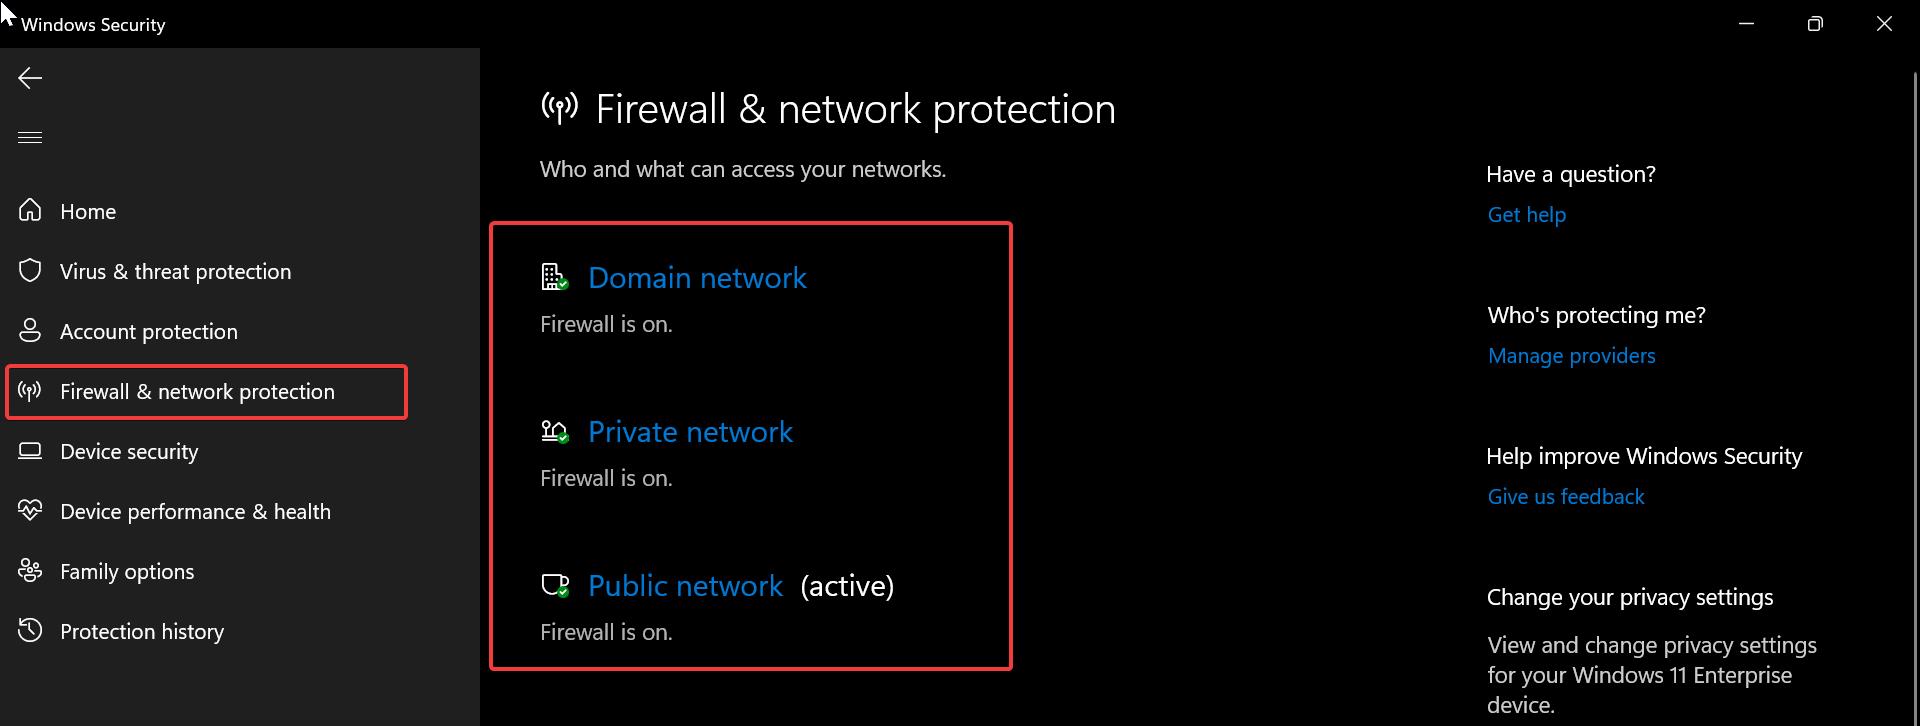
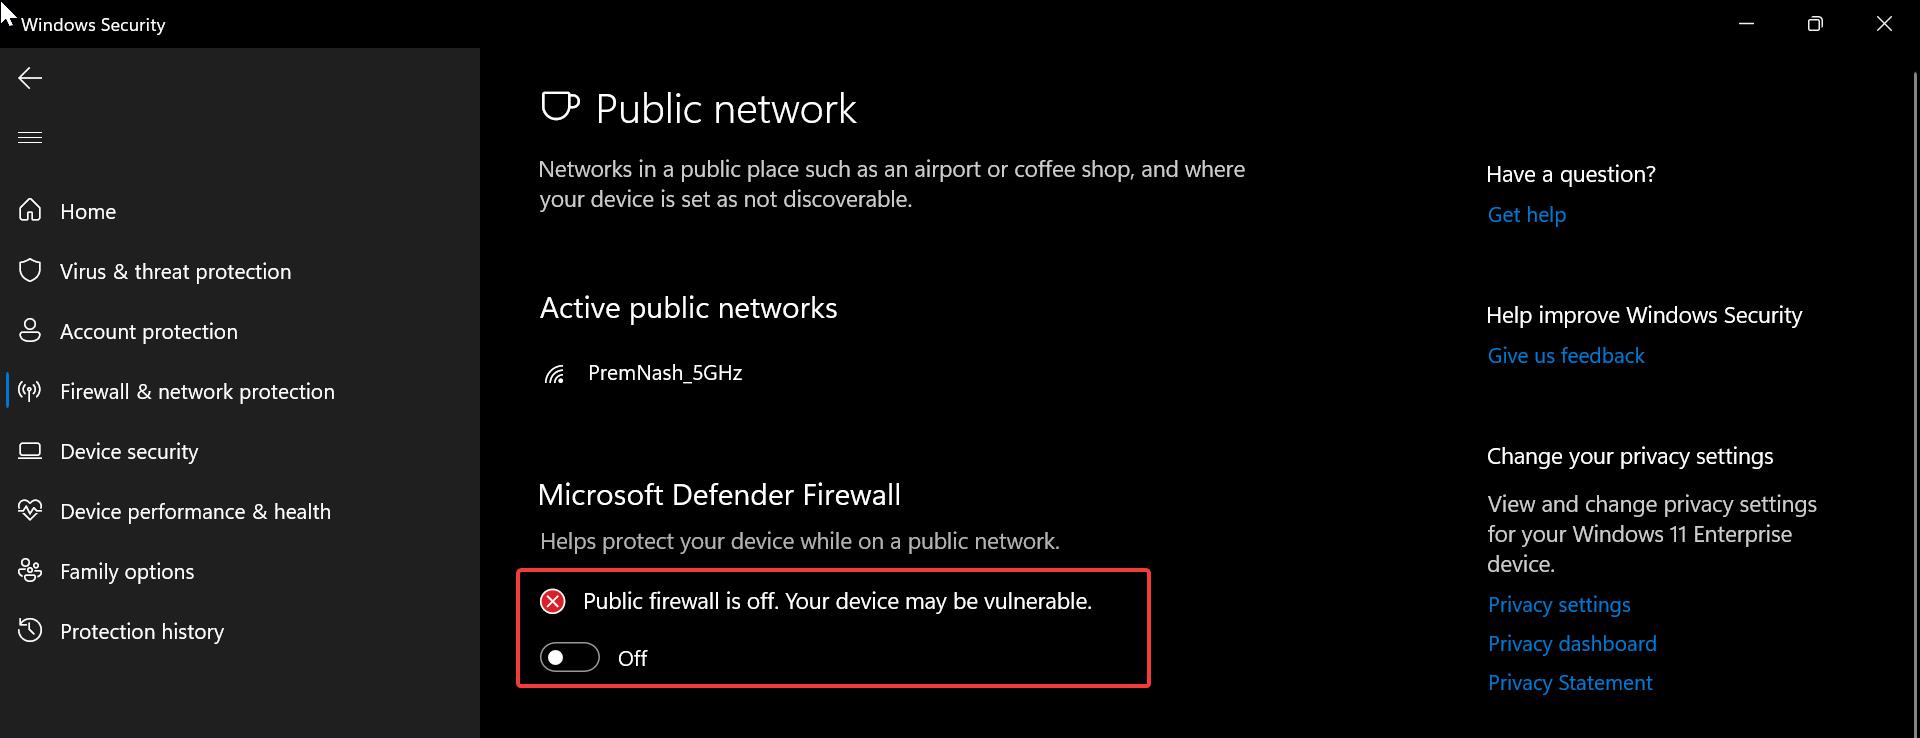
Choose the network for which you want to disable the Firewall. For example, choose Public network and click and open.
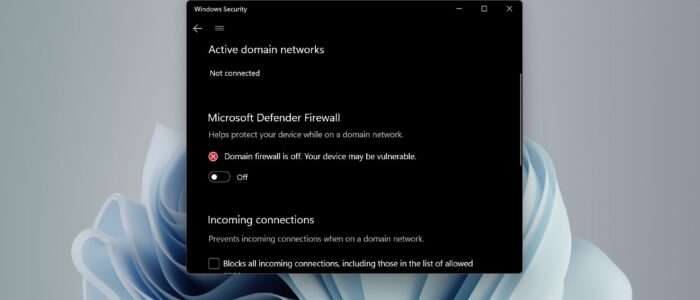
Next, under Microsoft Defender Firewall, turn off the toggle button to disable the Windows Firewall.
Using Control Panel:
Open Run command and type control and hit enter, this command will open the Control panel.
Set the Control panel icons to large icons and look for Windows Defender Firewall.
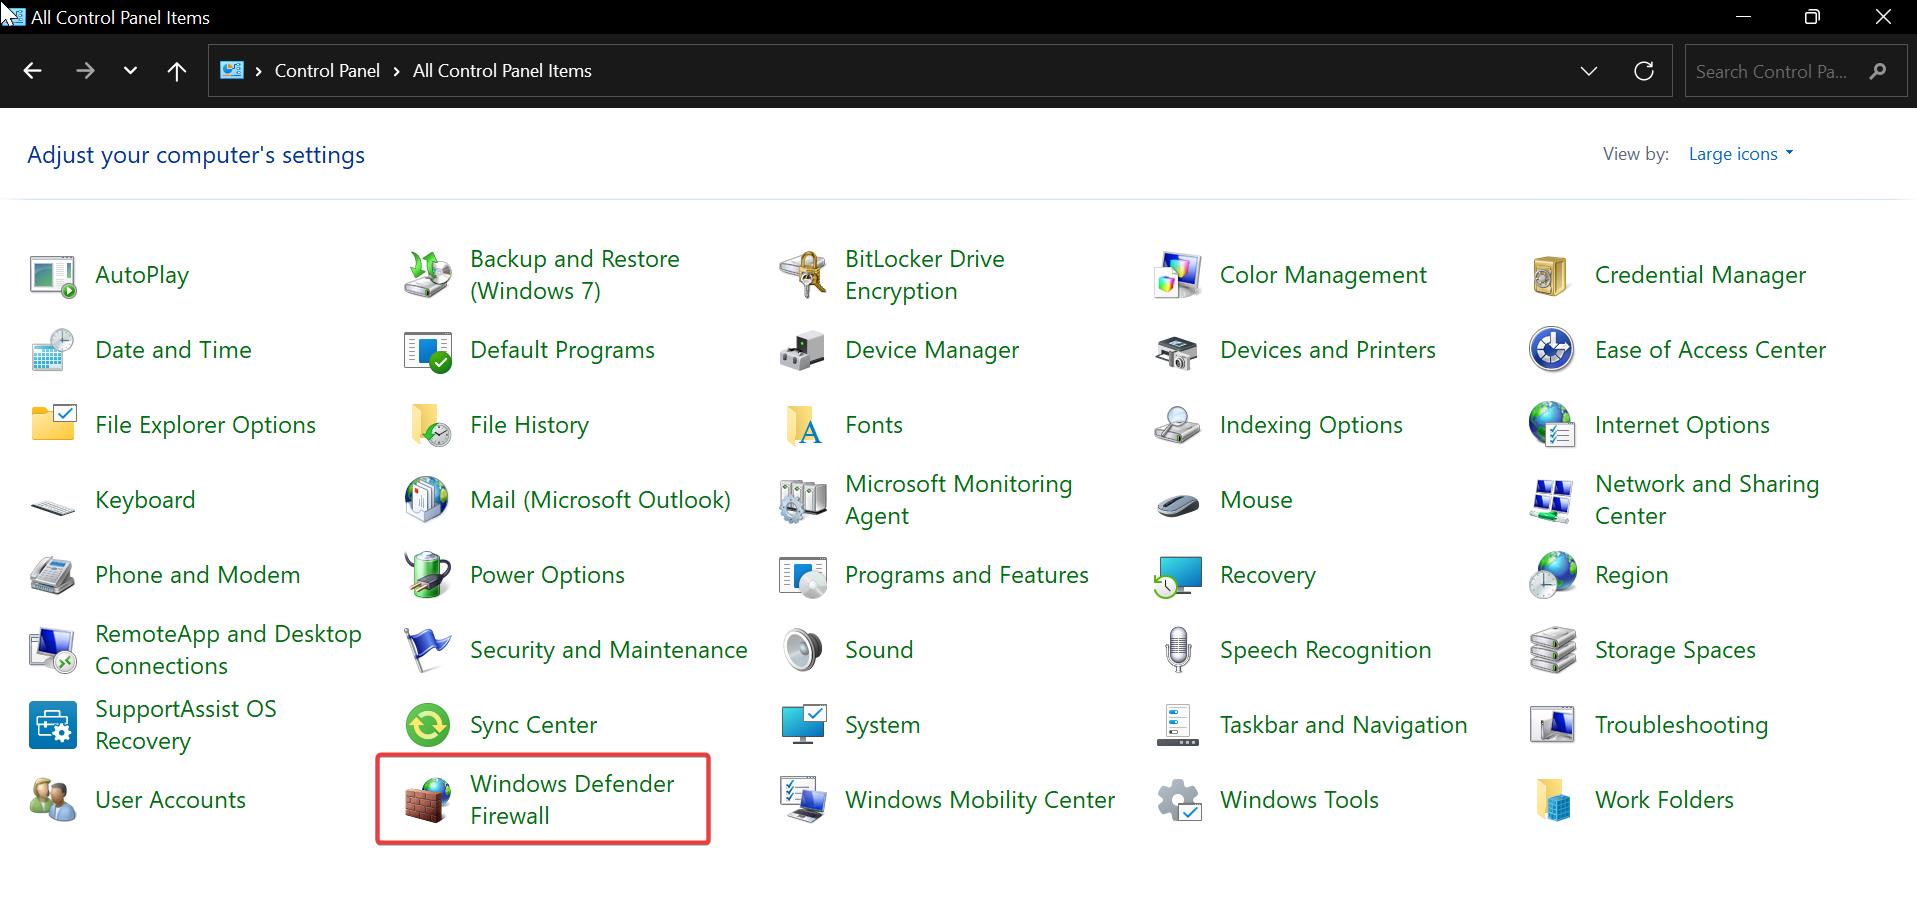
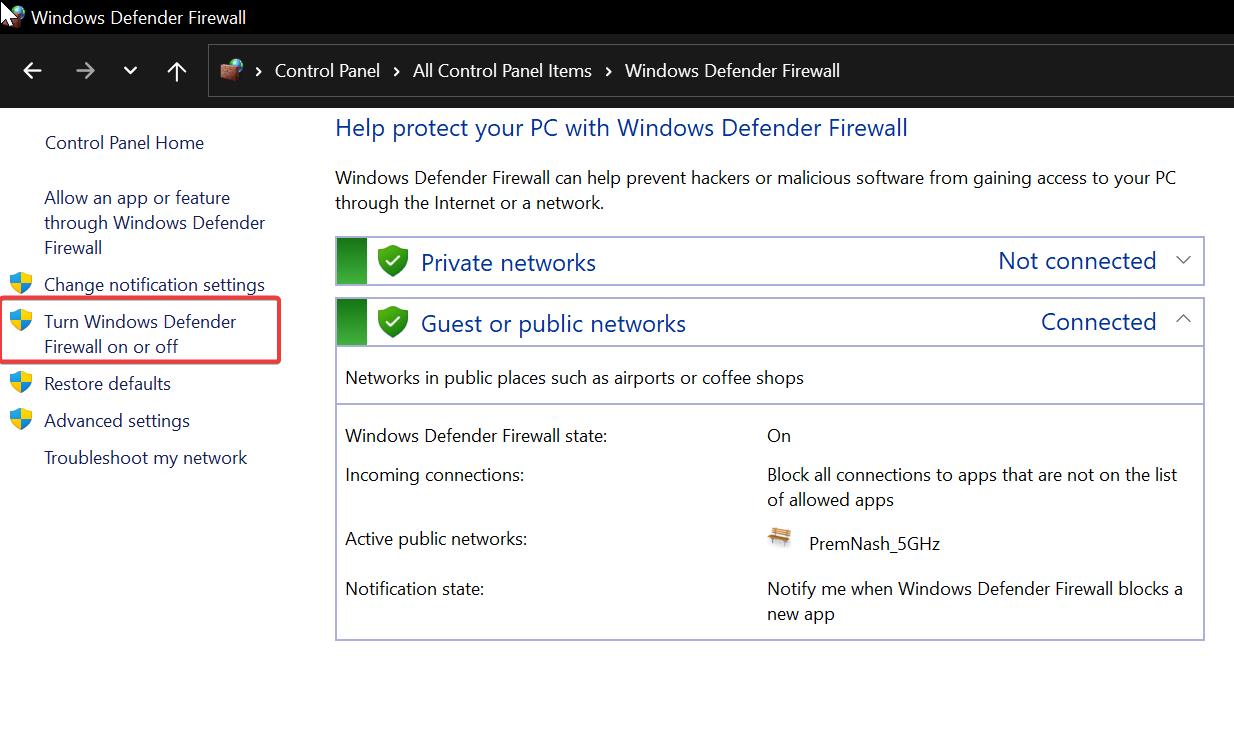
Under Windows Defender firewall settings, from the left-hand side click on Turn Windows Defender Firewall on or off.
Next, under Customize settings for each type of network, check the radio button for the desired network to Turn off Windows Defender Firewall.
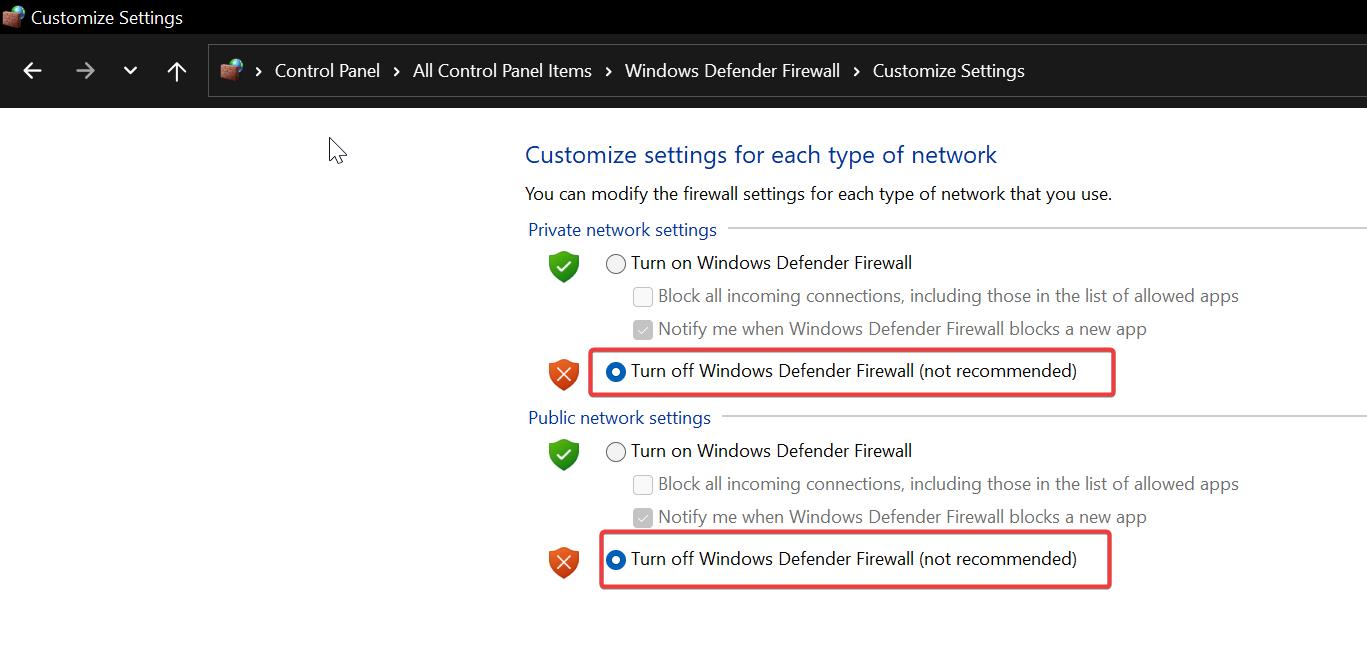
Click on OK.
Using Command Prompt:
Follow the below-mentioned steps to disable Windows Firewall using Command Prompt.
Launch the command prompt in elevated mode, search for Command prompt, right-click on cmd and choose Run as administrator.
Type the following command to Disable the firewall for all network profiles (Domain, Public, and Private).
netsh advfirewall set allprofiles state off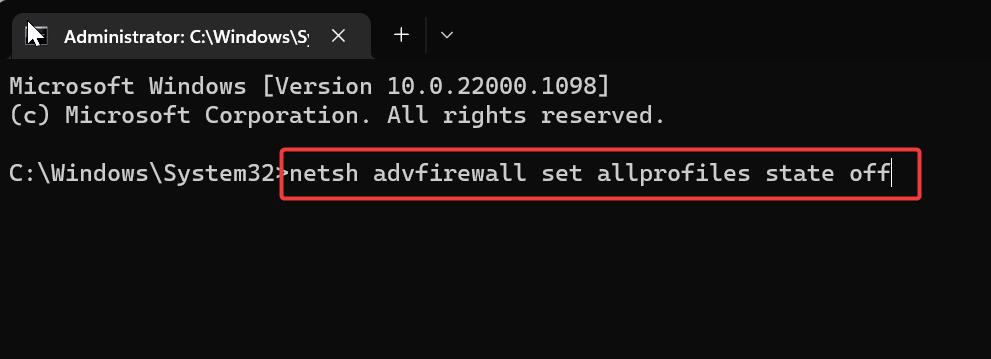
Type the following command to disable the firewall for the domain network, copy-paste the command, and hit enter.
netsh advfirewall set domainprofile state off
Type the following command to disable the firewall for the Public network, copy-paste the command, and hit enter.
netsh advfirewall set publicprofile state off
Type the following command to disable the firewall for the Private network, copy-paste the command and hit enter.
netsh advfirewall set privateprofile state off
That’s it Windows firewall will be disabled on your system.
Disable Firewall using PowerShell:
Launch PowerShell in elevated mode, search for PowerShell and right click on it and choose Run as Administrator.
Type the following command to disable the firewall for all network profiles.
Set-NetFirewallProfile -Profile Domain,Public,Private -Enabled False

If you want to disable the firewall only for specific network then remove the specific network names from the command. For example the below mentioned command disable firewall only for Private network.
Set-NetFirewallProfile -Profile Private -Enabled False
That’s it.
Read Also:
How to Disable Remote Desktop using Command Prompt or PowerShell?
How to check the Firewall status using cmd in Windows 11?
How to check the Firewall status in Linux?

