DISM or Deployment Image Servicing and Management (DISM.exe) is a command-line tool that can be used to service and prepare Windows images, including those used for Windows PE, Windows Recovery Environment (Windows RE) and Windows Setup. DISM can be used to service a Windows image (.wim) or a virtual hard disk (.vhd or .vhdx). DISM is available through the command line or from Windows PowerShell. We can also use the DISM as a Repair Tool. The utility can be used to repair your Windows PC, for a normal PC user this Tool work as a very good repair tool. In a normal working day if you ever feel your system is slow or if you face any system-related error and you don’t know how to check the entire system you can use this repair tool as your primary tool. you can also use the System File Checker (SFC) command-line utility to check the integrity and replace any corrupted or missing protected system files with a known good version. When SFC is unable to fix the problem, chances are the utility was unable to get the necessary files from the Windows image, which might have become broken.
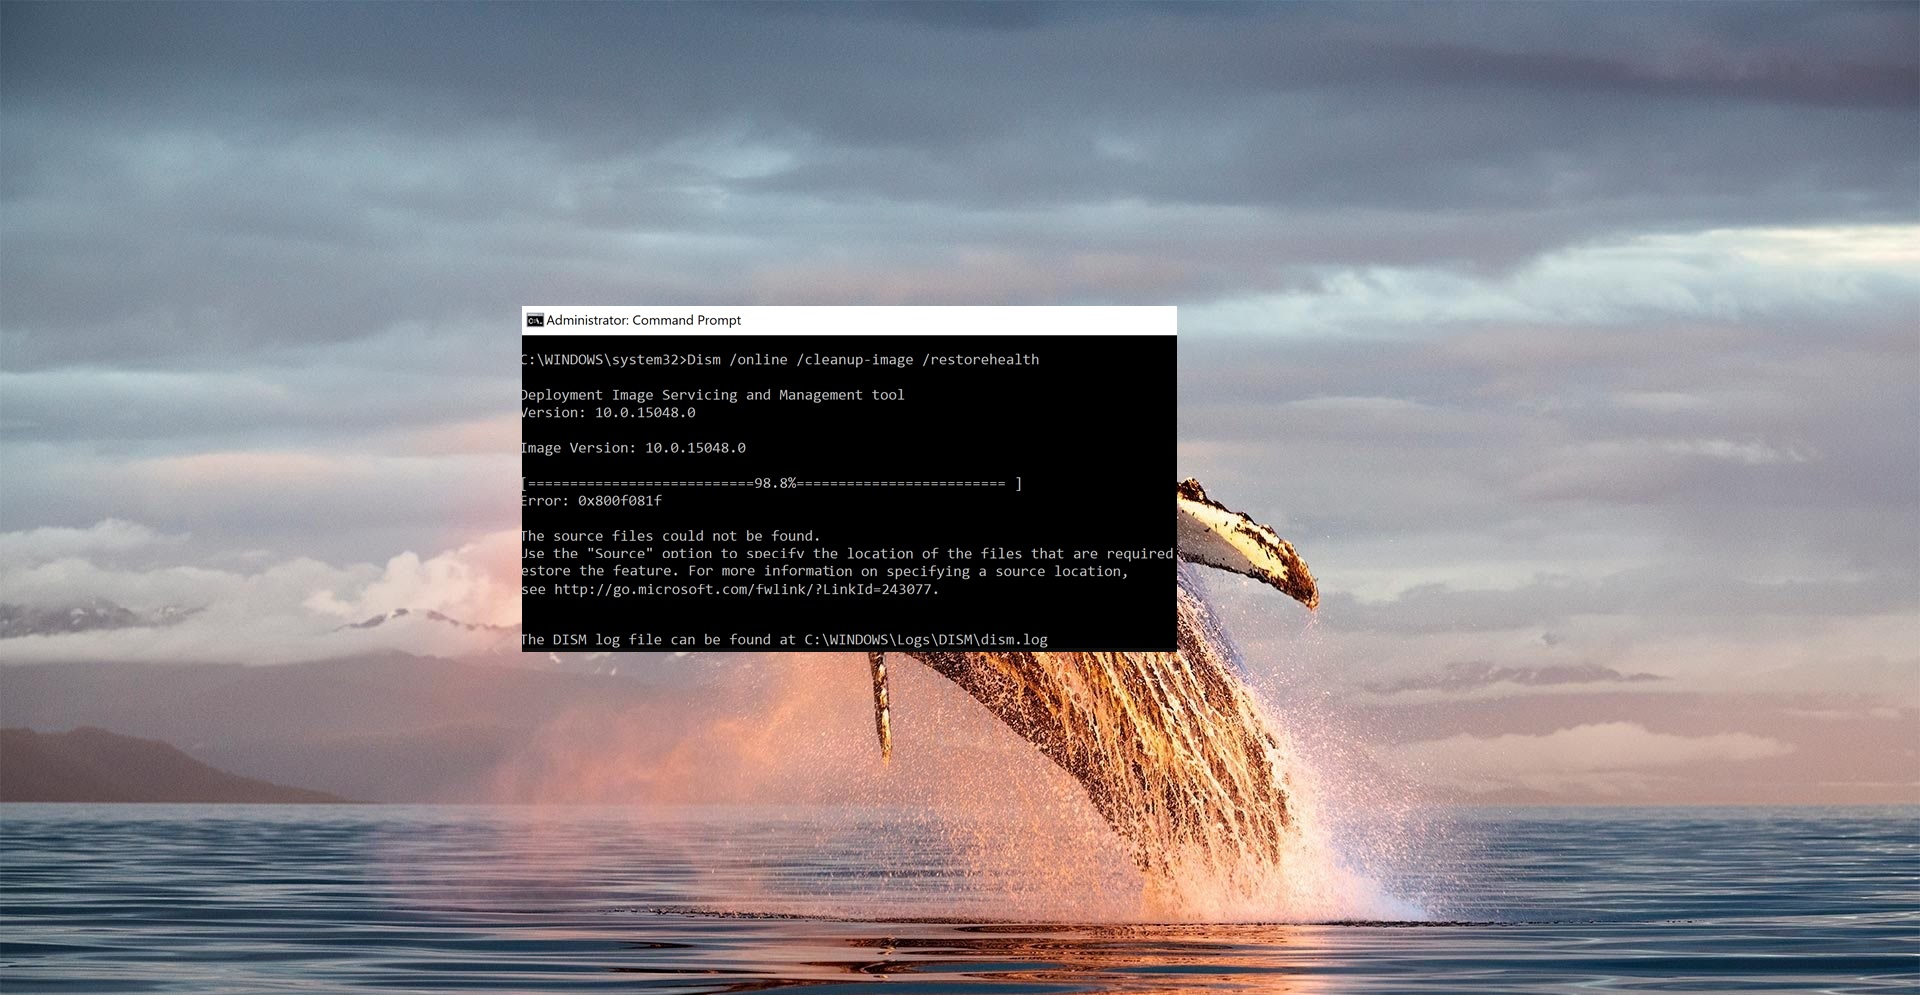
In this situation, you can use DISM to repair the Windows image (.wim), which then will allow you to use the System File Checker to fix any issue with your Windows 10 installation. Today in this article we are going to see about DISM error, “The Source files could not be found”. This error mostly occurs after running the “DISM /Online /Cleanup-Image /RestoreHealth” command, it is a very command issue that occurs while restoring the corrupted operating system on Windows 10. You will receive the following error codes along with the DISM error.
DISM’s source files could be found error codes: 0x800f081f or 0x800f0906 or 0x800f0907
What Causes this Issue?
The DISM error “The Source files could not be found” is a common error which you will receive because of the following reasons.
- If the DISM tool cannot able to find the required file in windows update or WSUS while repair then you will receive this error when using this command.
- If the repair source contains multiple install.wim file then you will get this error while running the command.
- If you have chosen wrong or corrupted windows.ISO file as a repair source then you will receive this error while running the command.
Fix DISM The Source files could not be found:
Using DISM Cleanup Command Choose the correct DISM Source Use Alternative Repair Source by using Registry Use Alternative Repair Source by using Gpedit.msc Repair or Reinstall Windows 10. Let’s see the below-mentioned methods in detail.
Method 1: Using DISM Cleanup Command
Press Windows + X and then choose Command Prompt (Admin), Open Command Prompt in Elevated mode.
Now type the following commands and hit enter.
DISM /Online /Cleanup-Image /StartComponentCleanup sfc /scannow

DISM /Online /Cleanup-Image /AnalyzeComponentStore sfc /scannow

Once the Command Executed successfully then type the following DISM Command and hit enter.
Dism /Online /Cleanup-Image /RestoreHealth
Check if you are able to run the command without any error, Mostly this will fix the “The Source files could not be found” error. If you are facing the error again then proceed to the next method.
Method 2: Choose the correct DISM Source
Sometimes if the DISM command connects online to incorrectly repaired source files to repair the windows image. Then you will get these types of error. So instead of connecting online to repair the operating system, you can specify a local source to Fix DISM source files could not be found an error.
To choose the correct DISM source file you will need the install.wim or install.esd file from the Windows installation media. Choose the correct Windows installation media. then Match the correct windows version, edition, and language which you are currently using now. And Download the Correct windows installation media, use the media creation tool, and then Extract the install.wim from install.esd file using the command prompt.
Download the Windows ISO file using Media creation tool, once the Windows ISO file is downloaded then mount the Windows ISO file from the file explorer. Open the mounted folder from the File explorer and then navigate to the Sources folder. The look for the Install.esd file and then copy to C: Drive. After copying Open Command Prompt in elevated mode and then root the cmd to C Drive.
Now type the following command and hit enter.
dism /Get-WimInfo /WimFile:install.esd
Once the command executed then you can see the list of Indexes will be displayed, according to your version of your windows operating system choose the correct index number. Now again type the following command and hit enter.
dism /export-image /SourceImageFile:install.esd /SourceIndex:IndexNumber /DestinationImageFile:install.wim /Compress:max /CheckIntegrity
Note: Replace the IndexNumber according to your Windows 10 installed Version. After the execution of the command, you will find the Install.wim file created on the C: drive. Again open the command prompt in elevated mode and type the following commands and hit enter.
DISM /Online /Cleanup-Image /StartComponentCleanup DISM /Online /Cleanup-Image /AnalyzeComponentStore
Now type the following DISM /Restore Health command.
DISM /Online /Cleanup-Image /RestoreHealth /Source:WIM:C:\install.wim:1 /LimitAccess
Note: Choose the Correct file Location. Check if you are able to run the command without any error, Mostly this will fix the “The Source files could not be found” error. If you are facing the error again then proceed to the next method.
Method 3: Use Alternative Repair Source by using Registry
This method is not suitable for Windows 10 Pro and Enterprise edition, If you are using these editions then use the following method.
Open Run command by pressing Windows + R and type Regedit and hit enter. This command will open the Registry Editor.
Now Navigate to the following Path.
HKEY_LOCAL_MACHINE\SOFTWARE\Microsoft\Windows\CurrentVersion\Policies
Now From the Left-hand side Right-click on the Polices and then select New > Key. Name the new key as Servicing and hit enter.

Again Right-click on the Servicing Key and then select New > Expandable String Value.

Name the new String value as LocalSourcePath, now double click on it and modify the value to “wim:C:\install.wim:1” in the Value data field and click on OK.

Now again right-click on the Servicing Key and then select New > DWORD (32-bit) Value.

Double click on the New DWORD and name it as UseWindowsUpdate the right click and choose modify, change its value to 2.

Click on OK, restart the system once and check if you are able to run the command without any error, Mostly this will fix the “The Source files could not be found” error.
Method 4: Use Alternative Repair Source by using Gpedit.msc
Open Run command by pressing Windows + R and type gpedit.msc and hit enter. This command will open the group policy editor.
Navigate to the following path.
Computer Configuration > Administrative Templates > System
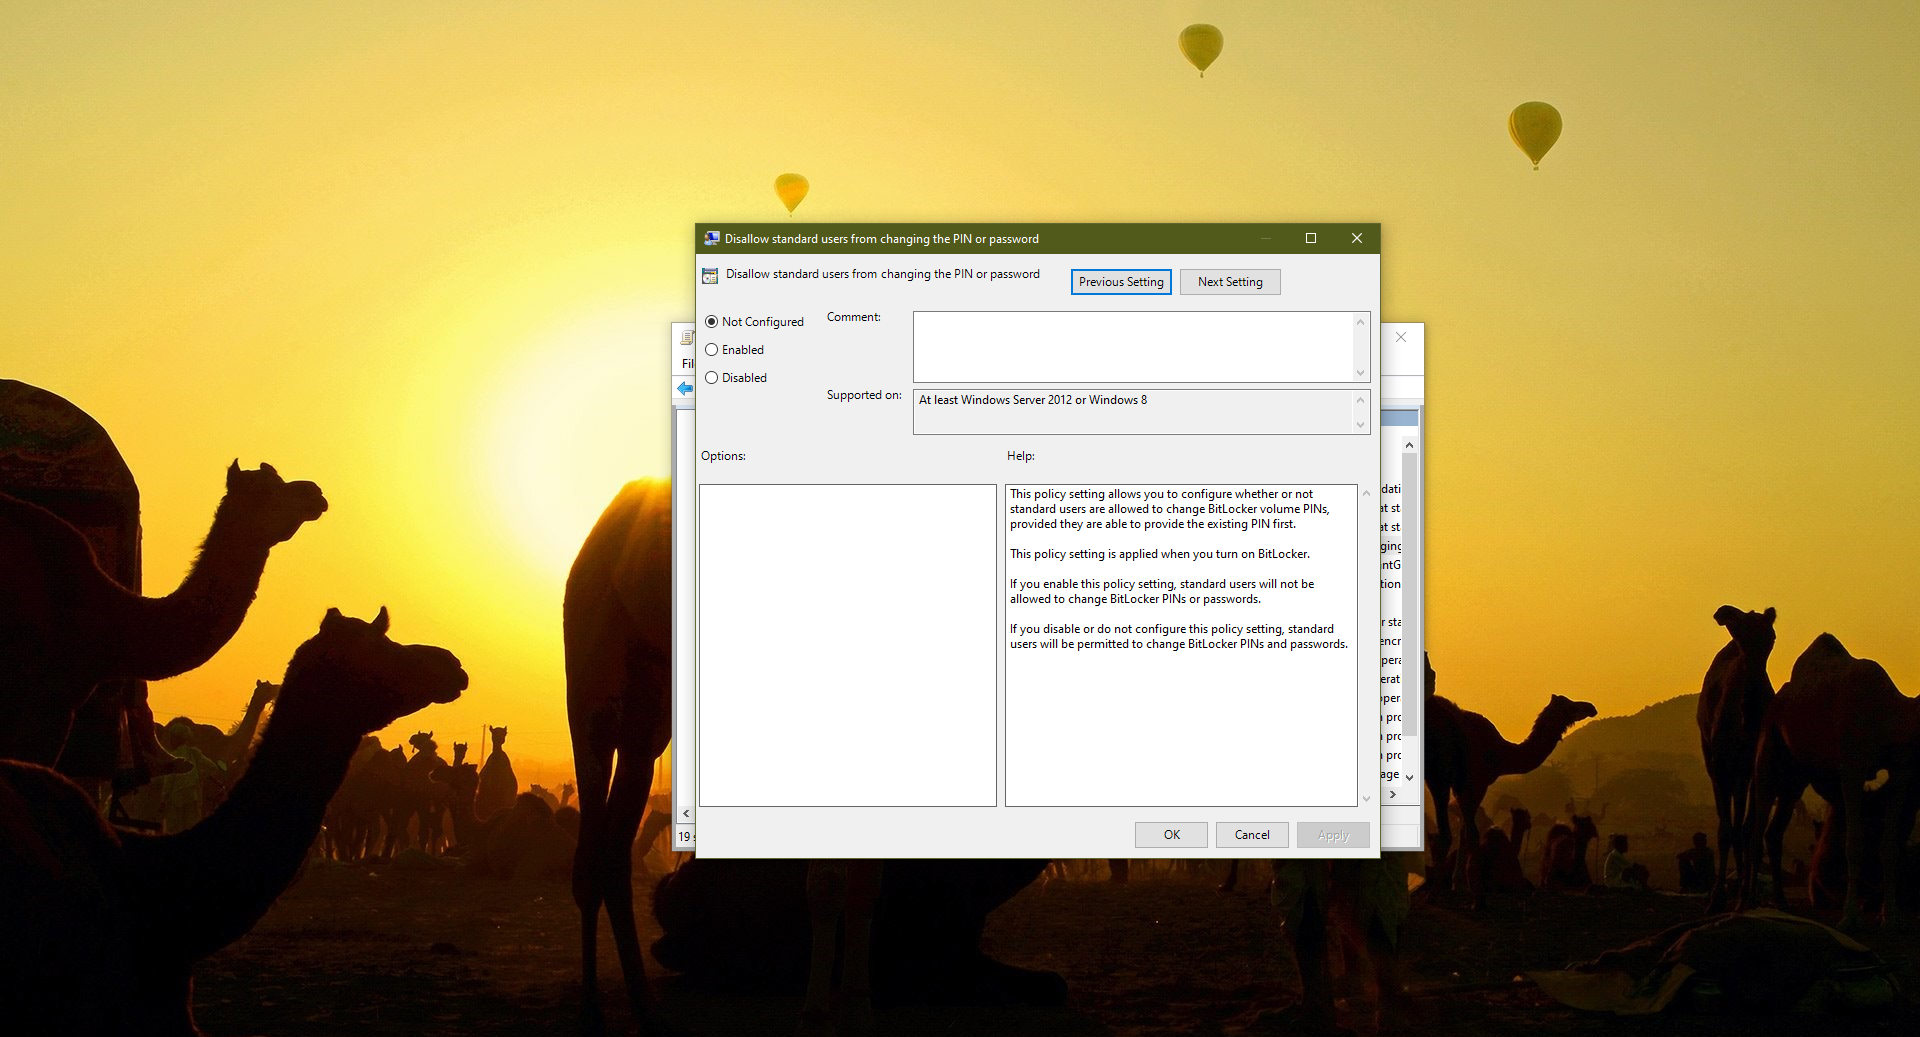
rom the Left-hand side click on the System and from the right-hand side look for the policy named “Specify settings for optional component installation and component repair“.

Double click on the Policy to open policy Setting and select Enabled, Then under “Alternate source file path” type below-mentioned value. wim:C:\install.wim:1 Check the box “Never attempt to download payload from Windows Update“.

Click on Apply and then OK. Restart the system once and check if you are able to run the command without any error, Mostly this will fix the “The Source files could not be found” error.
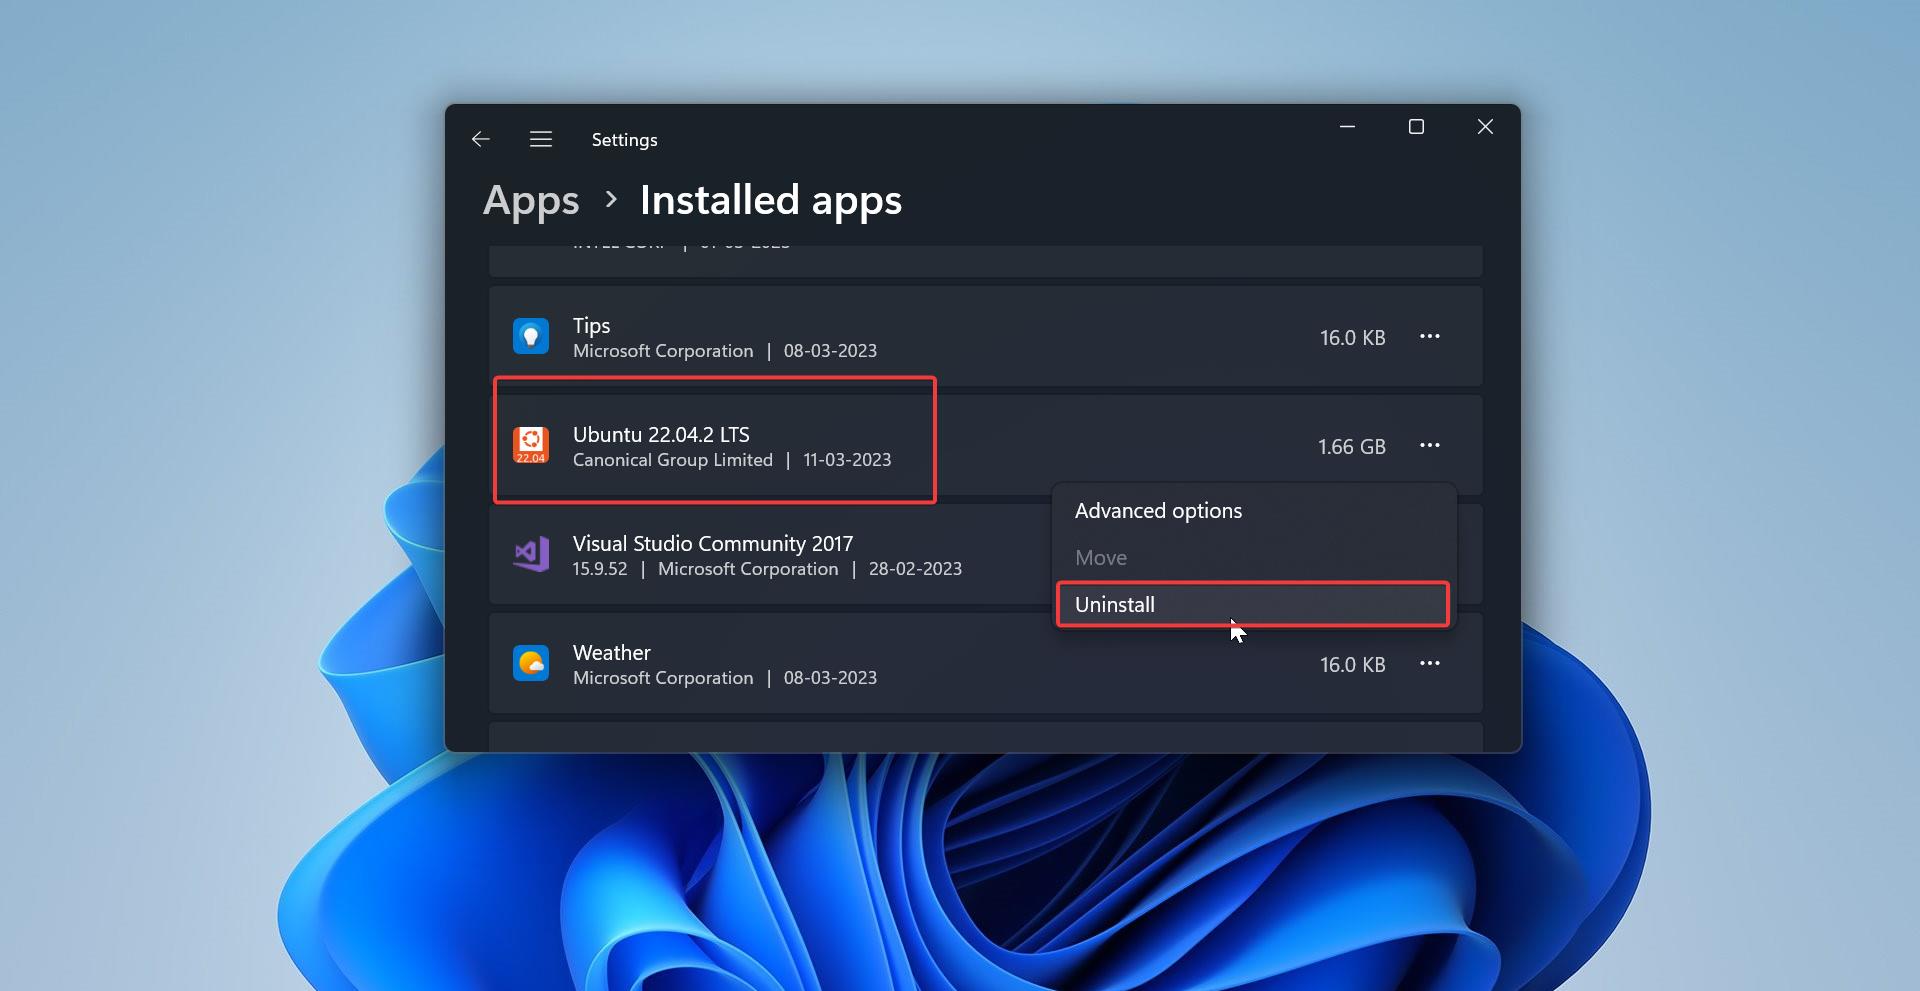
Method 5: Repair or Reinstall Windows 10.
If the above-mentioned methods don’t work then the final option is to repair the PC or Reinstall the fresh windows OS.