MS Office updates comes with the latest features, security patches, and bug fixes for Office users. These updates are very important to keep your Office apps up and running seamlessly, ignoring these updates would cause the office apps to crash and to work abnormally. To improve your office performance, you need to update your office to the latest version. There is no specific time period for the Microsoft Office updates, so whenever an update is available you need to update it. There are two types of Office Update options available in MS Office, Manual and Automatic, by default MS office will update automatically when the new update is available. Or you can choose the Manual update option to install the office updates. Mostly office updates will install automatically, the Automatic Office Updates option is turned on by default. If this option is not enabled, then you can enable this Automatic Office updates option by in two different methods. If you are not getting automatic office updates, then this article will guide you to fix Office not updating automatically in Windows 11/10.
Fix Office not updating automatically in Windows 11/10:
You can fix this issue by following the two methods below, before that make sure there is no VPN settings enabled on your device. Connect your device to the open internet to receive the Office Updates.
Solution 1: Make sure the Automatic Update Enabled:
Open any Microsoft Office apps, like Word, Excel, or outlook, click on the File option.

Under File Option click on the Office Accounts, Under Office Accounts, you can see the Update Options.
Click on the Update Options and make sure the update option is enabled, if not Choose Enable Updates option. This will enable automatic office updates.
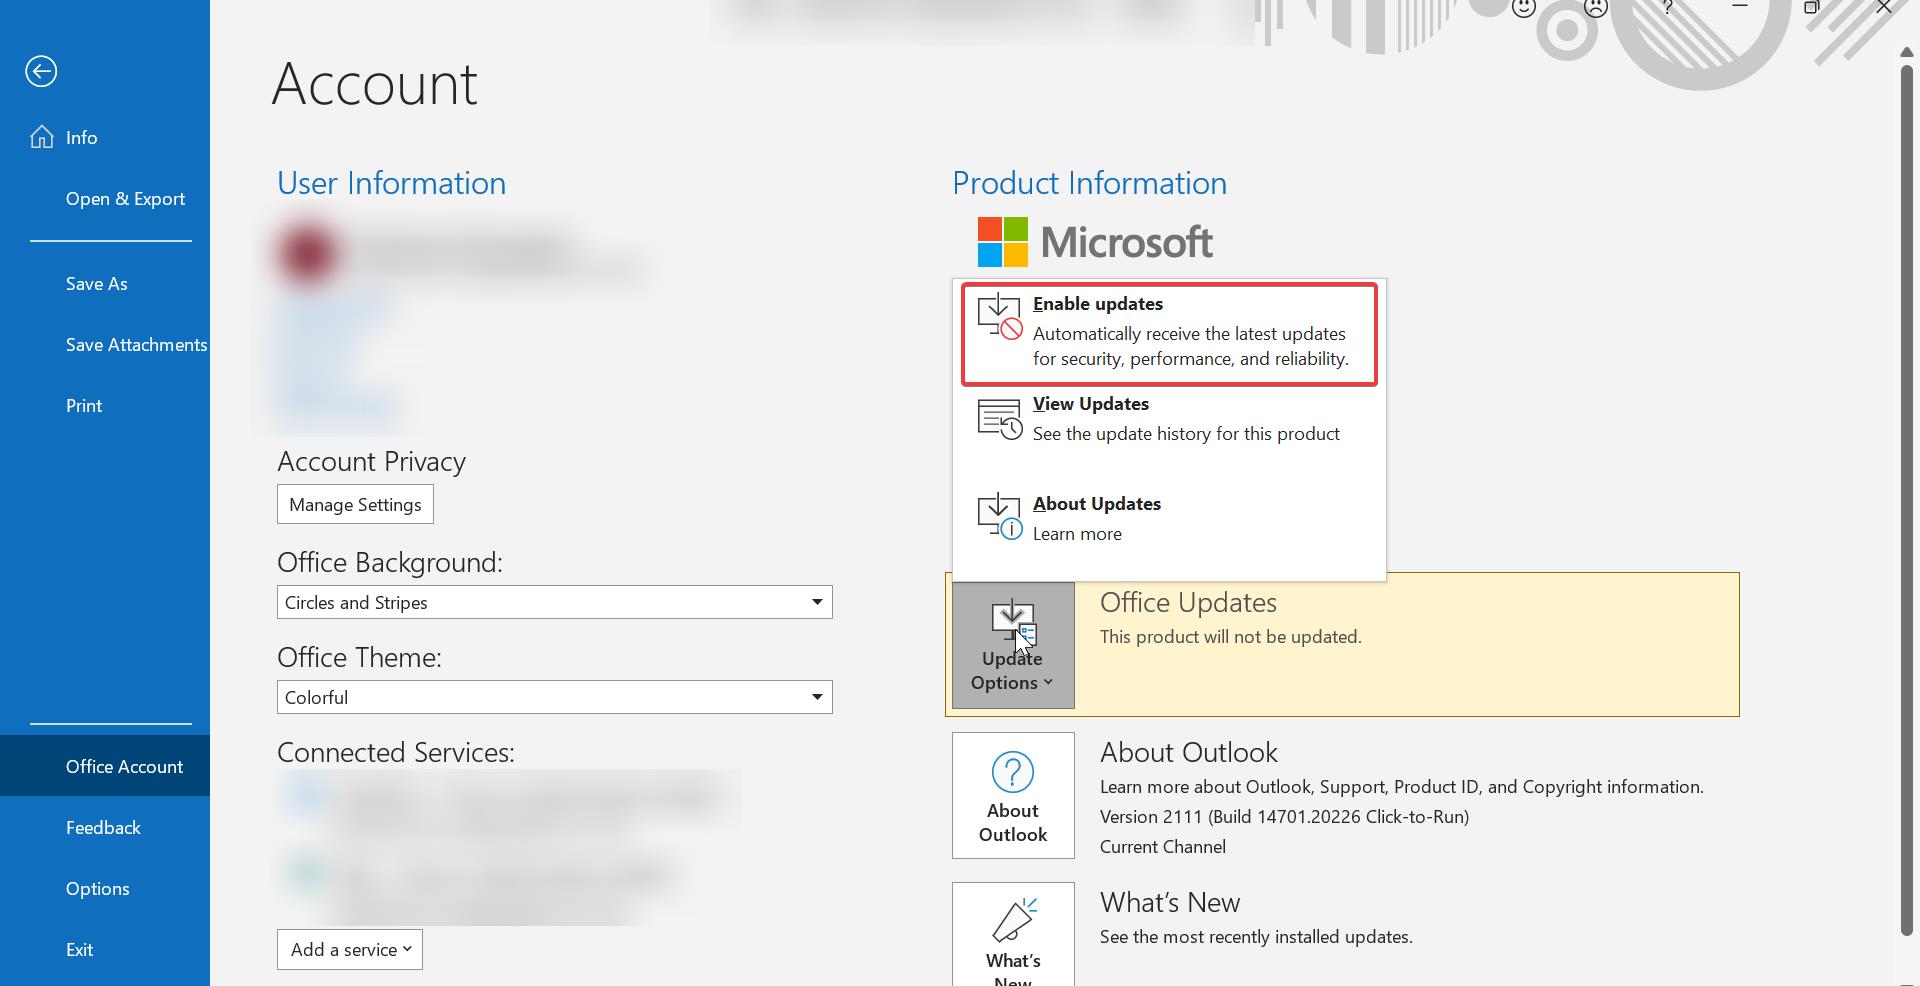
Now you’ll receive the automatic MS office updates from Microsoft. No need to update the office manually.
Solution 2: Modify the Registry Settings:
Note: Modifying the Registry is risky, and it causes irreversible damage to your OS Installation Follow the steps correctly. Friendly advice Before Modifying Registry Creating Restore Point is recommended.
For Office 2013, 2016, 2019 and 2021 users:
Open Run command by pressing Windows + R and type Regedit and hit enter, this command will open the Registry Editor console.
Now navigate to the following registry path.
HKEY_LOCAL_MACHINE\SOFTWARE\Policies\Microsoft\Office\16.0\common\OfficeUpdate
If you are using Office 2013, then replace the 16.0 with the 15.0 value and hit enter.
From the left-hand side click on the Office Updates and from the right-hand side Create a new registry DWORD and name it as EnableAutomaticUpdates.
Double click on the EnableAutomaticUpdates and set the value as 1 and click on OK.
Close the Registry Editor and restart the system once.
For Office 365 users:
If you are using Office 365 then use the following steps to enable the automatic updates.
Open Run command by pressing Windows + R and type Regedit and hit enter, this command will open the Registry Editor console.
Now navigate to the following registry path.
Computer\HKEY_LOCAL_MACHINE\SOFTWARE\Microsoft\Office\ClickToRun\Configuration
From the left-hand side click on the configuration registry key and from the right-hand side look for the String value UpdatesEnabled.
Double click on the UpdatesEnabled String value and set the value as “True”, this will enable the automatic updates in Office 365.
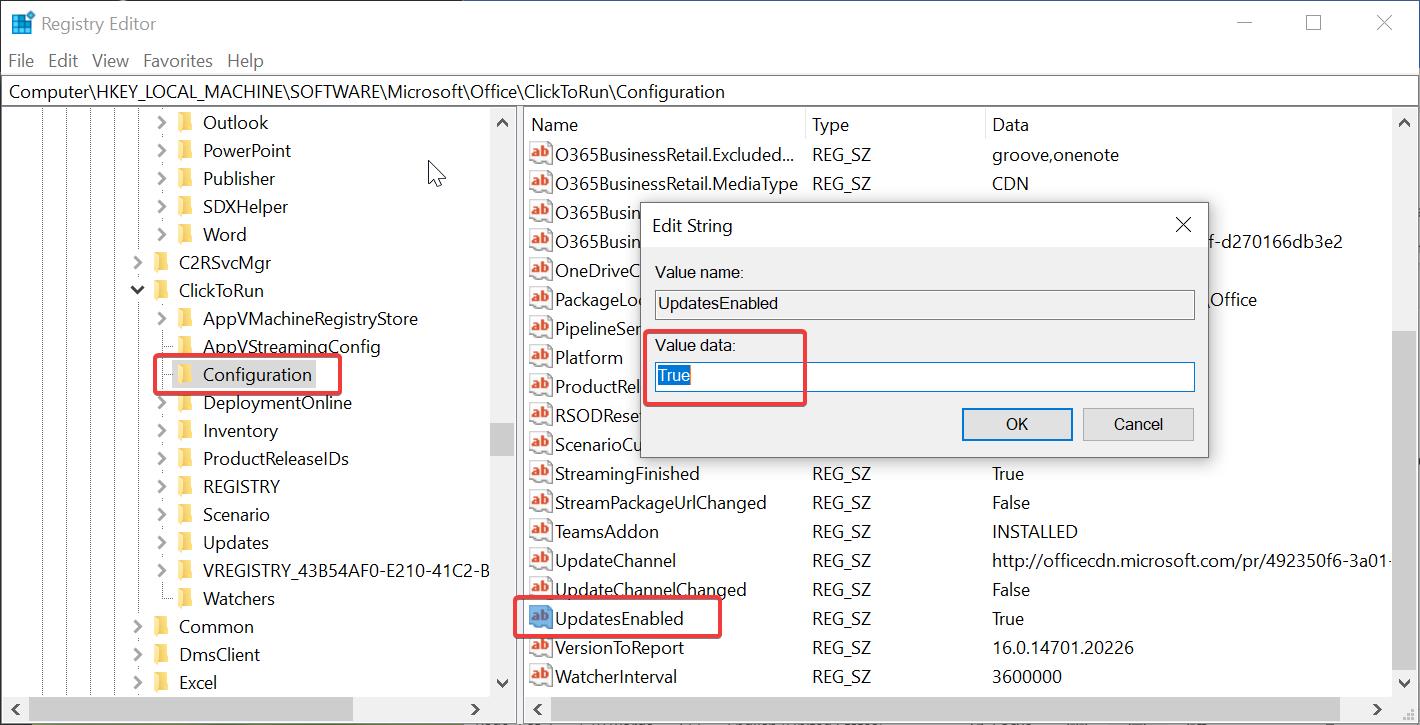
Click on Ok and restart the system once.
Read Also: How to Install OpenOffice on Windows 10?


