To Keep the Data safe in any operating system, backup is the standard practice, no matter what operating system you use, to keep your data safe you have to follow some procedures. There are several ways to backup your data, like copying all your data to an External hard disk, copying all your data to cloud storage, or syncing your folders to cloud storage. And in some operating systems, you can see the inbuilt data backup tool, in Windows, you can find an inbuilt backup tool called Backup and Restore. If your data size is small then you can easily copy-paste the data to any external hard disk, or to the cloud backup storage. But if you are copying a large amount of data, for example, an entire partition or hard disk, then you need to use any backup tool to copy the data. In this article, I am going to show you the way to Backup entire Windows 11 operating system to external hard drive.
Backup Windows 11 OS to External Drive:
Using the following method, you can take backup of Windows Operating System drive, you can create a System image backup.
Method 1: Using Backup and Restore:
Backup and Restore is a legacy feature that is used to take backups of files, folders, and partitions. And it is used to create System image backups. Follow the below-mentioned steps to take partition backups in Windows 11/10.
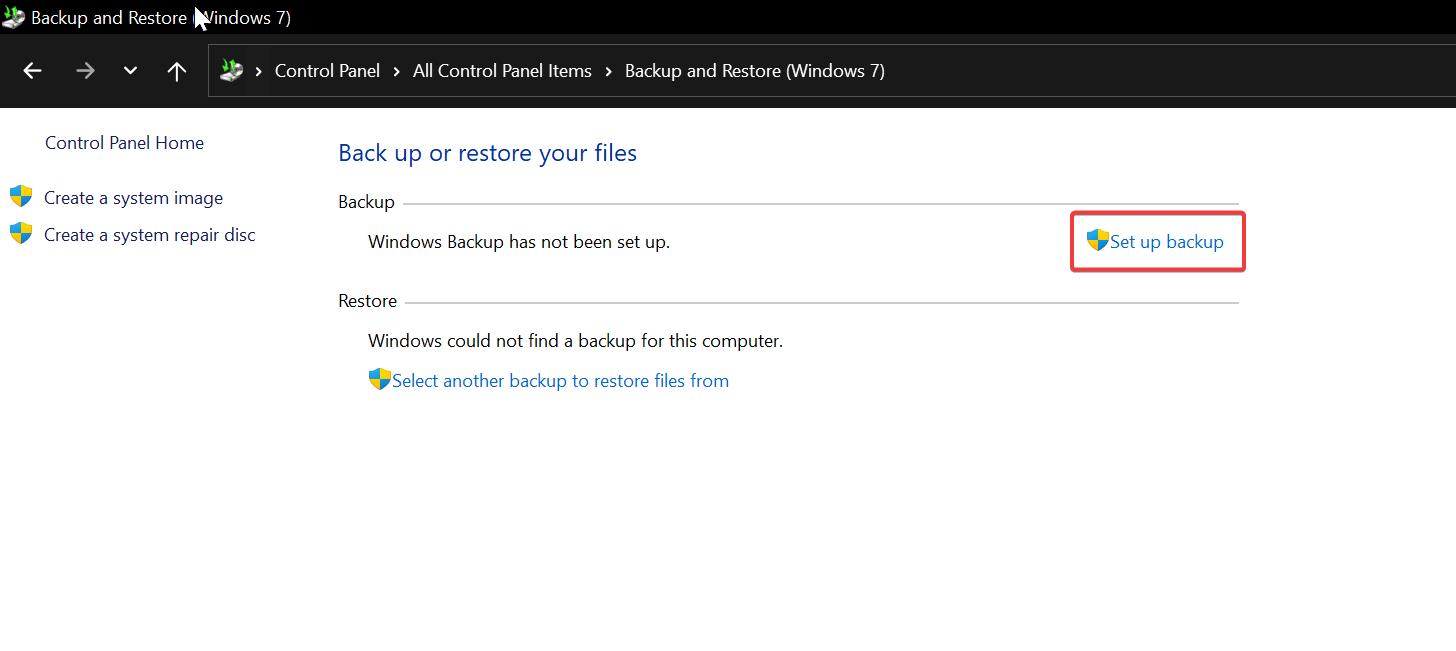
Open Run command by pressing Windows + R and type Control and hit enter, this will open the Control Panel.
Now set the icons to large and look for Backup and Restore (Windows 7). Click and open the Backup and Restore.

Under Backup click on the Set up backup option.
On the next window select the destination drive for the backup, you can choose any other partition or if you have the external hard drive connect and select the external hard drive.

you can also choose network drive, click on Save on a network option, to copy the data to any file server.
Once you selected Destination Drive, click on Next.
On the next Windows, you’ll receive the following options to What to backup, you can select the option based on your requirement.
Let Windows choose: Windows will back up data and files saved in libraries, desktop, default Windows folders. It will also create a system image and you can use it to restore your computer if it stops working one day. However, this option will not back up program files, things formatted in FAT file system, Recycle Bin files, and temporary files larger than 1GB.
Let me choose: You can freely choose the files, folders, and directories to back up. You can also choose whether to include a system image in the backup.
Choose the Option “Let Windows choose” or “Let me choose” based on your requirement.

Click on Next.
On the Next screen, Select What do you want to back up? Choose the Partition or folders that you need to take backup.
Also, you can find the option to check whether to include a system image of drives.

Check that option if you want, then click on Next.
Then schedule the backup process, click on the Change schedule option to set the date and time.
Click on Save settings and run backup.

This will initiate the backup process as per your schedule, if you want you can change the date and time later.
How to take System Image Backup?
System Image Backup is the snapshots of all system components and their data, image backups are exact copies of the whole OS, including applications, configuration, and files on every partition. Backup and restore utility helps you to take an image backup that takes the entire content in a C: drive. This image file contains the complete copy of your Windows Operating system.
Open Run command by pressing Windows + R and type Control and hit enter, this will open the Control Panel.
Now set the icons to large and look for Backup and Restore (Windows 7). Click and open the Backup and Restore.
From the left-hand side pane, click on Create a System image.

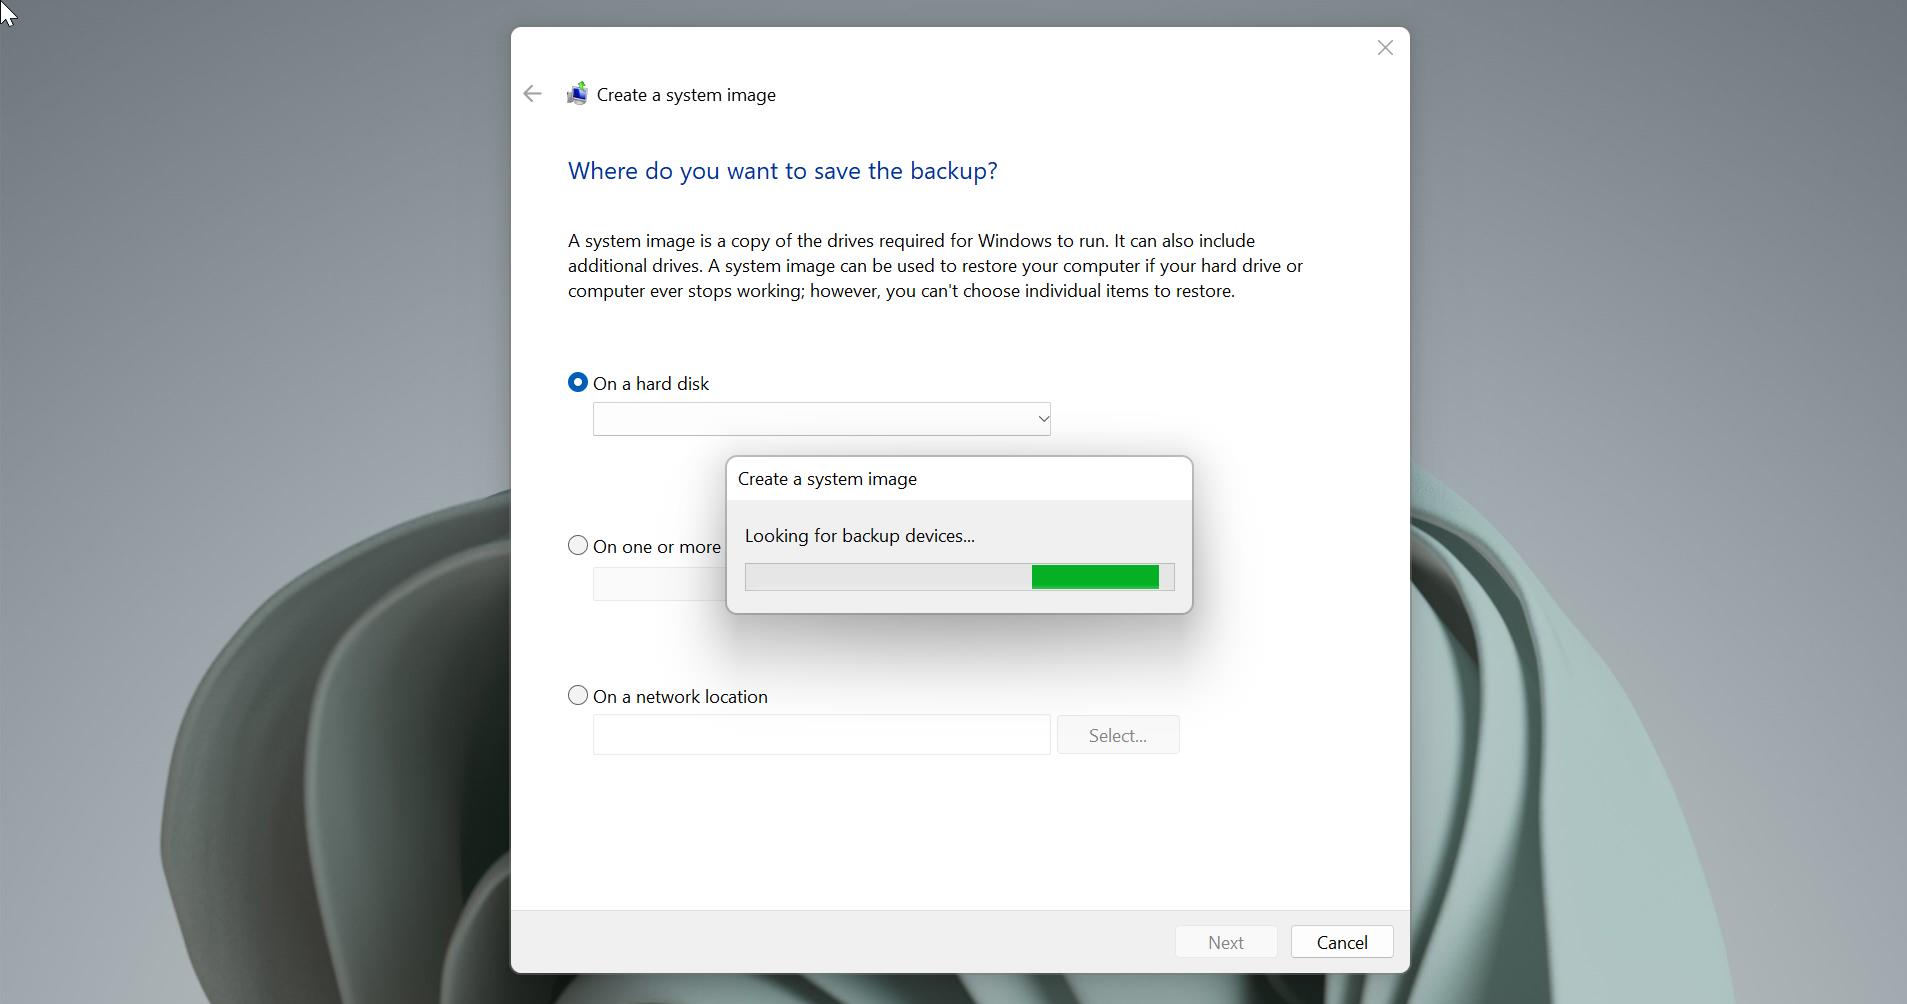
On the next screen, you’ll get Where do you want to save the backup?
You can save the backup in three different ways.
- On a hard disk
- On one or more DVDs
- On a network location

Select the preferred location and click on Next, on the next screen, the System partition will be selected by default, if you want to include additional partitions, you can select them too.
Review the settings once and Click on Start Backup. This will take time depends on your HDD Data size.
Method 2: Using Command Prompt:
You can also use the Command Prompt to Backup and Restore your data, Backup and Restore utility is also available in the Command Line Version. Wbadmin is the command line version of Backup and Restore, you can create a Backup, System image, and Restore backup using the Wbadmin utility. Follow the below-mentioned steps to create, schedule, and restore backups.
Open Command Prompt in elevated mode, click on the start menu and search for “Command Prompt” and right-click on it and choose Run as Administrator.
To Backup the System Drive, which means OS Drive, Type the following command.
wbadmin start backup -backupTarget:G: -include:C: -allCritical –quietIf you installed OS on different partition, Replace the :C with the Partition you would like to backup. Also Change the BackupTarget letter with the actual Drive letter of your External Hard Disk.
To Backup Multiple partitions type the following command.
wbadmin start backup -backupTarget:G: -include:C:,D:,E:,F: -allCritical –quietThis command will backup the multiple Drive partitions at the same time, and replace the backupTarget drive letter with the actual Drive letter of your External Hard Disk.
Use the Wbadmin command line utility to Backup Windows 11, Windows 10 operating system.
Read Also: Sticky Notes Backup and Restore Process in Windows 10