Teleport is a popular Open-source platform to access and protect all your infrastructure, and it is one of the easiest and most secure ways to access infrastructure such as servers, Kubernetes clusters, databases, and internal web applications. It operates on a foundation of cryptographic identity and Zero trust principles, ensuring access is granted based on Verified identity rather than network boundaries.
How Teleport Works?
Teleport helps organizations to implement a robust Zero Trust Security model across their infrastructure.
Certificate-Based Authentication: Teleport acts as a certificate authority, which issues short-lived certificates instead of relying on static credentials, such as passwords or keys. This is much more secure because it reduces the risk of credential theft or misuse.
Unified Access Proxy: Teleport serves as a multi-protocol access proxy, offering support for the protocols SSH, RDP, HTTPS, and the Kubernetes API. It also natively supports integrating with other existing client tools to provide easy access without modifications to user workflows.
Role-Based Access Control (RBAC): It is possible with Teleport that administrators can establish roles and access permissions. All the users’ access to any resource will thus be controlled, keeping management simple, while security compliance is enhanced.
Audit Logging and Session Recording: Access events and all sessions are logged by Teleport. This thus gives an in-depth audit log for compliance as well as for security monitoring purposes. This thus helps organizations go through user activity and detect probable security incidents.
How to Install Teleport on Windows 11?
This article will guide you in installing Teleport on Windows 11 using two different methods.
Install Teleport Standard method:
This is the standard method to install Teleport on Windows 11, First, you need to download the Teleport from the Official Teleport website, click on the link here to Download Teleport.
Click on the Windows Tab, and choose the tsh and tctl clients, and select the required version.

Next, click on the Download Link, once you downloaded the zip file, right-click and choose Extract all.

Once you extracted all the files, Copy the extracted folder to your User folder or to the C: Drive.
Note:
Do not put tsh.exe in the System32 directory. This may cause problems with WinSCP. Use %SystemRoot% instead, which is already in %PATH%. For example, C:\Windows.
If you don’t have administrator rights on the Windows system you are using, you can use %USERPROFILE% (for example, C:\Users\<username>) instead-but note that you won’t be able to run tsh commands globally from the command line unless you are in the same directory as tsh.exe.
If you copied the Teleport extracted folder to your User folder, then you need to add the Path to the System environment variable. Follow the below-mentioned steps to add the Teleport path to the System Environment Variable.
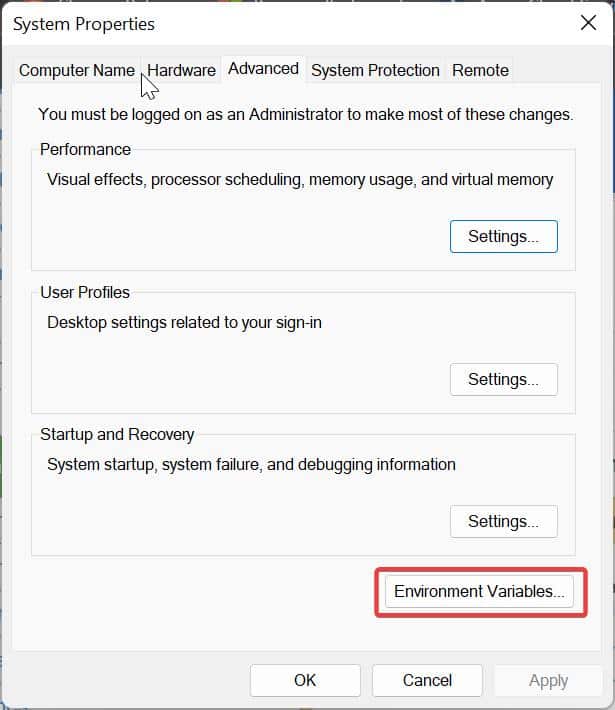
Open the Run command by pressing Windows + R and type sysdm.cpl and hit enter, this command will open the System Properties Window.
Click on the Advanced tab and Click on Environment Variables.
Under System Variables, click on Path and choose Edit.
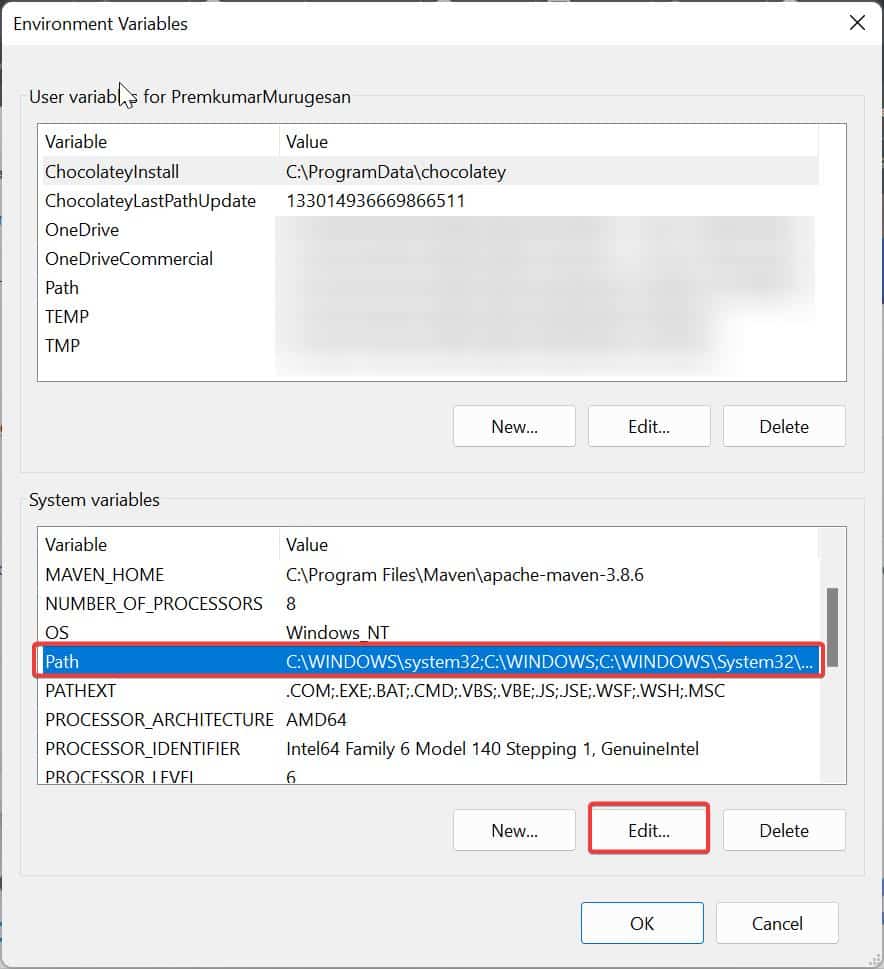
Under Edit Environment Variable, click on New and add the Teleport path.

Copy the path where you extracted and saved the Teleport folder. Click on New > and add the path. Click on OK and restart the system once.
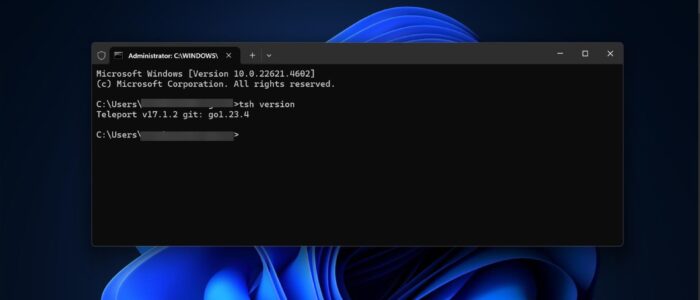
After the system restarts, open PowerShell and type tsh version to verify the installation.
Method 2: Using Chocolatey
To install teleport-tsh (Install), run the following command from the command line or from PowerShell:
choco install teleport-tsh
This command will download and install the teleport, once you received the successful message, open the command prompt or PowerShell and type tsh version to verify the installation.
Read More:
How to add Python to System Environment Variables in Windows 11?
Fix “pip not recognized as internal or external command” Error in Windows 11

