In Computers Keeping the Correct time is very essential, setting time is a very important setting in all Operating systems. By default, the computer keeps its own date and time internally, this is the default date and time, and leaving your computer with a default date and time leads to loss of files, Information mismatch, and poor recordkeeping. During the installation of the Operating system, almost all OS installation setup wizards will ask for the Time Zone, choosing the Time Zone will automatically set the correct Date and Time based on your Location. All computers have a Real-Time Clock Circuit, which keeps track of the date and time, the circuit gets its power from a battery, so when your laptop battery drains out or you turn off the computer the clock runs continuously and keep accurate time. In Windows, the clock synchronizes with Internet time automatically, you can also manually force the clock to sync with the internet whenever you want. This article will guide you to Sync Clock using Command Prompt in Windows 11.
How to Manually Sync Clock in Windows 11?
In Windows 11 you can manually Sync Clock with the internet using three different methods.
Method 1: Using Windows Settings:
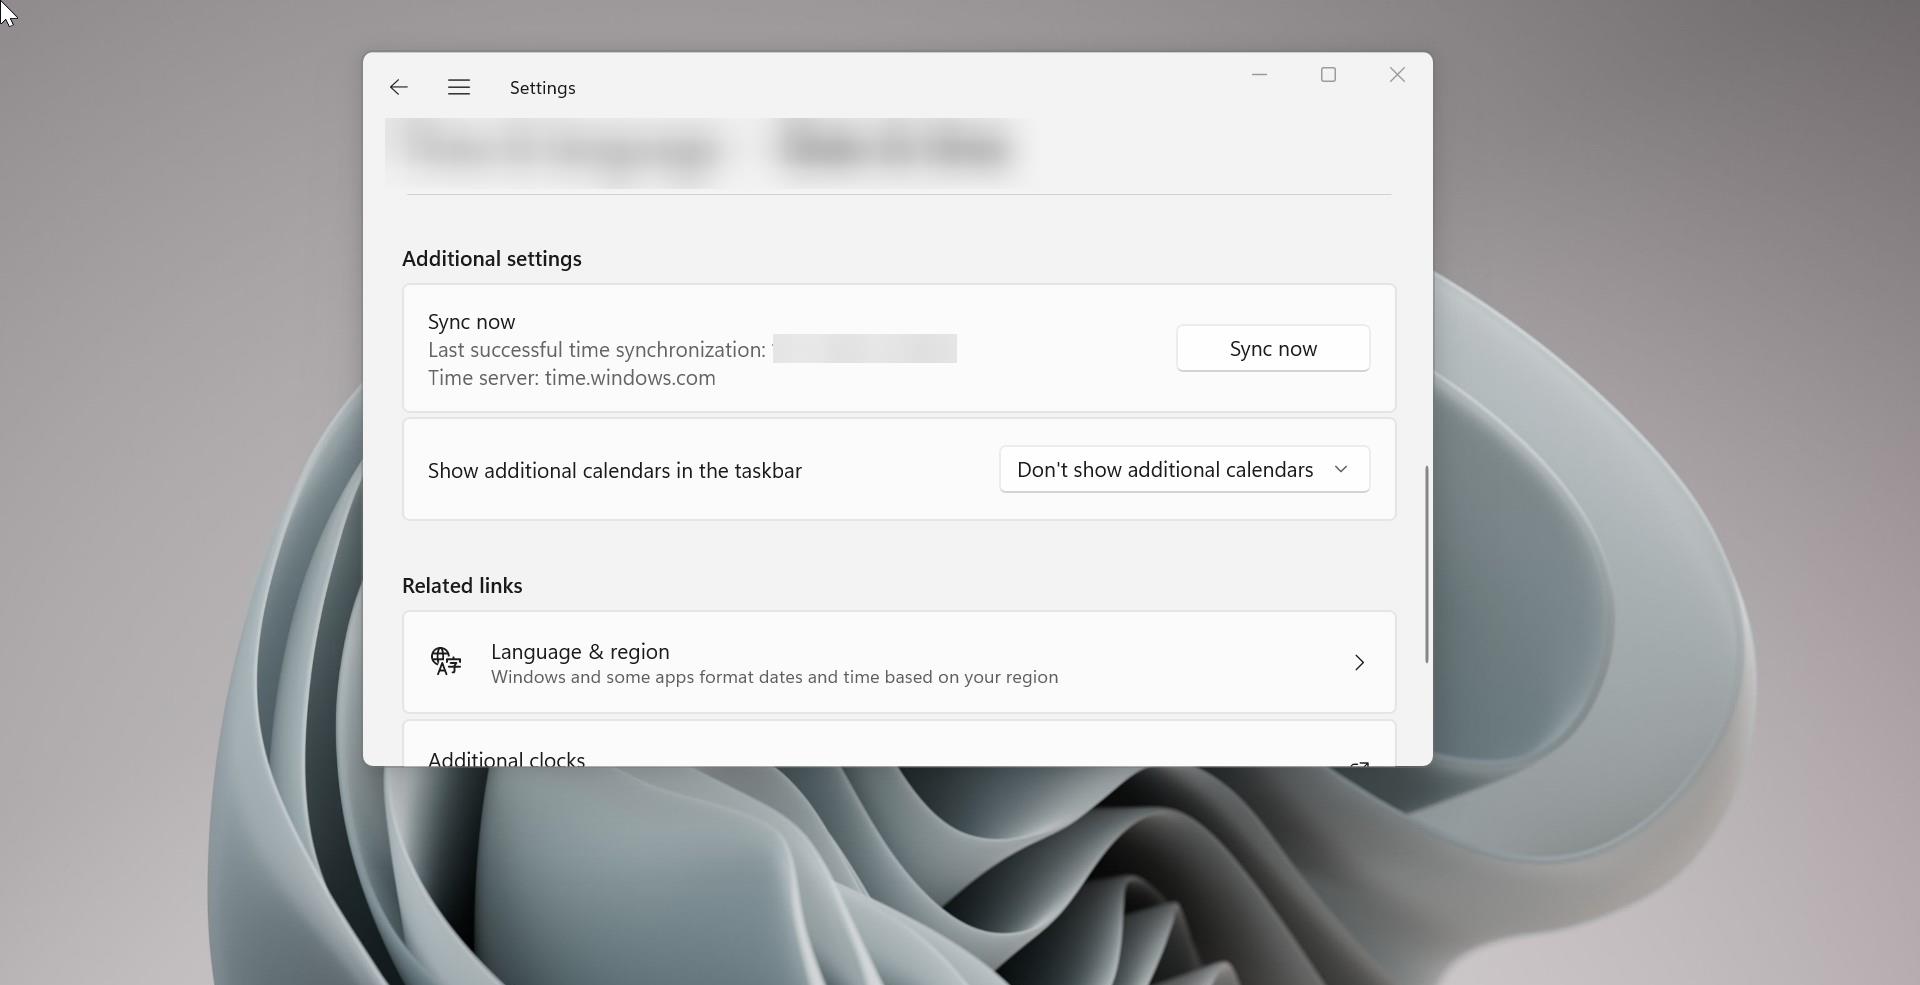
Open Windows Settings by pressing Windows + I and from the left-hand side click on Time & language and from the right-hand side click on Date & time.

Under Date & time look for Additional settings and click on Sync now.

This will Sync clock with the internet, You’ll get the checkmark indicating the time has been successfully synced.
Method 2: Using Internet Time Server in Control Panel:
Open Control Panel, click on the Start and search for Control Panel.
In Control Panel set the icons to Large, and look for the Date and Time option.

Under Date and Time settings, click on the Internet Time tab then click on Change Settings.

Under Internet Time settings, check the Synchronize with an Internet time server, if you like, you can select the Internet time server.
Click on Update now, and then click on OK.

You’ll get the clock was successfully synchronized with the time server message.
Method 3: Sync Clock using Command Prompt:
Open Command Prompt or PowerShell in elevated mode, Search for Command Prompt or PowerShell right click on it, and choose Run as administrator.
Type the following command and hit enter, this will sync your system clock with Internet time server.
If you are using a Domain-Joined system type the following command.
net time /domainIf you are using a non Domain system type the following command.
w32tm /resync
If you get any error while syncing the clock The service has not been started. (0x80070426) error, then you need to restart the Windows Time service.
Start the Windows Time Service using net start w32time command.
Read Also: How to add Different Time zone Clocks in Windows 11?