Telnet is a user command and an underlying TCP/IP protocol for accessing remote computers. Through Telnet, an administrator or another user can access someone else’s computer remotely. On the Web, HTTP and FTP protocols allow you to request specific files from remote computers, but not to be logged on as a user of that computer. With Telnet, you log on as a regular user with whatever privileges you may have been granted to the specific application and data on that computer. Network administrators use telnet to access and control hardware like switches and access points remotely. Some servers enable remote connections using Telnet to access public data to play simple games or look up weather reports. Some software requires text-based, unencrypted protocols via telnet from web servers to ports. There are lot of uses for Telnet, this article will show you different ways to enable telnet in Windows 11.
Enable Telnet using Different methods in Windows 11:
In Windows 11 you can enable Telnet using three different methods, follow the method which is convenient for you.
Enable Telnet using Control Panel:
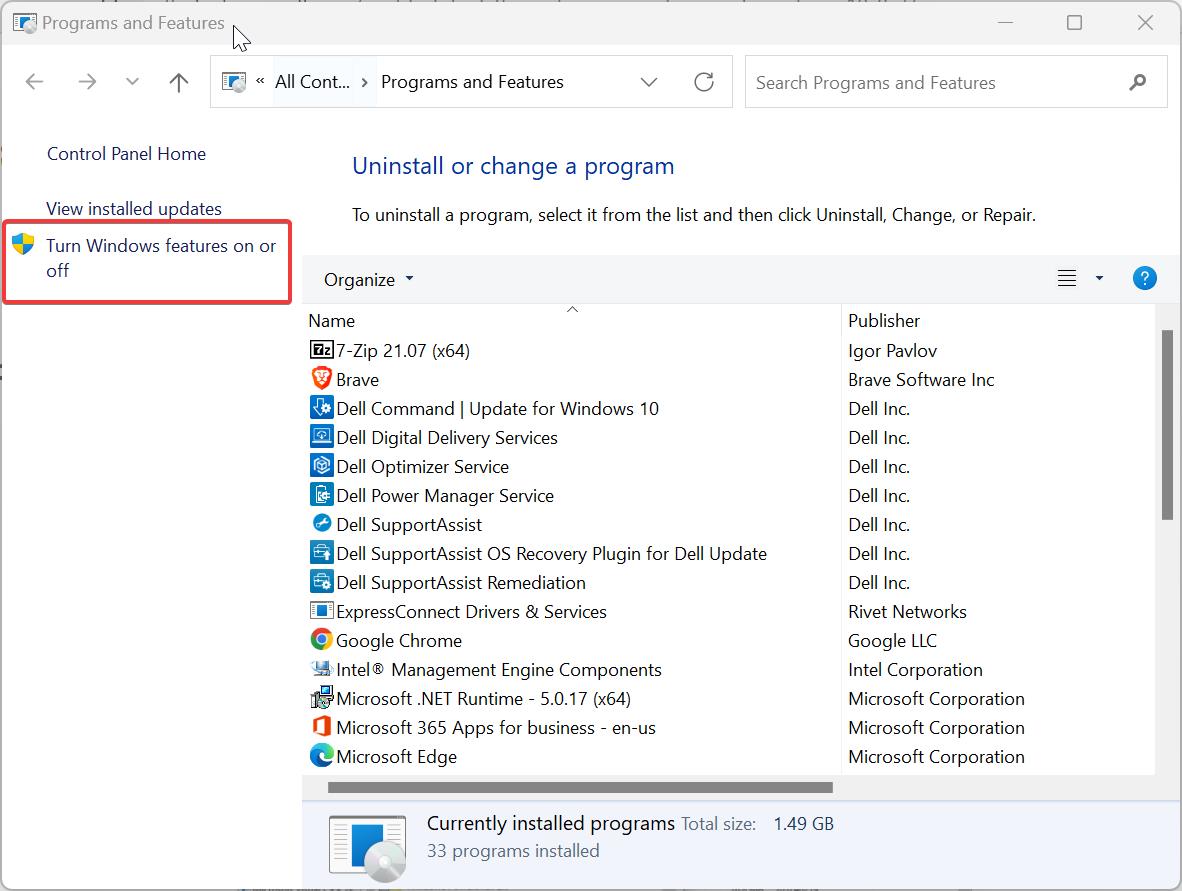
Open Run command by pressing Windows + R and type appwiz.cpl and hit enter, this command will open the Programs and features.
From the left-hand side click on Turn Windows features on or off, you’ll need admin privileges to open Windows features.
Under Windows features look for Telnet Client and check the box.

Click on OK, now the Telnet Client feature will install, that’s it you can use the telnet client now.
Using Command Prompt:
Open the Command prompt in elevated mode, click on the search icon and type Cmd, and right-click on the command prompt and choose Run as Administrator.
Then type in pkgmgr /iu:”TelnetClient” OR dism /online /Enable-Feature /FeatureName:TelnetClient and hit Enter to enable the Telnet Client.

To enable telnet server type the below-mentioned command.
pkgmgr /iu:”TelnetServer”
This command will enable the Telnet, restart the system once to make the changes effective.
Using PowerShell:
Open PowerShell in elevated mode and type the command and hit enter.
Install-WindowsFeature -name Telnet-Client

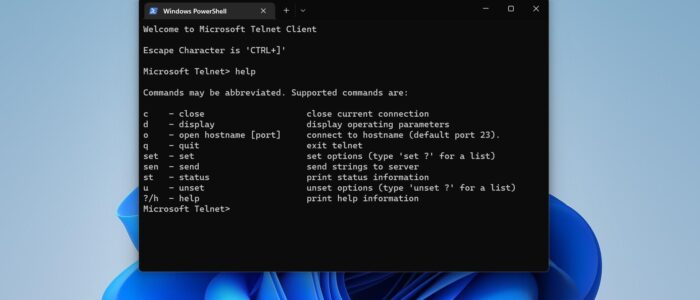
This Command will enable the telnet client. You can verify the installation by typing telnet in the command prompt.