Introduction
In this comprehensive guide, we will walk you through the entire process of setting up a kiosk in Windows 11. Whether you’re a small business owner looking to provide a self-service kiosk for your customers or just want to create a controlled environment for public use, this guide will help you get started.
What is a Kiosk?
A kiosk is a self-service device that allows users to perform specific tasks, such as browsing websites, accessing information, or completing transactions. Kiosks are commonly used in various settings like retail stores, museums, airports, and hotels to provide an interactive and efficient user experience. Windows 11 offers native features to set up a kiosk mode, which allows you to restrict user access to specific apps or websites.
Benefits of Setting Up a Kiosk in Windows 11
Setting up a kiosk in Windows 11 can provide several benefits, including:
- Improved customer experience – A self-service kiosk system allows customers to access information or complete tasks quickly and efficiently.
- Reduced workload – you can offload certain tasks to customers, freeing up your staff’s time for more critical duties.
- Increased productivity – Kiosks can streamline processes and eliminate the need for manual data entry, leading to improved productivity.
- Better data collection – By using this feature, you can collect valuable data about customer preferences, behaviors, and trends.
- Enhanced branding – Customized kiosk interfaces can reinforce your brand identity and provide a cohesive customer experience.
Step-by-Step Guide to Setting Up Kiosk in Windows 11
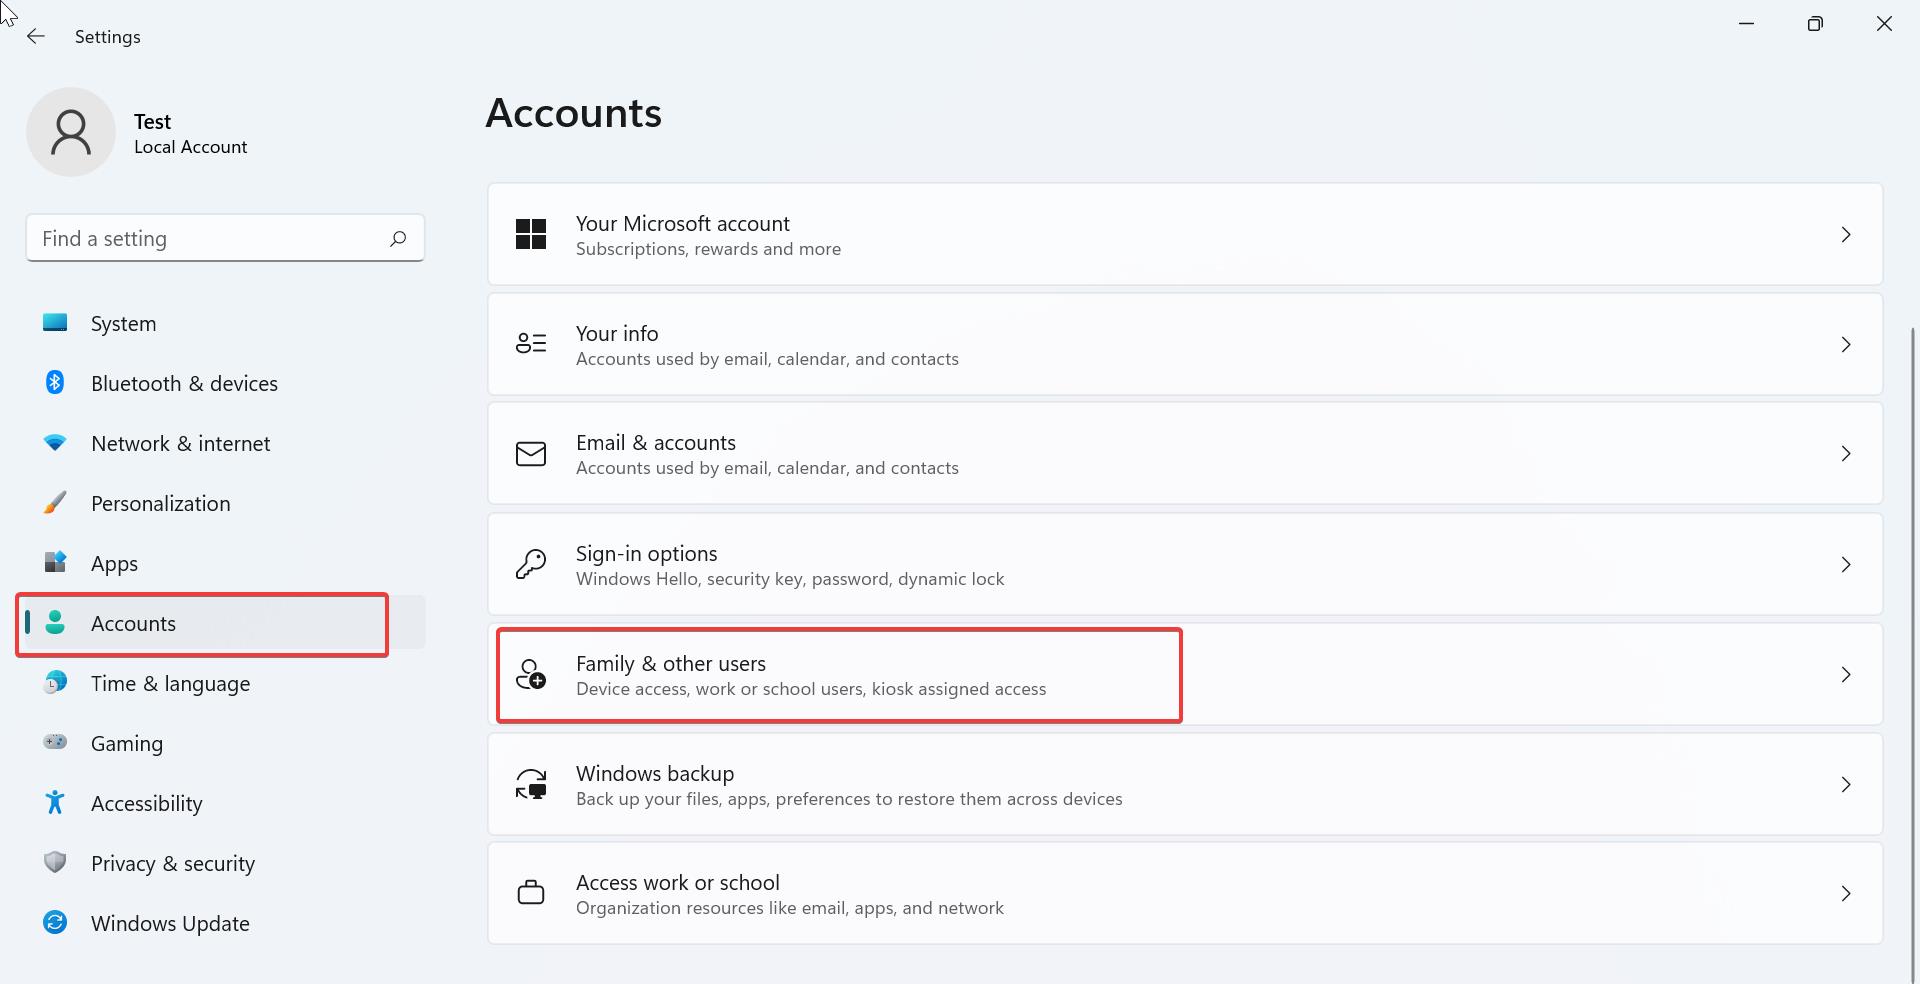
Open Windows Settings by pressing Windows + I and from the left-hand side click on Accounts.
And from the Right-Hand side click on Family & other Users.
Under Set up a Kiosk Section, Click on Get Started.
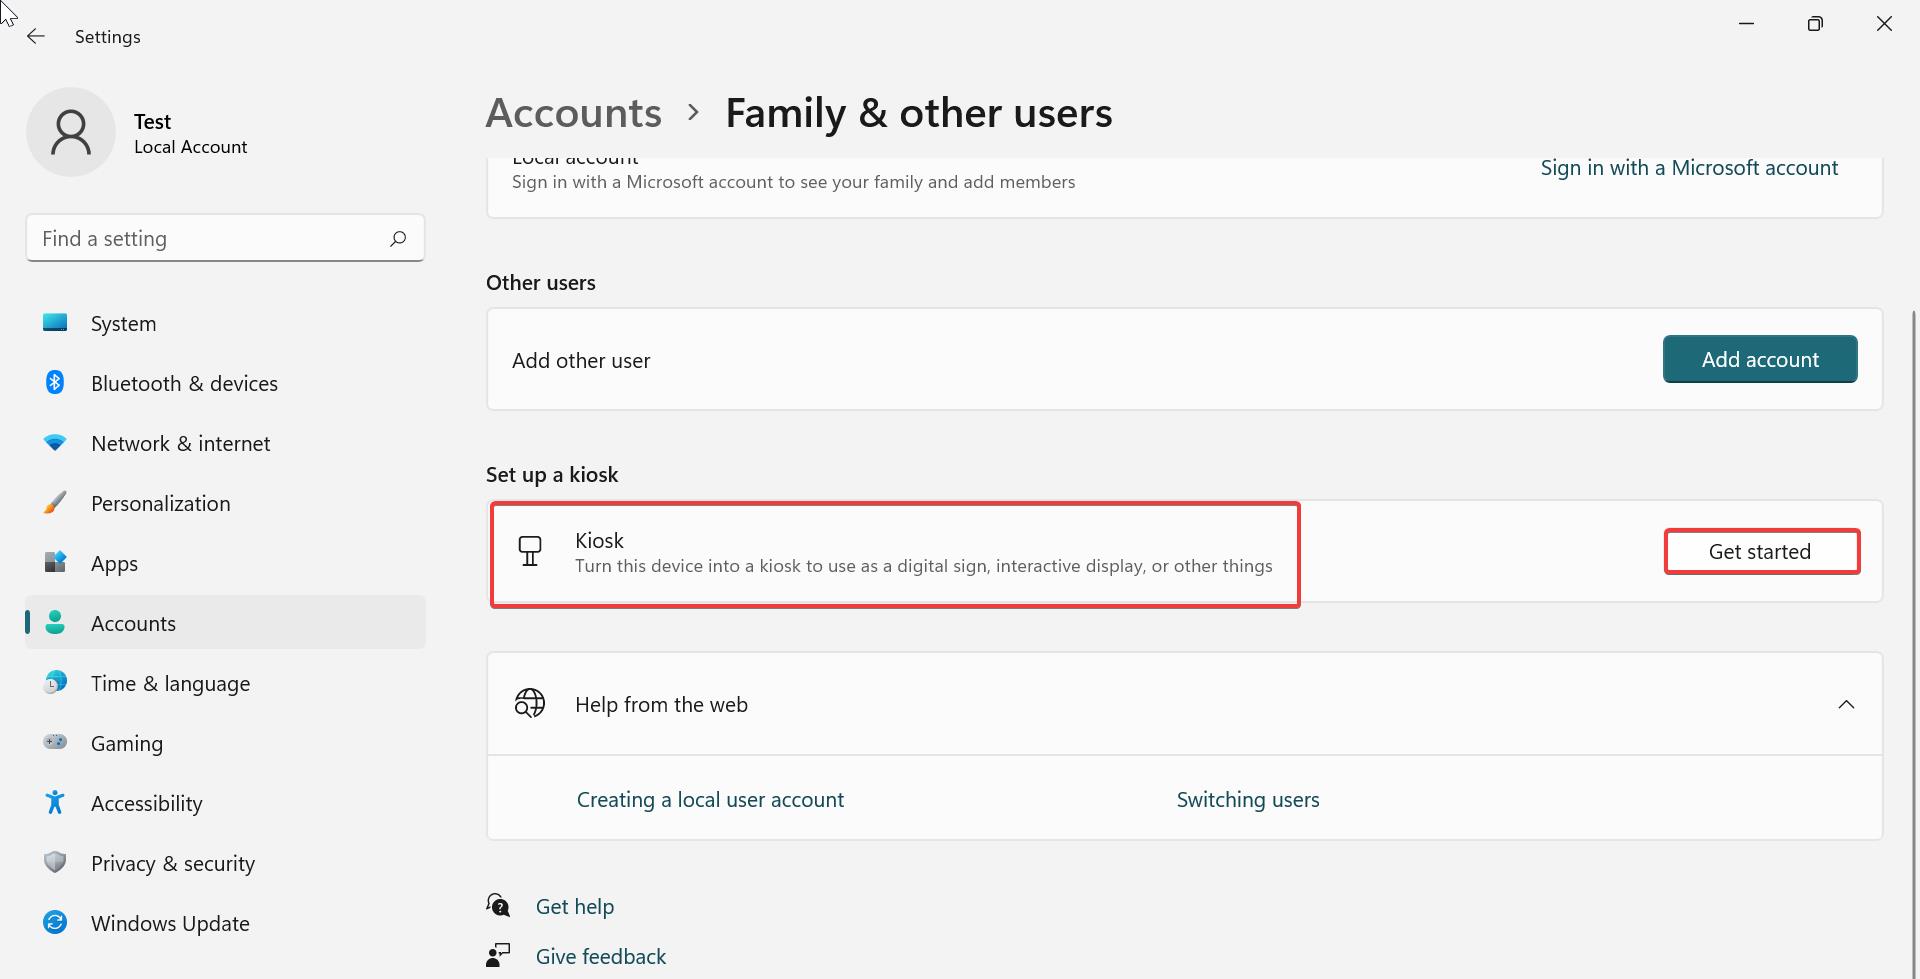
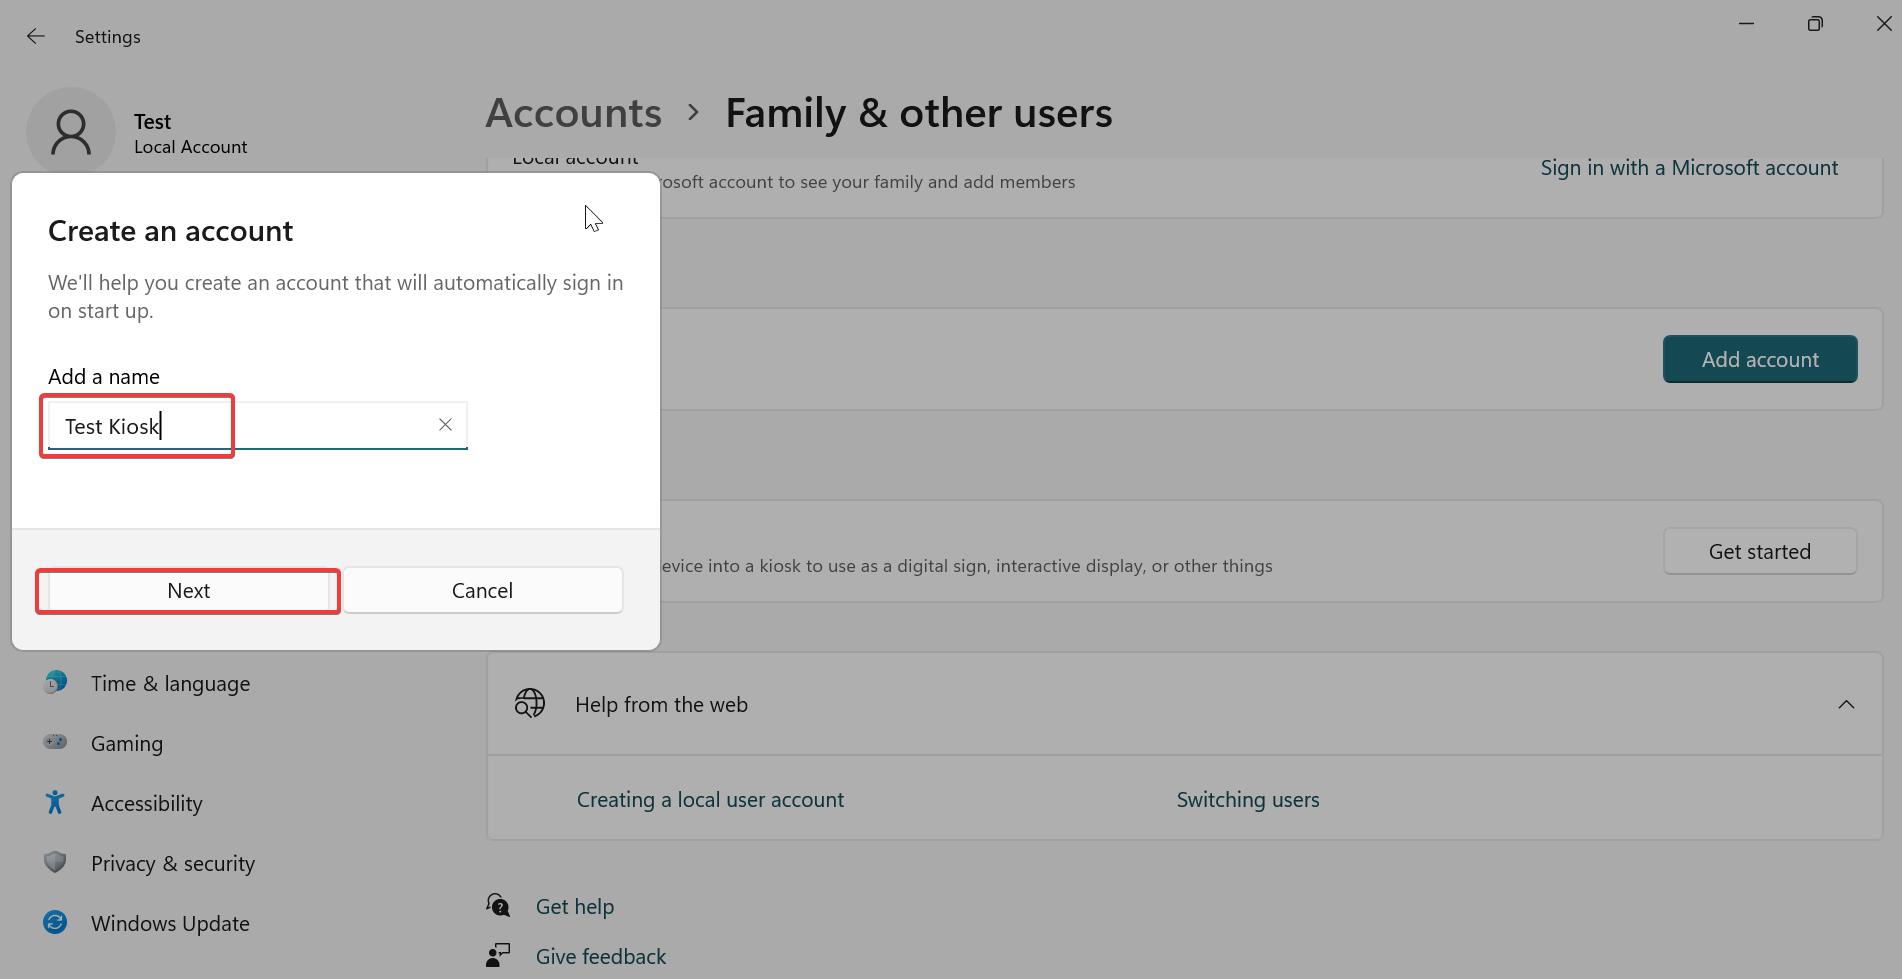
Once you click on Get Started, you’ll get Create an account pop-up, Type a Name for the account and click on Next.
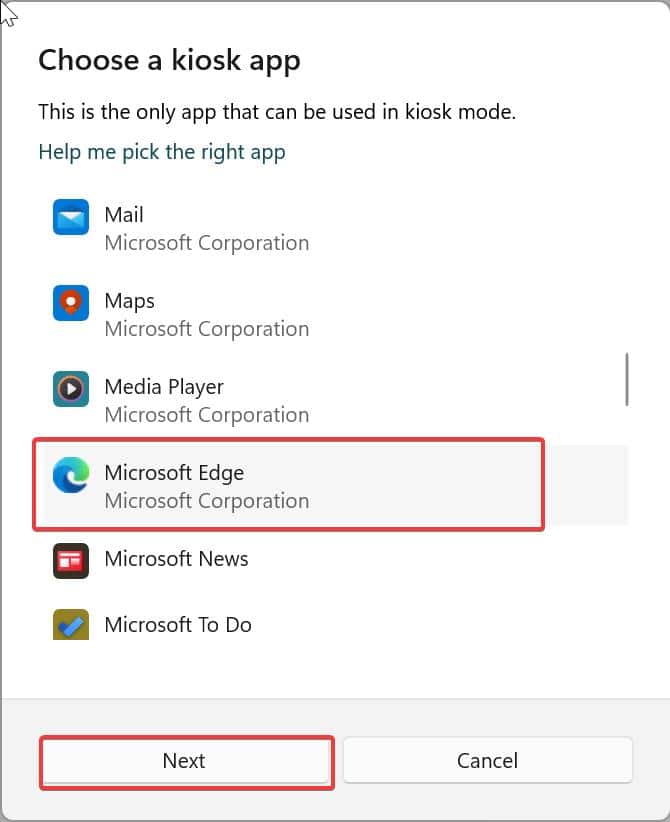
Now it will ask you to choose the app, Under Choose a Kiosk app, you’ll get a list of installed apps. Choose the app which you want to configure and then click on Next.
Next Choose the Option Under How will this Kiosk be used, you’ll get two options based on the app. If you are choosing the Edge browser you’ll get the following options.
- As a digital sign or interactive display
- As a public browser
Choose the option you want and click on Next.

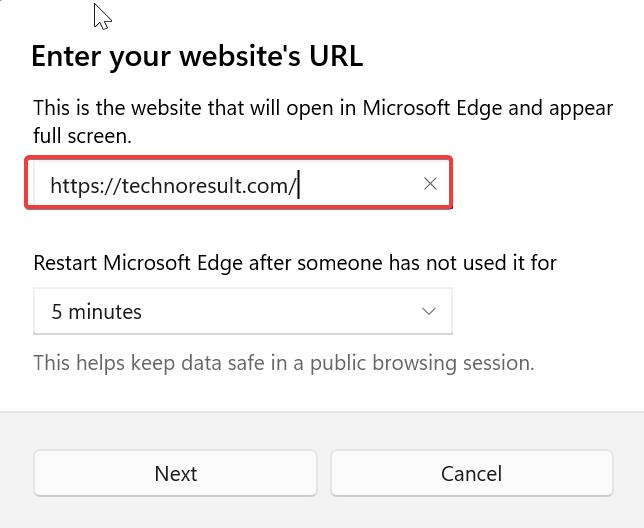
Next Configure the website URL, Enter the URL, and set the time to refresh automatically. Then click on Next.
Once you’re done then Press Ctrl + Alt + Del to exit.
Now you can do the Switch user and login to the Kiosk account, you’ll get the configured app in full version.
Remove Kiosk Account:
Open Windows Settings by pressing Windows + I and from the left-hand side click on Accounts.
And from the Right-Hand side click on Family & other Users.
Under the Set up a Kiosk section, you can see the Active Kiosk account, click on it, to get the Kiosk info.
Under Kiosk Info you can see the configured Kiosk application, Click and expand the Kiosk app.
Look for Remove this Kiosk section and click on Remove to delete the Kiosk Account.
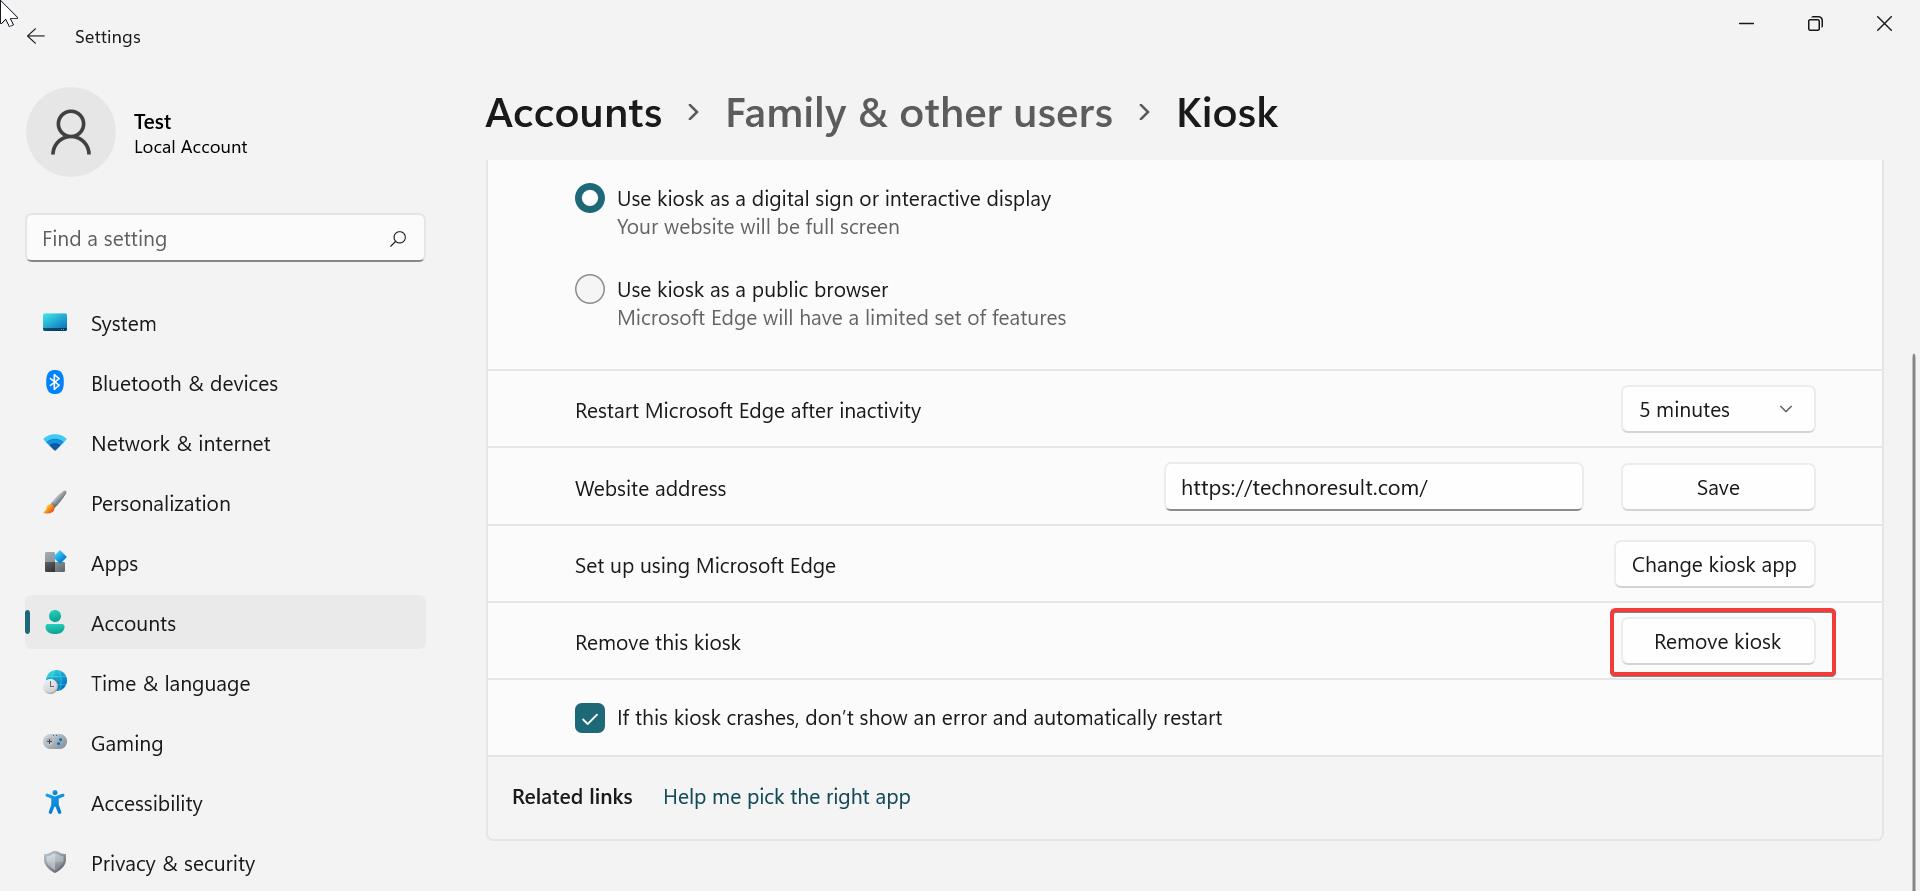
After Removing the Kiosk account, just restart the system once. That’s it the Kiosk account will be no longer visible after the Restart.
Conclusion
Setting up a kiosk in Windows 11 can be a valuable addition to your business or organization. It allows you to provide self-service options to your customers, streamline processes, and collect valuable data. By following this step-by-step guide, you can easily set up a kiosk in Windows 11 using native features like Assigned Access and kiosk mode settings.


