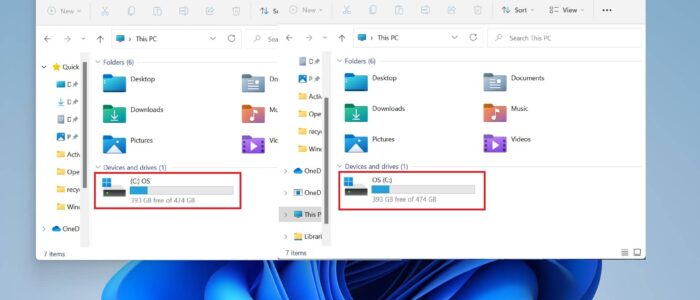
In Windows, drive letter assignment is the process of assigning alphabetical identifiers to volumes, alternatively, the drive letter is also referred to as the device letter. A single alphabetic character from A to Z is assigned to a physical computer drive or drive partition. Drive letter plays important role in Windows operating system, it avoids the confusion between two different drives or partitions. Windows by default allow you to keep the same name for two drives but you cannot assign the same drive letter for two different drives or partition. And drive letter tells Windows where to look for files and folders during Windows Search. In Windows, you can see all your connected drives and partitions using File Explorer “This PC”, here you can see the Drive Names with Driver letter for connected drives and partitions. Mostly the Drive letters come after the Drive names, with doing the little trick you can switch the drive letter Before or after the Drive name. In this article, we’ll see how to Switch Drive Letters Before or after the Drive name in Windows 11.
Switch Drive Letters Before or after the Drive name:
To Switch the drive letters before or after the drive name, here we are going to use the registry editor method.
Open the run command by pressing Windows + R and type Regedit and hit enter, this command will open the Registry Editor Console.
HKEY_CURRENT_USER\Software\Microsoft\Windows\CurrentVersion\ExplorerFrom the left-hand side click on the Explorer registry key and from the right-hand side right-click on an empty area and choose New > DWORD (32-bit) value, and name the DWORD as ShowDriveLettersFirst.
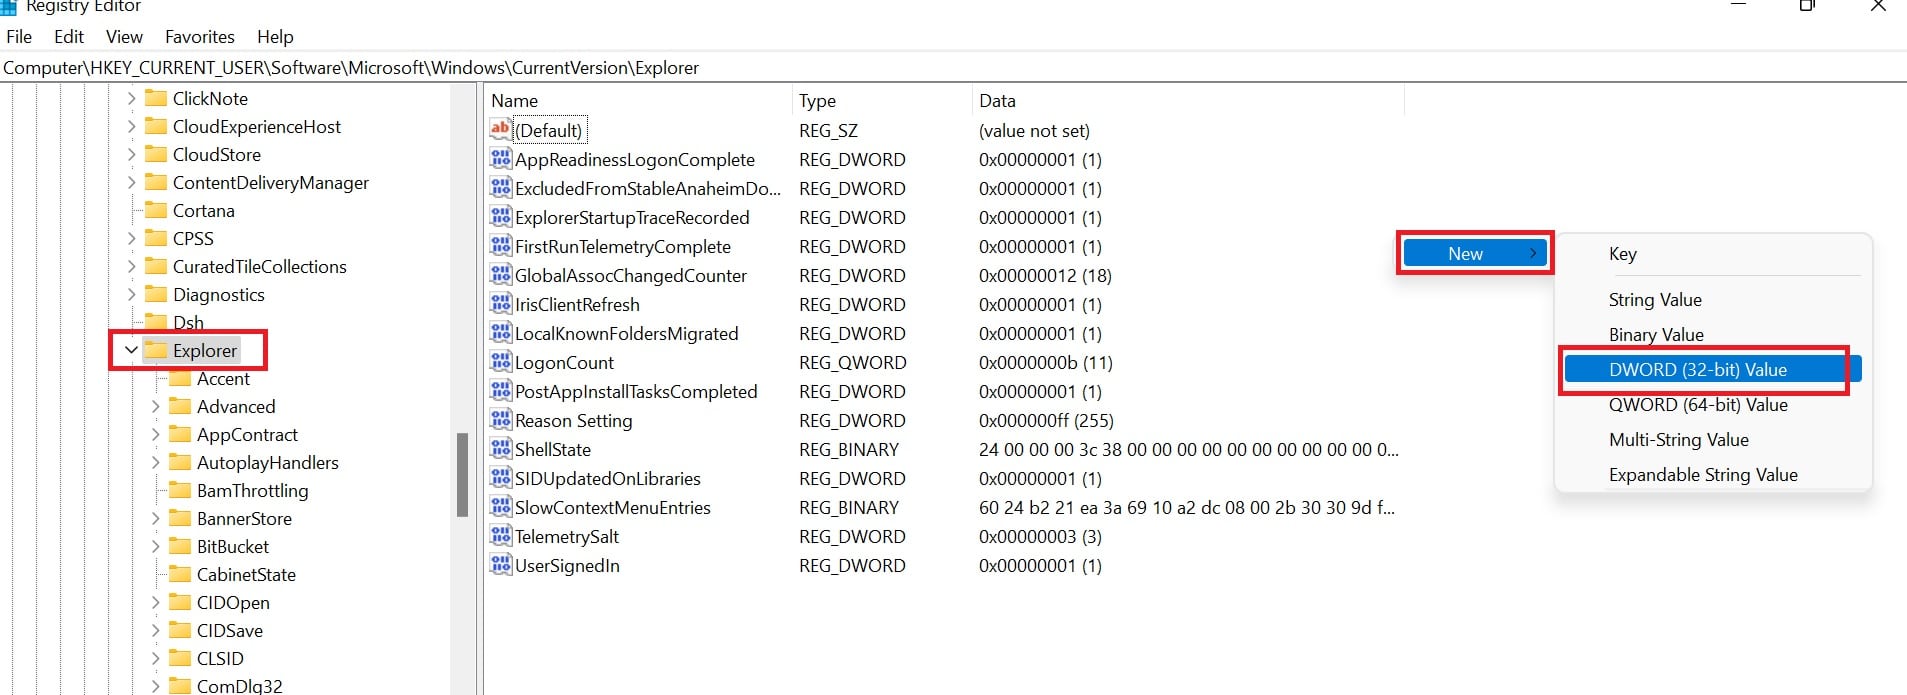
Double click on the ShowDriveLettersFirst DWORD and set the value as mentioned below.
To Show the Drive letter in front of Drive Name: 4
To Show the Drive letter back of Drive Name: 0
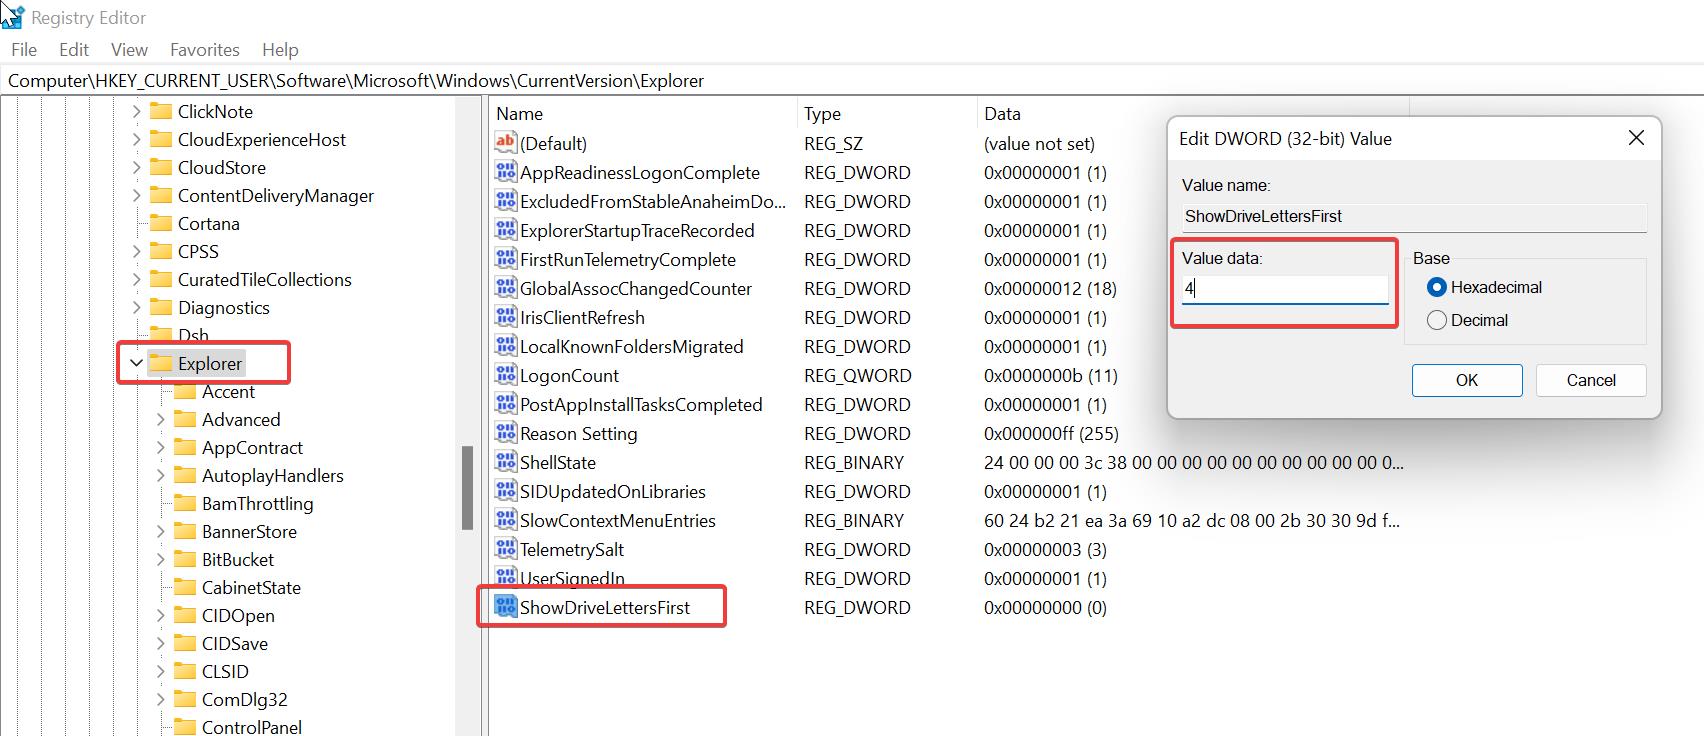
Click on Ok and close the Registry editor. If you didn’t see the changes just restart the file explorer once.

