Windows 11 comes with a range of exciting features and improvements, and one highly anticipated addition is the availability of Sudo. If you’re familiar with Linux, you’ve likely used Sudo to execute administrative commands securely. Microsoft recently announced that it is adding the Sudo command in the Latest Insider Preview build of Windows 11. This feature is available from Windows Insider Preview build 26052 or higher, if you are using this Insider Build or higher then you can enable this feature. This blog post will guide you on how to enable Sudo in Windows 11 and harness its power.
What is Sudo?
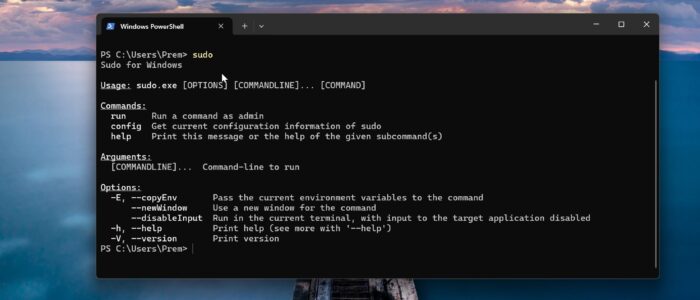
Sudo, short for “Superuser Do,” is a command utility found in Unix-like operating systems. It allows authorized users to execute commands with the privileges of the root (or administrator) user. By default, regular users do not have access to perform administrative tasks. Instead of logging in as the root user, which poses potential security risks, Sudo enables users to execute specific commands requiring administrative privileges. Sudo is new for Windows, it allows users to run elevated commands directly from an unelevated console session. This means you can run the admin commands from the user cmd console session. This feature prevents you from opening the elevated command prompt separately, to run the admin commands.
Why Enable Sudo in Windows 11?
Enabling Sudo in Windows 11 offers several advantages:
- Enhanced Security: Sudo ensures that only authorized users can perform administrative tasks, reducing the risk of accidental damage or misuse.
- Segregation of Privileges: Regular users can execute specific administrative commands without requiring access to the entire administrative account.
- Auditing Capabilities: Sudo logs all commands executed through it, providing a traceable record of administrative activities.
- Flexibility and Control: Sudo allows precise control over the commands and applications that users can execute with elevated privileges.
Enable Sudo in Windows 11:
Follow the below-mentioned steps to enable the super user feature. Make sure your Windows system has the latest update, if not go to Windows Settings and check for the Latest update.
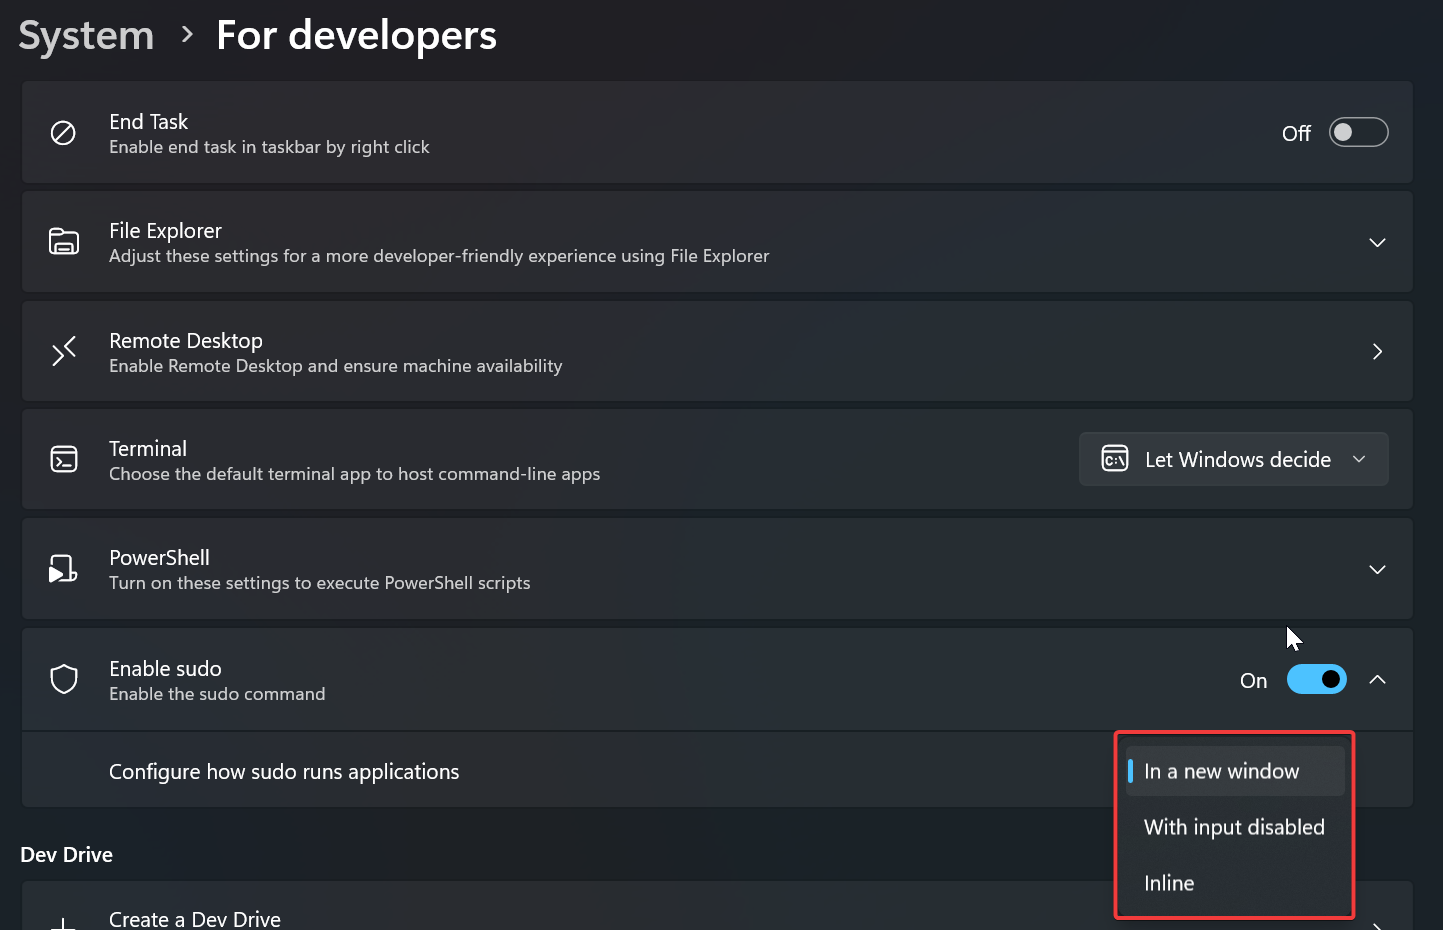
Open Windows Settings by pressing Windows + I and from the left-hand side click on System and from the right-hand side pane click on For developers.
Under the For developers section look for “Enable Sudo”, Turn on the toggle button to Enable the Sudo.

Configure Sudo in Windows 11:
Next under “Configure how sudo runs applications” click on the drop-down menu, here you can see three different configuration modes.
- New Window: This mode opens a new elevated console window when you run the sudo command. This is the default mode once you turn on the sudo feature.
- Input Closed: This mode runs the command in the elevated mode in the same window but will not accept any further user input after the first execution.
- Inline: This mode runs the command in an elevated mode in the same window. If you are looking for the same sudo experience you get in Linux or macOS, this is the mode you should choose.
Choose the configuration mode as per your wish, Now you can use the sudo command in terminal.
How to Use Sudo Command in Windows 11?
Follow the above-mentioned steps and enable the Sudo command feature in Windows 11, after setting the configuration mode you can open the Terminal app in Windows 11.
Just type sudo <Command>, here replace the <Command> with the cmd or program of your choice, hit enter, now you’ll get a UAC prompt, click on Yes and Continue.
eg: sudo ipconfig /renew
That’s it, you have successfully enabled Sudo command in Windows 11.