Windows Security Center is also known as Defender in windows 10. It is the Antivirus Program which is inbuild in windows 10/11, Windows Defender is the next-generation protection component of Microsoft Defender Advanced Threat Protection (Microsoft Defender ATP), Windows Defender comes with the most advanced feature, which starts from the design of a panel displaying its various modules and their status. You can find the seven protected areas of the windows defender below.
- Virus & threat protection
- Account
- Firewall & network protection
- App & browser control
- Device Security
- Device performance & health
- Family options
From these seven protecting areas, Scanning the computer is part of the virus and Protection feature, which is very important for any antivirus, once the defender is enabled the system full scan will happen automatically and the defender detects a suspicious file on your system. Windows Defender will continuously monitor your computer system for security threads. Defender offers you different types of scan options. You can find scan options like Quick Scan, Full scan, Custom scan, and Microsoft Defender Offline Scan under Virus & threat protection option. You can run any of these scan options using two different methods, one by using GUI and another method by using a Command prompt, This article will guide you to Scan for Virus using Command prompt in Windows 11.
Scan for Virus using Command prompt in Windows 11:
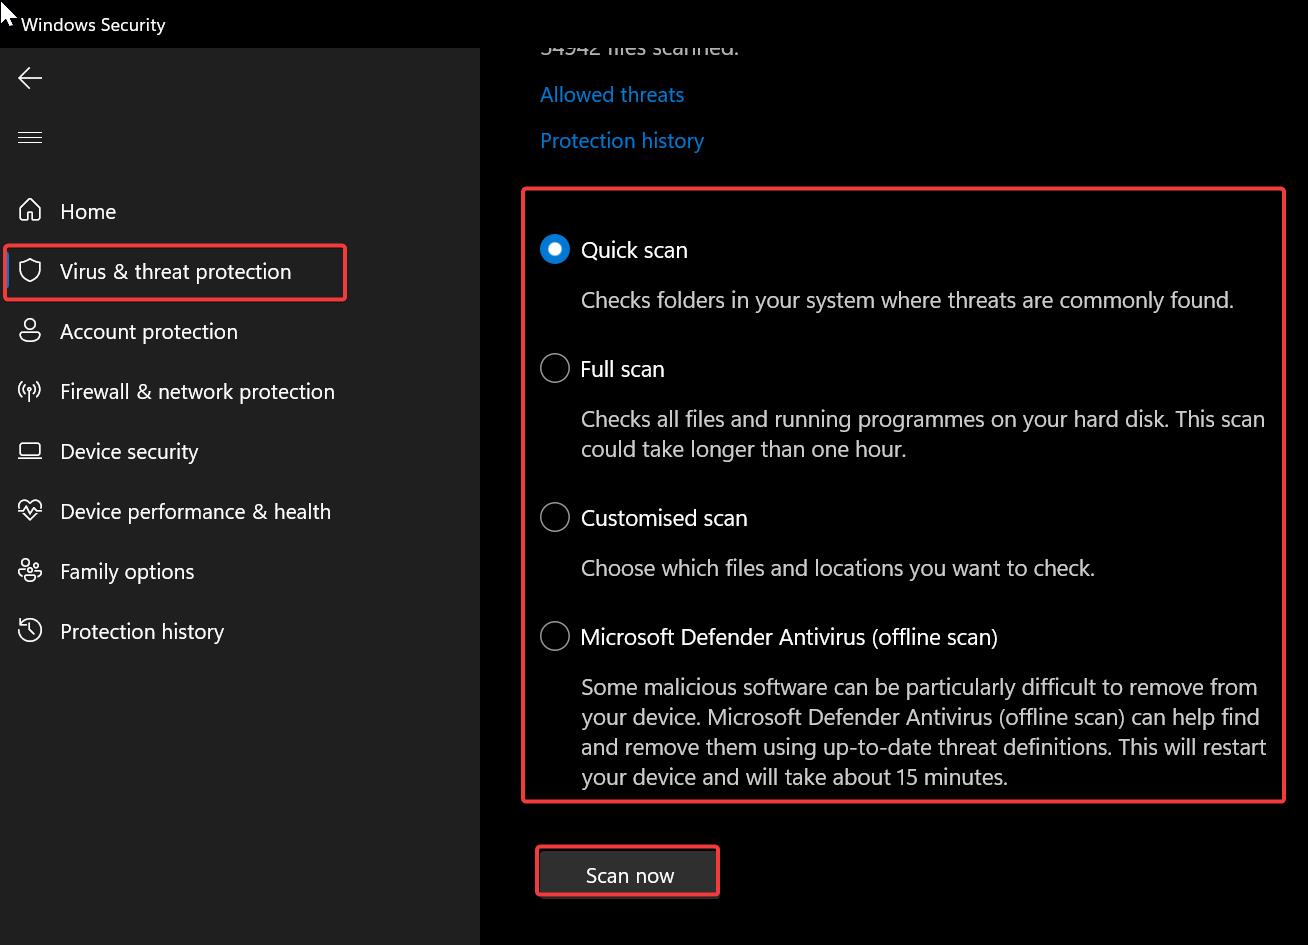
In Windows Security to scan for viruses using the GUI method, just open Windows Security, from the left-hand side click on Virus & threat protection, and from the right-hand side click on Scan options.
Under Scan Options just choose the scanning method and click on Scan now.
Now Windows Security will start the scan, based on the scanning method and disk size the scan time will get different. Follow the below steps to perform a virus scan using the Command prompt.
Run a Quick Scan for Virus using Command prompt:
In Windows Security Quick scan typically scans the objects that are loaded during the system startup Which is mainly loaded in the system memory and boot sectors. This type of scan won’t scan your computer thoroughly, but it can alert if your system is infected or not.
To run a Quick Scan using the command prompt, open the Command Prompt in elevated mode and copy-paste the following path in the command prompt and hit enter. This command will change the command prompt runtime directory to the Windows Defender Installation directory.
cd C:\ProgramData\Microsoft\Windows Defender\Platform\4.18*
Next, type the following command and hit enter.
MpCmdRun -Scan -ScanType1
This command will initiate Quick scan on your system.
Run Full Scan:
Full scan in Windows Security scan your system thoroughly, it scans System memory, Startup programs, system backup, hard drives, network drives, email databases, and other removable storage media.
To run a Full Scan using the command prompt, open the Command Prompt in elevated mode and copy-paste the following path in the command prompt and hit enter. This command will change the command prompt runtime directory to the Windows Defender Installation directory.
cd C:\ProgramData\Microsoft\Windows Defender\Platform\4.18*Next, type the following command and hit enter.
MpCmdRun -Scan -ScanType 2
This command will initiate a Full scan, and the full scan will take hours to complete depending on the Disk size.
Run Custom Scan:
You can use the Custom scan option to scan only specific locations on your hard drive, This type of scan reduces the time of scanning and you can use this type of scan to check viruses on your removable storage media.
Open the Command prompt in elevated mode and copy-paste the below-mentioned command and hit enter.
cd C:\ProgramData\Microsoft\Windows Defender\Platform\4.18*Next, use the following command and make sure you have replaced the <directory> with the Folder or Drive path you wish to scan.
MpCmdRun -Scan -ScanType 3 -File <directory>
Run Boot Sector Scan:
Boot Sector scan is the type of scan that targets the boot sector specifically, it checks for any malware or virus in the boot sector and once you initiate this scan, the system will ask for restart and scan the system during the boot.
Type the following command and hit enter, and change the directory to windows defender.
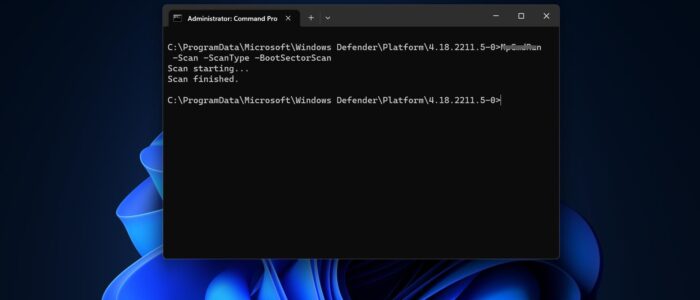
cd C:\ProgramData\Microsoft\Windows Defender\Platform\4.18*Next, type the following command and hit enter.
MpCmdRun -Scan -ScanType -BootSectorScan
This will initiate the BootSector scan during the system boot.
Read Also:
How to Update Windows Defender Virus signature using Command Prompt?
How to scan individual Files and Folders using Microsoft Defender?
Enable Network Scanning in Windows Defender on Windows 10?