Snipping Tool is a screenshot utility included in Windows Vista and later. It can take screenshots of an open window, rectangular areas, a free-form area, or the entire screen. Snips can then be annotated using a mouse or a tablet, stored as an image file (PNG, GIF, or JPEG file) or an MHTML file, or e-mail. Snipping Tool allows for basic image editing of the snapshot, with different colored pens, an eraser, and a highlighter. By default, the Snipping tool doesn’t have any shortcut key to open the Snipping tool or to take a screenshot. This article will guide you to create your own keyboard shortcut for snipping tool.
Steps to Create your Own Keyboard Shortcut for Snipping Tool:
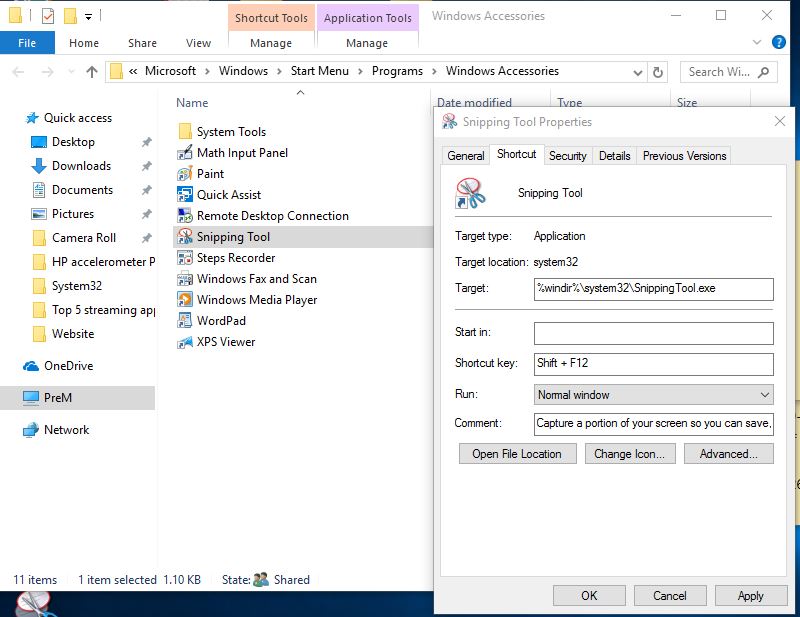
Open Snipping Tool file location C:\ProgramData\Microsoft\Windows\Start Menu\Programs\Accessories.
If you are using Windows 11 click on the Start menu, and search for Snipping tool. Right click on the Snipping tool and choose Open File location.
Then copy the shortcut of snipping to the desktop Right-click on the snipping and go to the properties There you can find a shortcut key option.
Press any shortcut you want from the keyword Apply and save it.
Read Also:
How to Change Snipping Tool Save Location in Windows 11?


