Microsoft Edge is the second most popular browser for Desktop, Edge earned this reputation for the following reasons. First, it’s a chromium-based browser, so it gains the advantage of using the extensions available on rival platforms. And it almost reaches Chrome’s performance, the browser delivers improved performance and gains user experience. Microsoft Edge has a lot of improved features and it also delivers improved battery life. According to reports Microsoft Edge offering a new set of features daily. Microsoft New Edge web browser is already integrated into Windows 10/11 and soon Microsoft will add the Edge browser to Microsoft Store. And Microsoft is forcing users to use Edge as a default browser, and if you want to disable the Microsoft Edge, then this article will guide you to Completely Disable or Uninstall Microsoft Edge in Windows 11.
Related: Disable Use Recommended browser prompt from Microsoft Edge
Completely Disable or Uninstall Microsoft Edge in Windows 11:
Disabling Microsoft Edge is a little tricky because there is no direct option to disable or remove the Microsoft Edge from the Windows 11 or Windows 10 Operating system. Follow the below-mentioned methods to Completely Disable or Uninstall Microsoft Edge in Windows 11.
Method 1: Rename the Edge Folder:
Open Run command by pressing Windows + R and copy-paste the below-mentioned path.
C:\Windows\SystemApps\Microsoft.MicrosoftEdge_8wekyb3d8bbwe
Right-click on the Microsoft.MicrosoftEdge_8wekyb3d8bbwe folder and choose Rename.
Note: Before Renaming Note the Original name somewhere else. Rename it here as Microsoft.MicrosoftEdge_8wekyb3d8bbweold2.
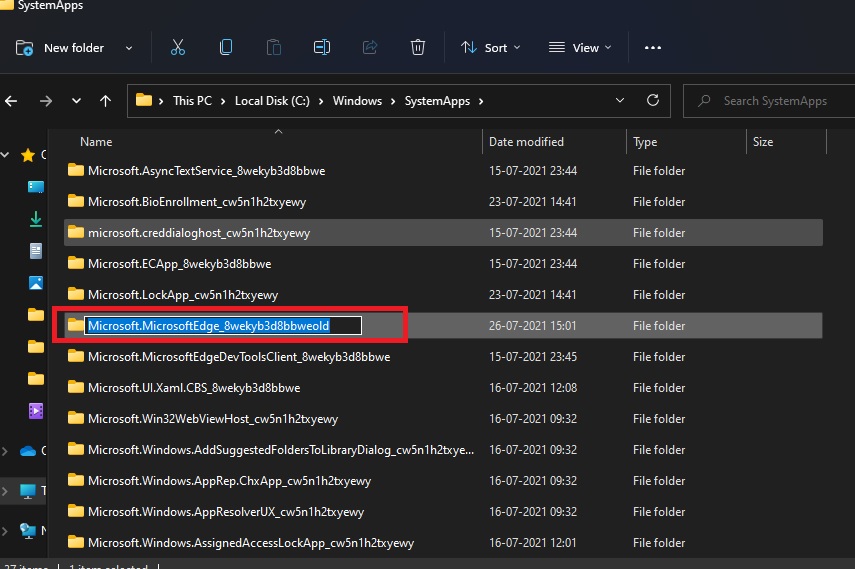
Once you click on Ok it will ask for the confirmation message for the file operation. Click on Ok and proceed with the operation. If you faced any issue, like the file is already in use, stop the Edge Process from the Task Manager and continue.
Open Task Manager and click on Details Tab and search for Edge, Stop all the Edge Process.
Method 2: Uninstall Microsoft Edge Using PowerShell
Open PowerShell in elevated mode and type the following command.
Get-appxpackage *edge*
This command will list out all the Edge Installation. Copy the full name from the Microsoft Edge title and paste it in the following command.
remove-appxpackage <package full name>
example: remove-appxpackage Microsoft.MicrosoftEdge.Stable_92.0.902.55_neutral__8wekyb3d8bbwe
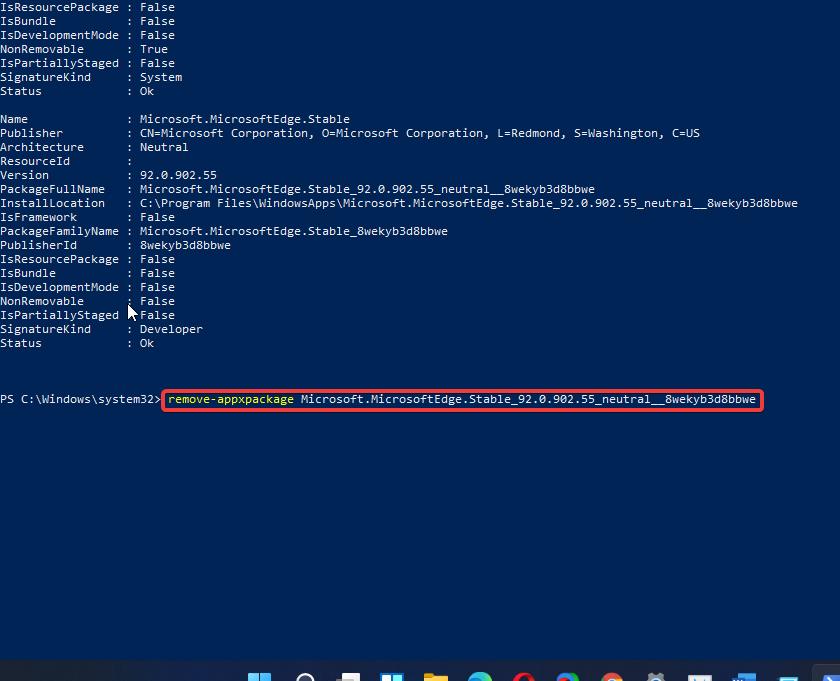
Hit on enter, this command will remove the selected Edge package. But mostly this method is not working in Windows 10 or Windows 11 latest version.
Method 3: Change the Edge File Association:
Open Windows Settings by pressing Windows + I and choose Apps > Default Apps
Under Default Apps click on the Microsoft Edge.
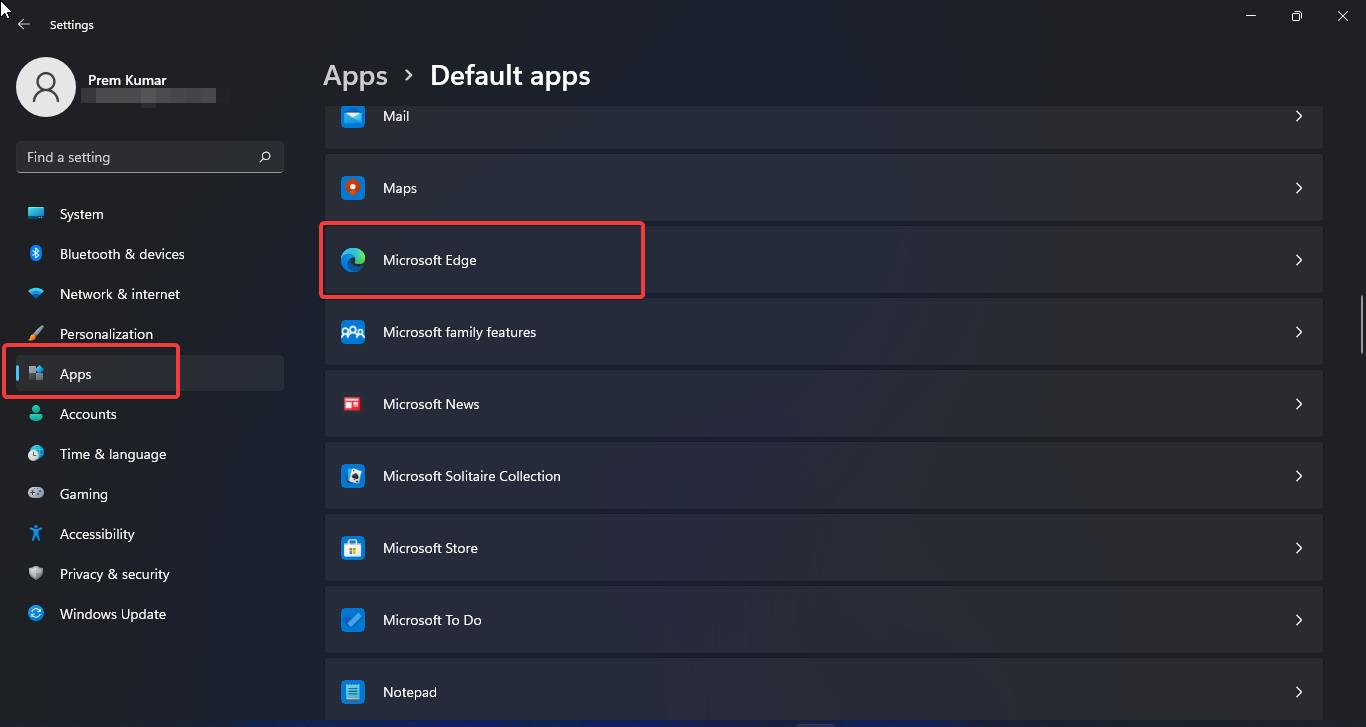
Under Microsoft Edge you can see the default file associations, just click on the file association and choose Switch anyway.
Now you will get a separate pop-up, just choose your favorite browser and click on OK.
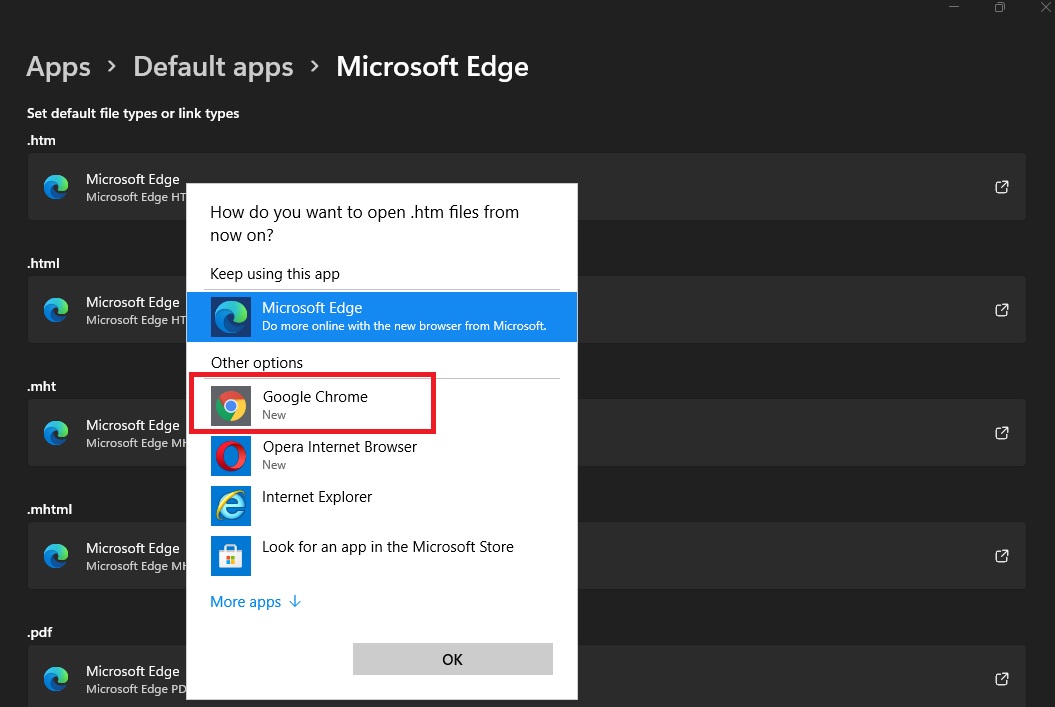
Do the same for all the file associations and restart the system once.
Method 4: Using Command Prompt
First right-click on Microsoft Edge and choose Properties. Under the Shortcut tab, you’ll see the Open File Location option.
Click on it and open the Edge app file location.
Now open the version folder name like 92.0.902.55, if you got a different number folder just open it and open the Installer folder.
Now just select and copy the folder path.
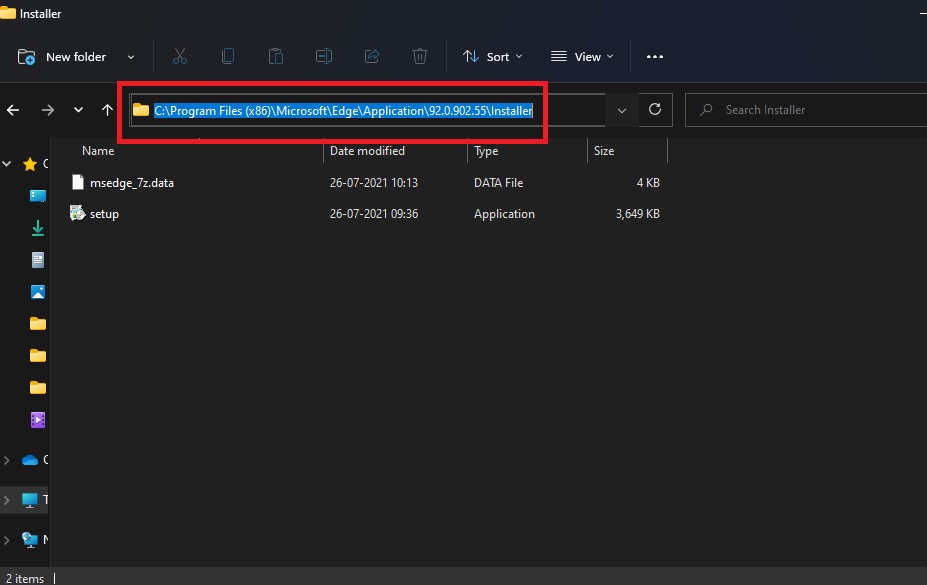
Open the command prompt in elevated mode and type cd and then paste edge folder location, and hit enter.
Eg: cd C:\Program Files (x86)\Microsoft\Edge\Application\92.0.902.55\Installer
Next, type the following command and hit enter.
setup --uninstall --force-uninstall --system-level
This command will forcefully uninstall the Microsoft Edge from the Windows 11 Operating system.
Related: Disable Built-In Password Manager in Edge, Chrome, Firefox Browsers

