Windows 11 recently updated the Notepad which matches the refreshed look of the Operating System. The new Notepad comes with the Fluent Design makeover, similar to other office apps and Paint, the new design brings rounded corners, dark mode compatibility, new font for buttons, menus, and more. New Notepad has the option to access the settings page, you can see the settings icon on the right-hand side. With the help of the settings option, you can access the settings page, where you can Change the font and the most important features, the theme color. In addition, the New Notepad comes with a new find and replace interface, you can access this option by pressing (Ctrl + F), and it supports the multi-level undo. By default, the new Notepad will automatically update via Windows Update, if you don’t have a new Notepad you can use this guide to Install new Notepad app. But some users want to access the old classic notepad, this article will guide you to Install Classic Notepad in Windows 11.
Install Classic Notepad in Windows 11:
You can use the following methods to restore the Classic Notepad in Windows 11, you no need to install the Classic Notepad. Because the modern Notepad in Windows 11 overrides the Old Notepad via the “Apps Paths” registry Key, so whenever you launch the Notepad.exe the New Notepad will appear. Disabling the Notepad alias via the settings app will open the classic Notepad, follow the below-mentioned method.
Method 1: Disable the Notepad alias
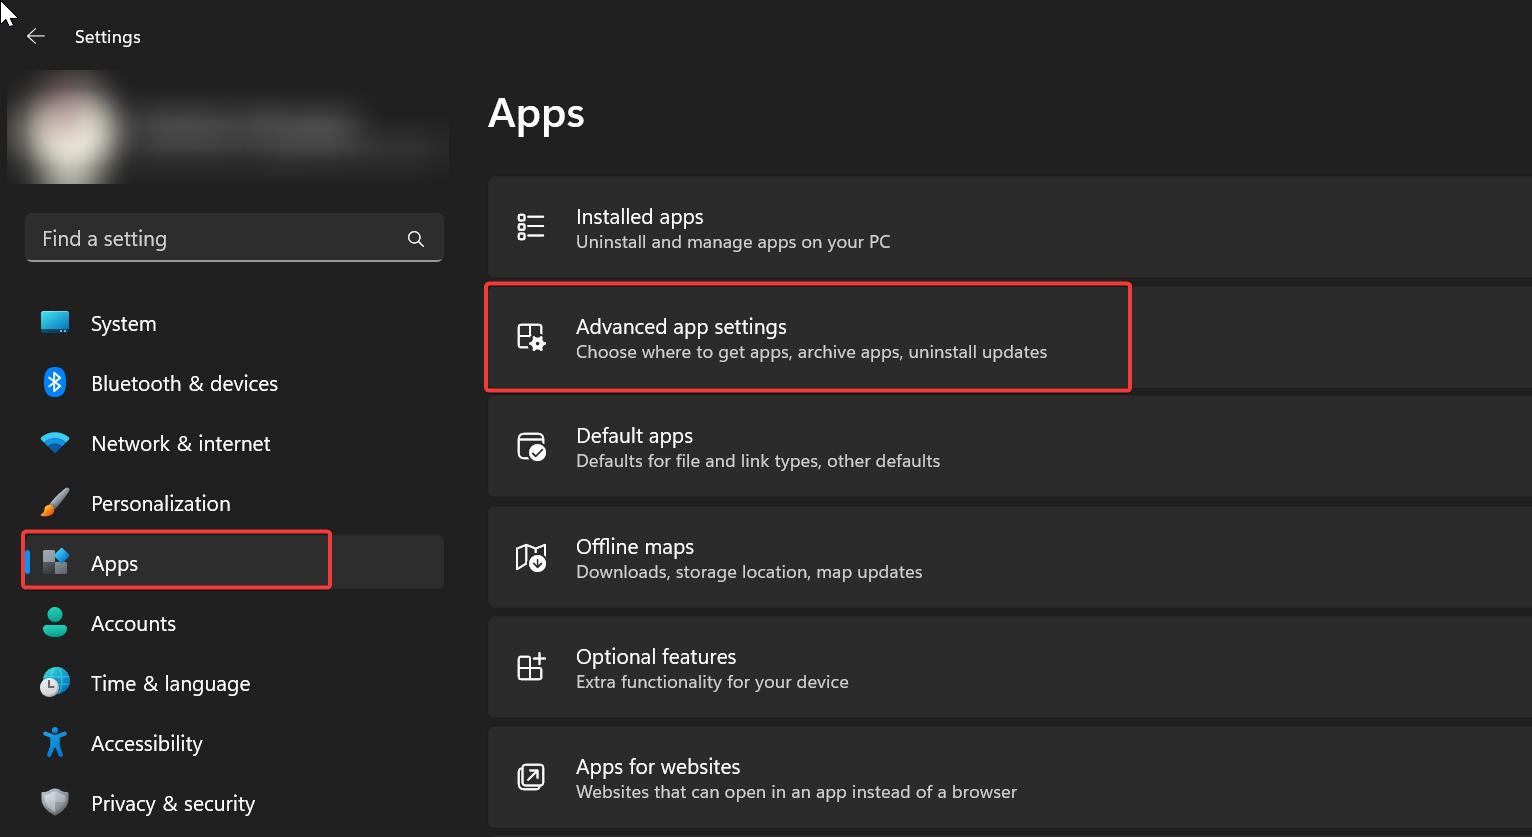
Open the Setting app by pressing Windows + I and from the left-hand side click on Apps, and from the right-hand side click on Advanced app settings.
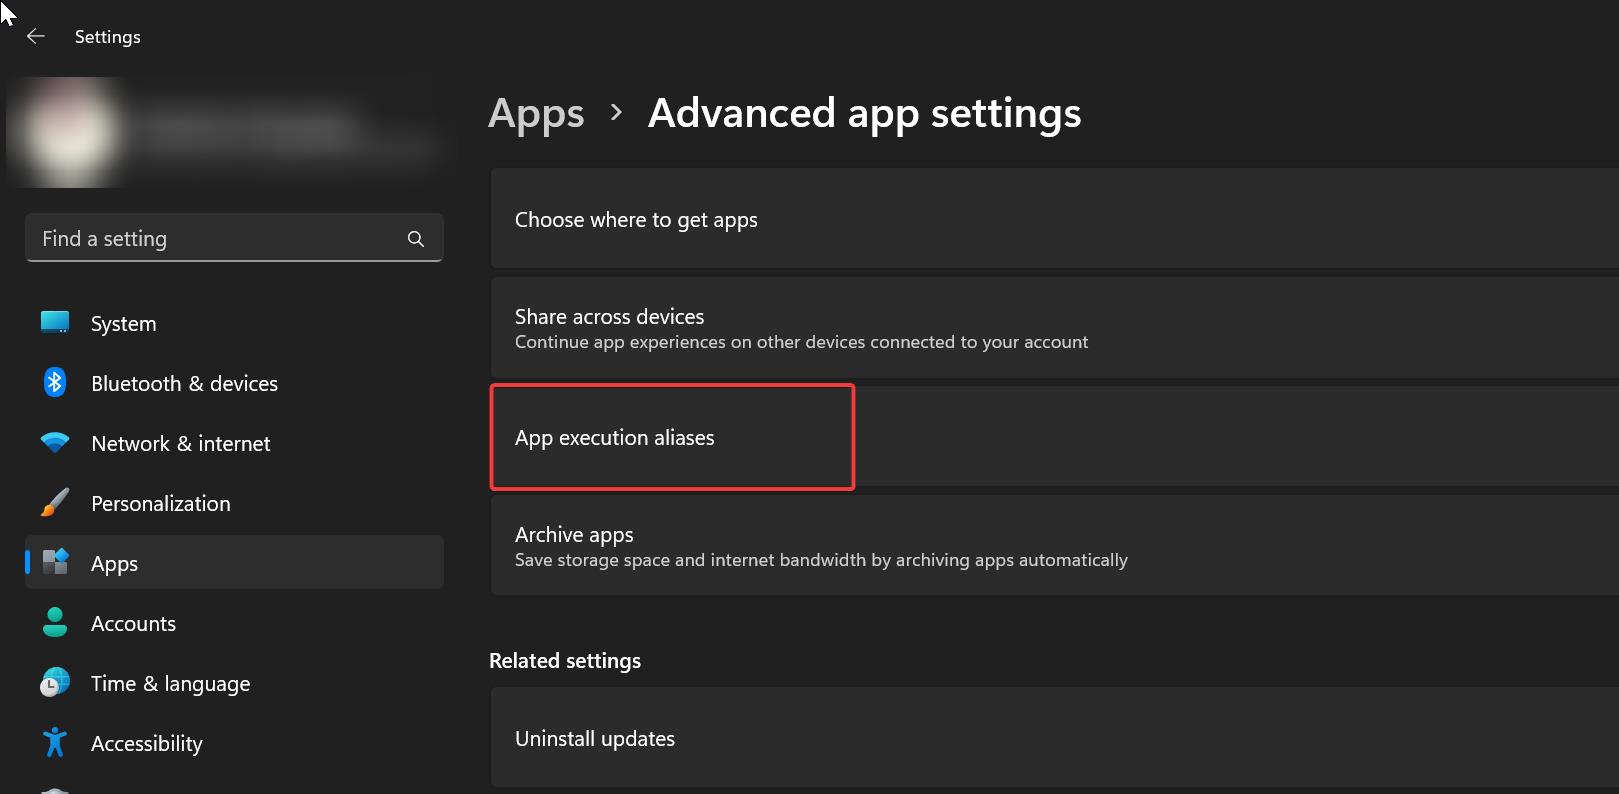
Under Advanced app settings, choose App execution aliases.
Under App execution aliases, look for Notepad (notepad.exe) and turn off the toggle button.
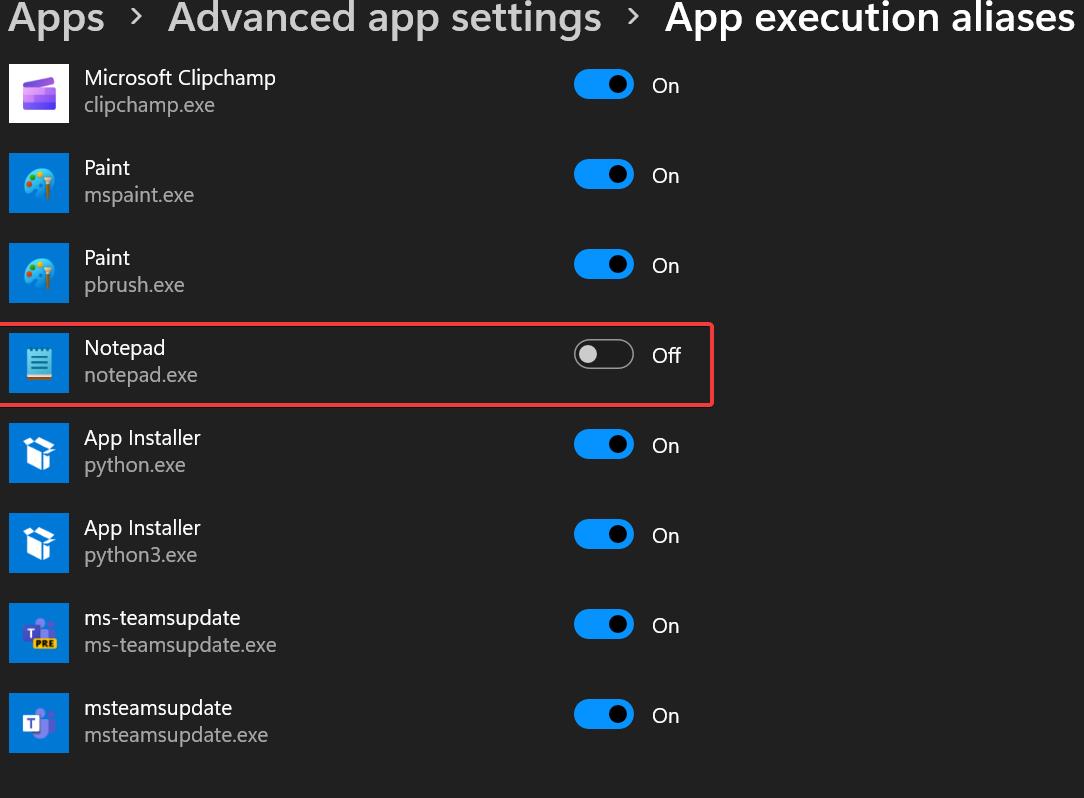
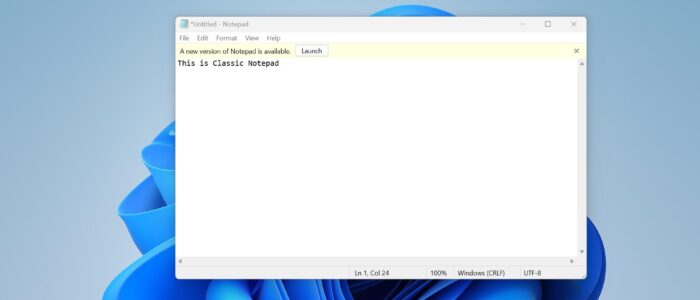
That’s it, now if you open Notepad from Run command or search, you will get Classic Notepad.
You can still access the new Notepad from the following path, but before accessing the Windows Apps folder make sure you have folder permission, follow the link how to get the folder permission in Windows 11.
C:\Program Files\WindowsApps\Microsoft.WindowsNotepad_11.2203.10.0_x64__8wekyb3d8bbwe\Notepad\Notepad.exeMethod 2: Accessing the Classic Notepad from the File Explorer
Before using this method you have to disable the Notepad Alias, so follow the above instructions and then follow this method.
The classic Notepad is still located in the following locations.
- c:\windows\notepad.exe
- c:\windows\system32\notepad.exe
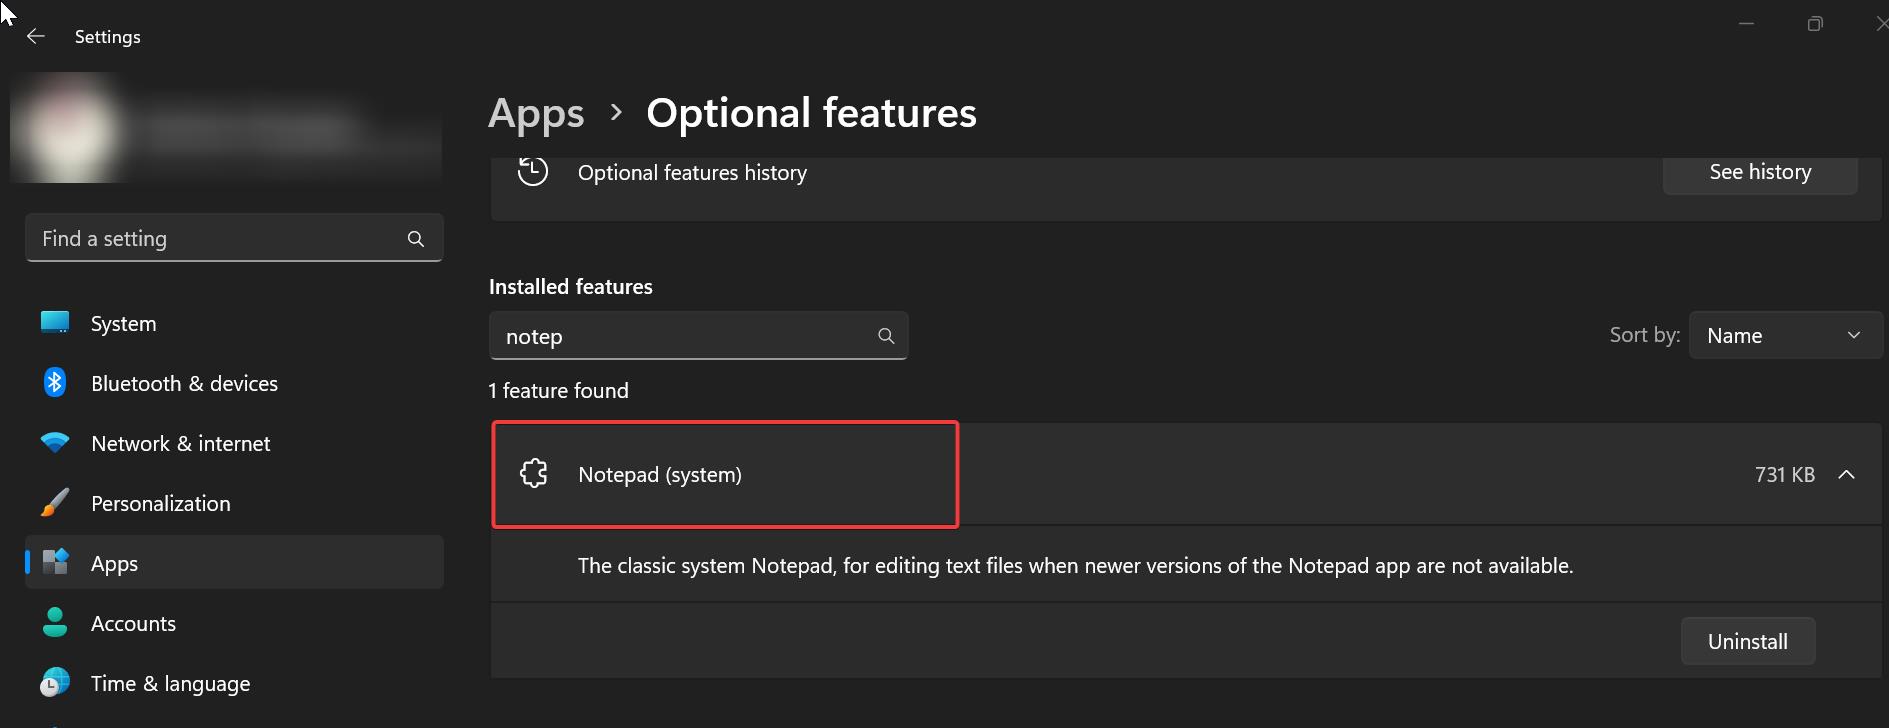
If you are unable to find the Notepad in the above-mentioned location, then you need to install the Notepad via Optional features.
Method 3: Install Classic Notepad via Optional features
Open Settings app by pressing Windows + I and from the left-hand side click on Apps and from the right-hand side click on Optional features.
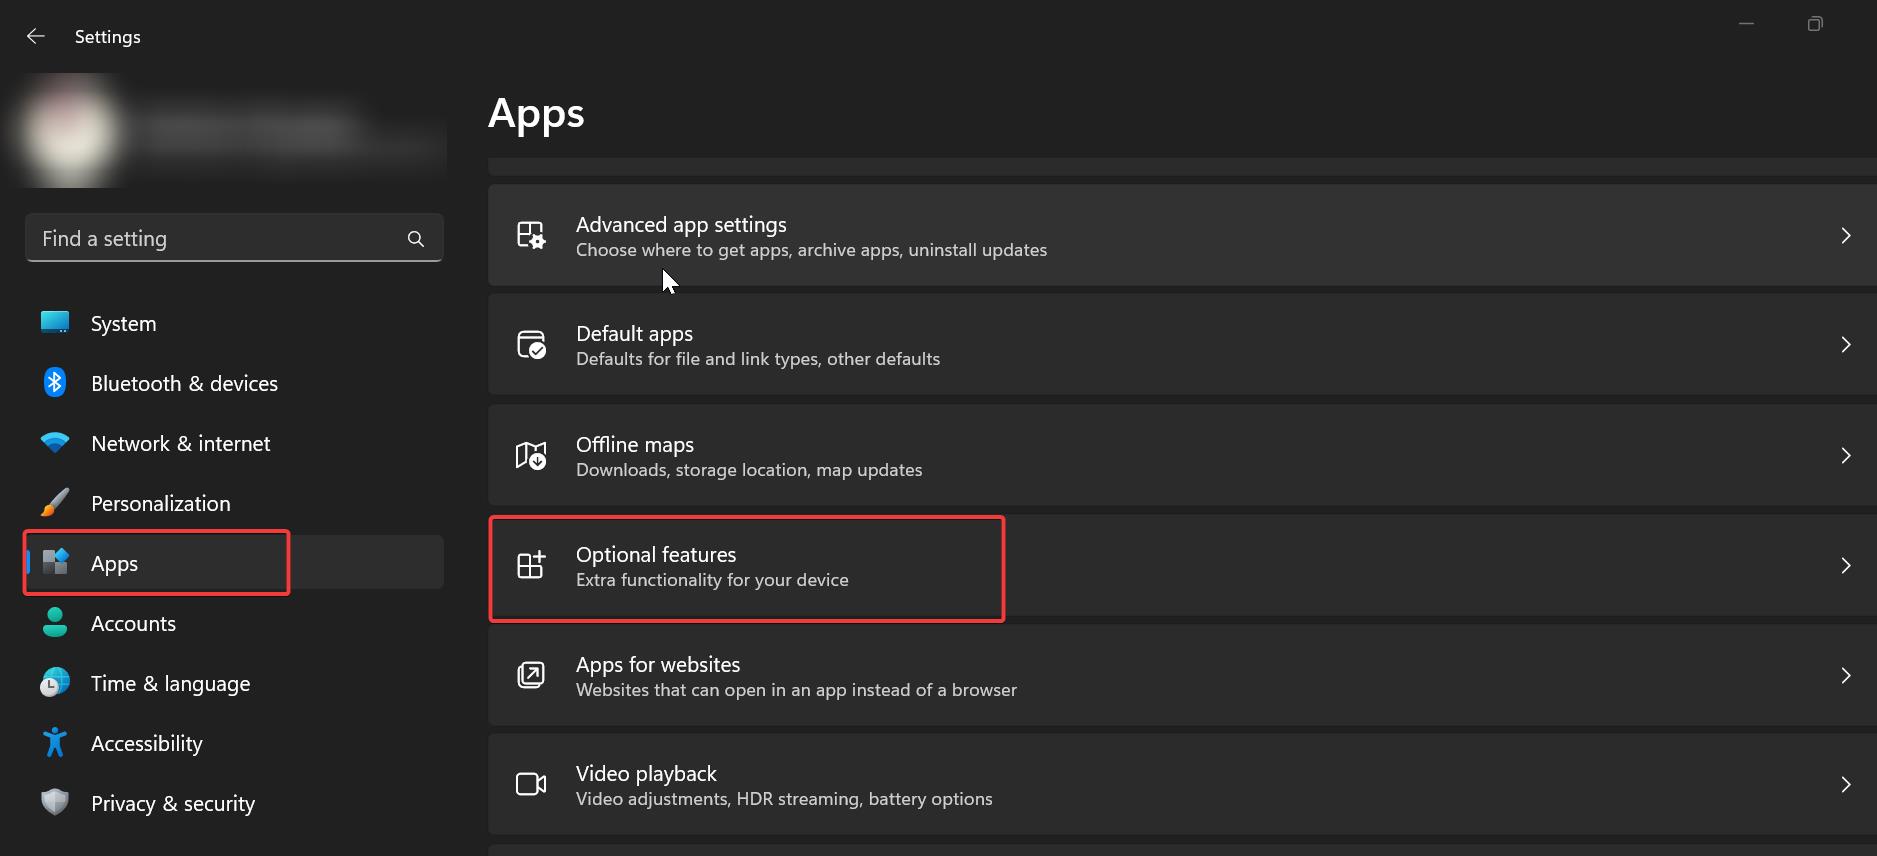
Click on Add an optional feature -> View features, search for Notepad (System), and click on Next to install.
Method 4: Restore Classic Notepad Via Registry
Open any Text editor, Notepad and copy paste the following lines to the Notepad.
Windows Registry Editor Version 5.00

[HKEY_CLASSES_ROOT\Applications\notepad.exe]
"NoOpenWith"=-

[-HKEY_CURRENT_USER\Software\Microsoft\Windows\CurrentVersion\App Paths\notepad.exe]

[HKEY_CLASSES_ROOT\txtfilelegacy\DefaultIcon]
@="imageres.dll,-102"

[HKEY_CLASSES_ROOT\txtfilelegacy\shell\open\command]
@="C:\\Windows\\System32\\notepad.exe \"%1\""

[HKEY_LOCAL_MACHINE\SOFTWARE\Microsoft\Windows NT\CurrentVersion\Image File Execution Options\notepad.exe]
"UseFilter"=dword:00000000
Save the file as Restror_Classic_Note.reg on your Desktop.
Double-click on the reg file and merge it to apply the registry settings.
That’s it now you have successfully restored the old classic Notepad with a dialog menu.
Read Also:
How to Change Default Encoding in Notepad?
How to Uninstall Notepad on Windows 10?
Top 10 Interesting Notepad Tricks

