In Windows 11, Time Zone settings allows you to automatically adjust the System Time to match the Local time based on your Geographic location. This includes taking into account Daylight Saving Time (DST) changes. The time zone setting is crucial for ensuring that the displayed time is accurate, which is important for scheduling, calendar events, file timestamps, and syncing with online services. In Windows 11 you can either set the time zone automatically or manually, if you choose manual settings you have to select your time zone manually from a list of Predefined Time Zones. If you choose automatic, Windows 11 will automatically detect and adjust the time zone based on your current location. This is very useful for the users who travel frequently. If your time zone keeps changing to other countries then it will create a lot of issues on your system. If you encounter a similar issue, you use the following resolution methods to fix the problem. This article will guide you to fix Time Zone Keeps Changing to other countries in Windows 11.
What causes the Time Zone Keeps Changing issue?
This issue can be caused by several factors, here are the most important factors that cause this problem.
- Automatic Time Zone Settings
- VPN or Proxy usage
- Location services issues
- Group Policy or Registry setting modifications
- BIOS/UEFI Clock Issues
- Software or App Conflict.
Fix Time Zone Keeps Changing to other countries in Windows 11:
Time Zone Keeps Changing to other countries in Windows 11 can be caused by different factors, here I have mentioned all the possible methods to fix this issue.
Solution 1: Set Internet Time
If you are using manual time settings, then switch it to Internet Time, follow the below steps to Set Internet Time.
Open the Control panel and Click on the Date and Time option.

Under the Date and Time setting windows click on the Internet Time tab.
Click on the Change settings option.

Under Configure Internet time settings, check the Synchronize with an Internet time server, and select the preferred time server, and click on Update now.

This will automatically update your local time and, this will change the Time zone to the correct Geographical Time zone. Once you set the Internet time zone, restart your system once and check. If the Time zone keeps changing proceed to the next solution.
Solution 2: Disable Automatic Time Zone Settings
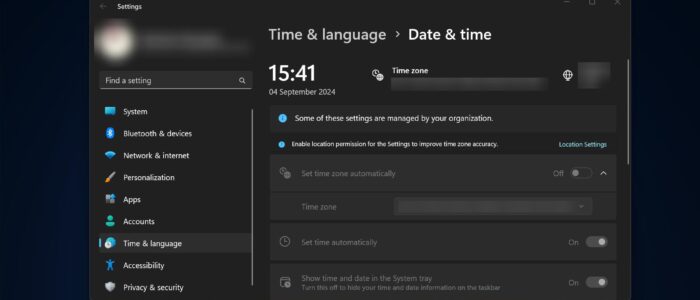
Open Windows Settings by pressing Windows + I and from the left-hand side click on Time & Language and from the right-hand side click on Date & time.
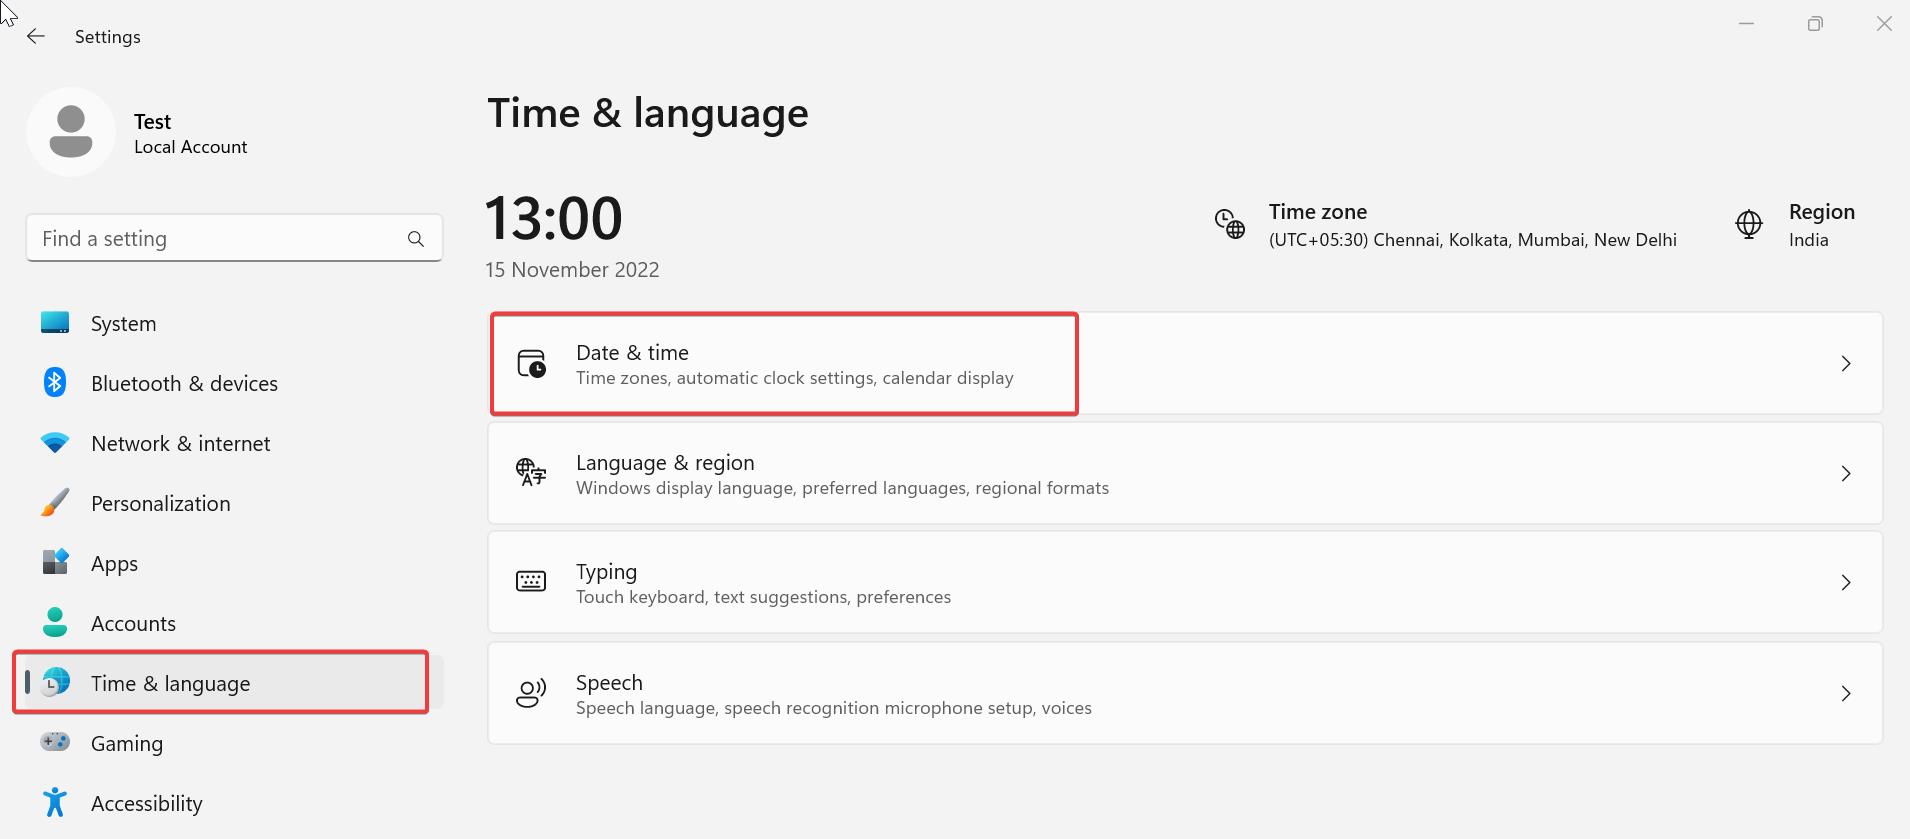
Under the Date & time, Turn off Set time zone automatically toggle button.
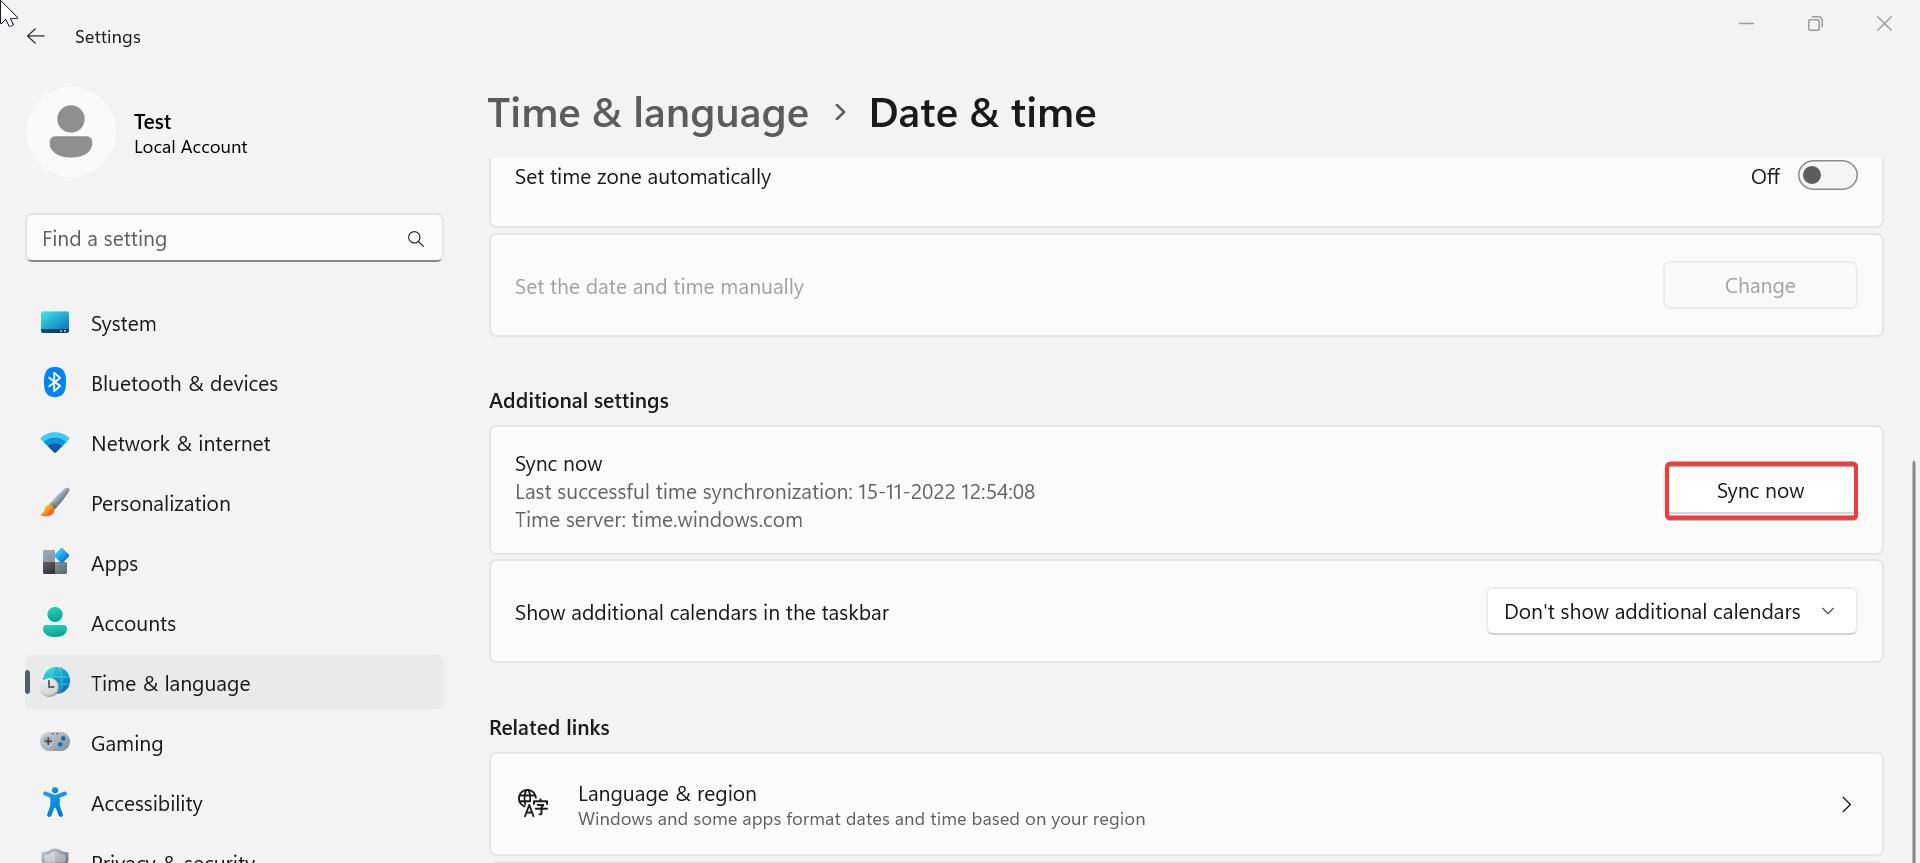
And under the Time zone drop-down menu, choose the correct time zone based on your location.
Solution 3: Check Location Settings
If you want to use the Automatic Time Zone, then make sure the Location Service is enabled on Windows, follow the below-mentioned steps to Enable the Location Settings.
Open Windows Settings by pressing Windows + I and from the left-hand side click on Privacy & security, and from the right-hand side make sure the Location service toggle button is Turned on.
If not Turn on the Location Services toggle button.

Solution 4: Windows Time Service Not Running
Check if the Windows Time service is running or not on your system, if not, you need to start the Windows Service.
Open Run command by pressing Windows + R and type Services.msc and hit enter, this command will open the Windows Services Management console.
Now look for the Windows Time service, and click on Start to start the service, this will enable the date and time synchronization on all clients and servers in the network.
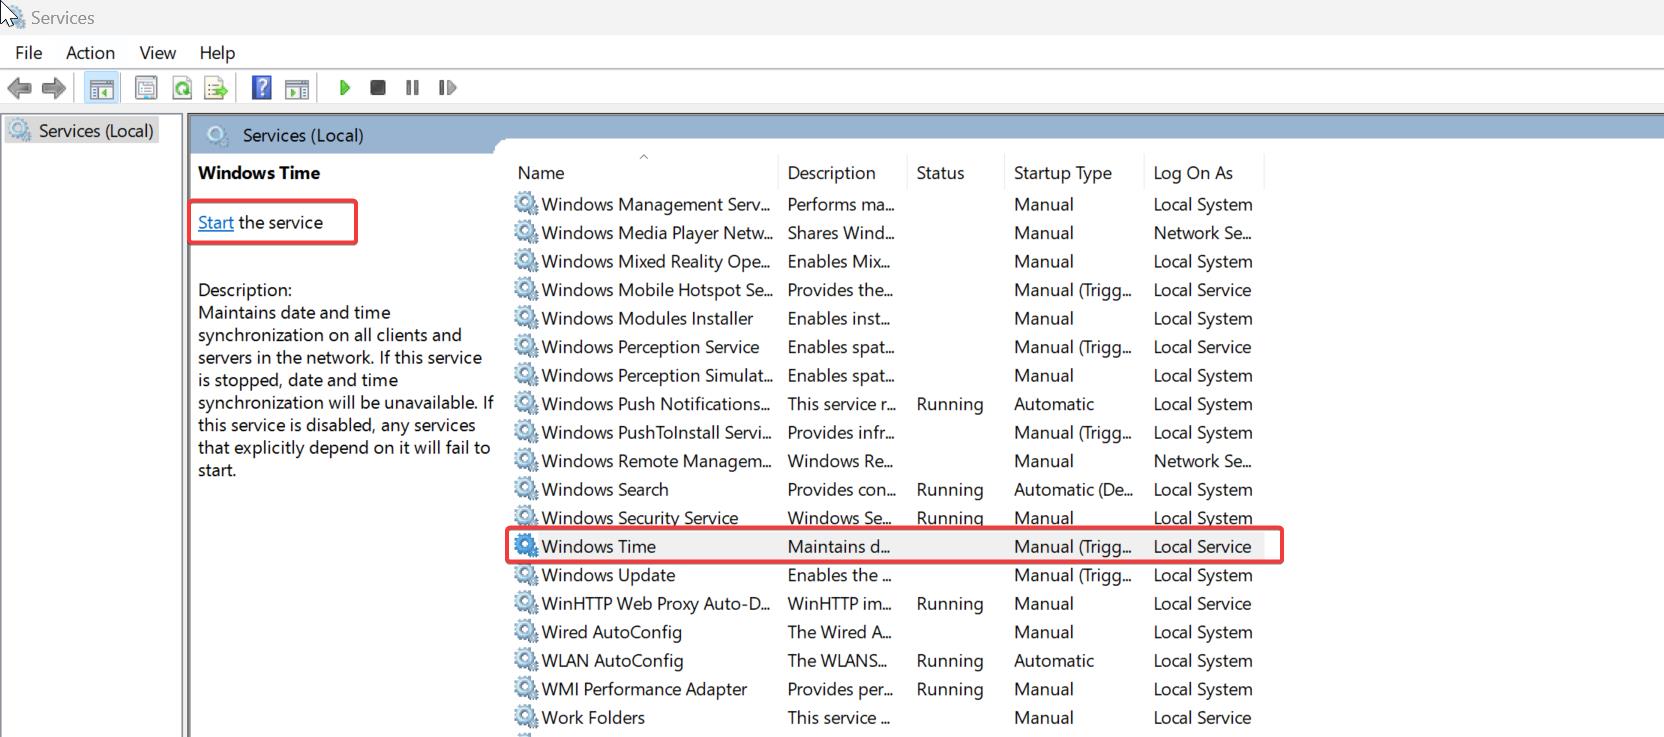
Once you start the service, check the Time zone is changing or not.
Solution 5: Check Proxy
Sometimes if there is any proxy servers chosen automatically by VPN, if you are using a proxy server, internet traffic flows through the proxy server on its way to the address you requested. The request then comes back through that same proxy server (there are exceptions to this rule), and then the proxy server forwards the data received from the website to you. Sometimes the Proxy server blocks the internet.
Open Internet Option, and click on the connection tab. In connections tab click on LAN settings.
Under LAN Settings, uncheck Use automatic configuration script, and check Automatically detect settings.
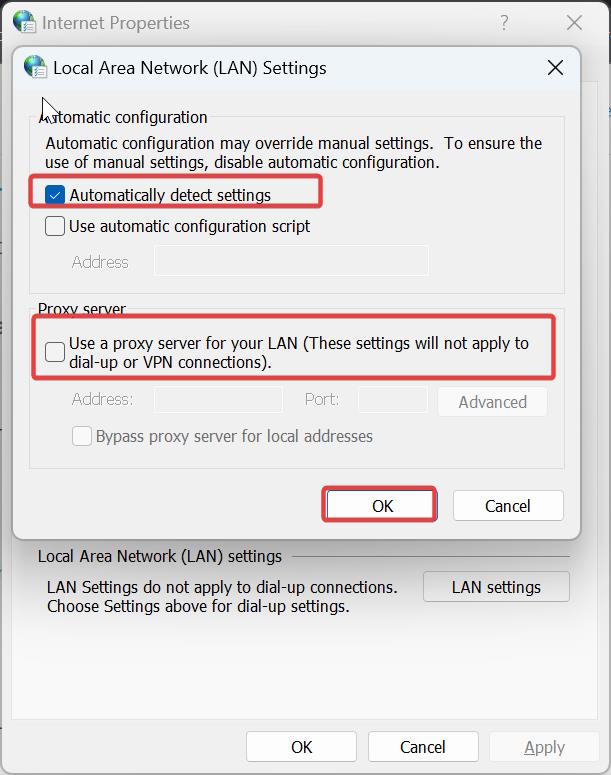
Click on Ok and restart the system once and check the Time zone is stable or not.
Solution 6: Disable VPN Network
If you are connected to any VPN network then disable or deactivate the VPN and then try to install or update the apps from the Microsoft Store.
Open run command by pressing Windows + R and type ncpa.cpl and hit enter. This command will open the Network Connections Window.
Right-click on the VPN adapter and then choose Disable.
Solution 7: Check BIOS/UEFI Settings
Sometimes, incorrect BIOS/UEFI settings can affect your system’s time settings.
Restart your computer and enter the BIOS/UEFI settings (usually by pressing F2, DEL, or ESC during boot).
Check the system time and date in BIOS and correct them if necessary.
Save changes and exit.
Solution 8: Check Windows Update
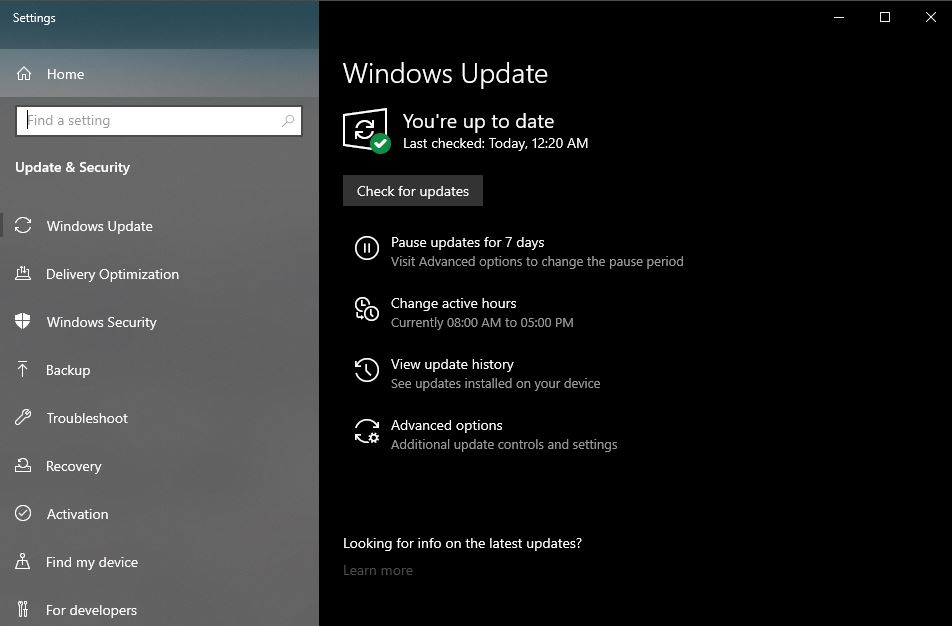
Open Windows Settings by pressing Windows + I and then select Update & Security.
From the left-hand side click on Windows Update and from the right-hand side click on Check for Updates.
Solution 9: Scan for Malware on your Computer
Sometimes “Time Synchronization failed” error may also occur due to Malware, Run a full antivirus scan once. Click on the link to check for Malware or viruses.
Solution 10: Run SFC or DISM scan
Running SFC and DISM scan will fix the Windows Corrupted files, follow the link to run the SFC or DISM scan.
Read Also:
How to add Different Time zone Clocks in Windows 11?
Fix Time Synchronization failed error in Windows 11/10
How to Display the time in Windows 11 Calendar flyout?

