What is Bitlocker?
BitLocker is a full-disk encryption feature included with Windows Vista and later. It is designed to protect data by providing encryption for entire volumes. By default, it uses the AES encryption algorithm in cipher block chaining (CBC) or XTS mode with a 128-bit or 256-bit key. CBC is not used over the whole disk; it is applied to each individual sector.
Enable BitLocker by using cmd line
- Log on as an administrator to the computer where you want to enable BitLocker.
- Open a Command Prompt window as an administrator.
- To do this, click Start, type cmd in the Search programs and files box, right-click cmd.exe, and then click Run as administrator.
- If the User Account Control dialog box appears, confirm that the action it displays is what you want, and then click Yes.
- At the command prompt, type manage-bde.exe -? to view the available parameters for the Manage-bde.exe command.
- Use the Manage-bde.exe parameter list you created earlier to enable and configure BitLocker for the computer.
- To Enable Bitlocker type the following command,
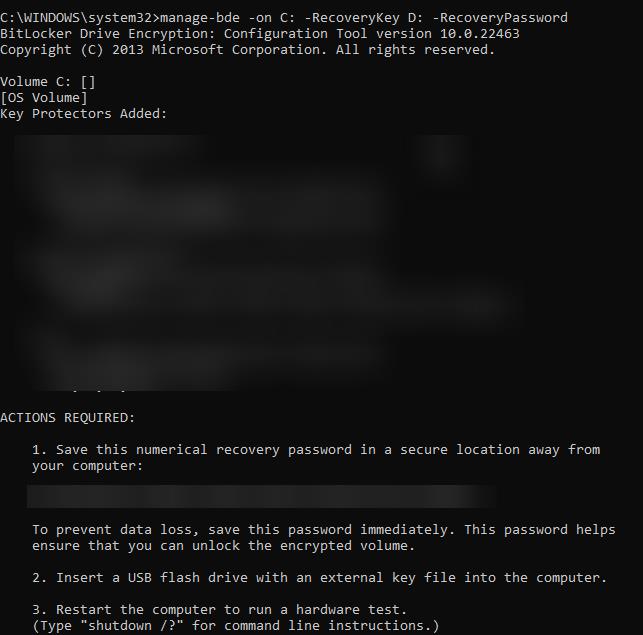
manage-bde -on C: -RecoveryKey D: -RecoveryPassword

This command will turn on the BitLocker encryption, and save the RecoveryKey in D drive, if you want you can change the Drive letter, and this command will generate a random recovery password.
After you run the command, restart the computer with the recovery key connected to complete the hardware test. After the computer restarts, BitLocker will begin encrypting the disk.
Verifying that BitLocker is enabled
To ensure that all of the steps are completed as intended, you should verify that BitLocker was successfully enabled as part of your deployment.
To verify that BitLocker is enabled on a drive
- Verify BitLocker encryption is occurring by using exe. You can run this command at the command prompt.
- To do this, click Start, type cmd in the Search programs and files box, right-click cmd.exe, and then click Run as administrator.
- If the User Account Control dialog box appears, confirm that the action it displays is what you want, and then click Yes.
- At the command prompt, type fvenotify.exe to view the status of the BitLocker encryption process.
- If a notification message does not appear in the notification area, do one of the following:
- Open an administrative Command Prompt window, and type the following command, replacing Volume with the drive letter of the drive being encrypted: %systemdrive%\Windows\System32\ manage-bde.exe –status Volume: Verify that encryption has completed.
- Click Start, click Control Panel, click System and Security, and then click BitLocker Drive Encryption. If the User Account Control dialog box appears, confirm that the action it displays is what you want, and then click Yes. Verify that BitLocker is turned on.
How to suspend and enable the BitLocker in windows 10?
- To suspend the Bitlocker the system should be logged in the local admin.
- If the system is connected to the domain and you cannot found the BitLocker option in the control panel
- After logging local Admin just check the BitLocker option in the control panel.
- In that, you can find the suspend option just click the suspend and give yes to the prompt.
- the BitLocker is suspended now.
Read Also:
How to Enable Bitlocker using PowerShell in Windows 11?


Hi,
I have configured BitLocker on my Laptop but its encrypted
but recovery key bot-generated on Active directory
is there any command for that so we do sync it again
Pingback: Fix Group Policy Do Not Permit The User Of PIN At Startup - RSSFeedsCloud