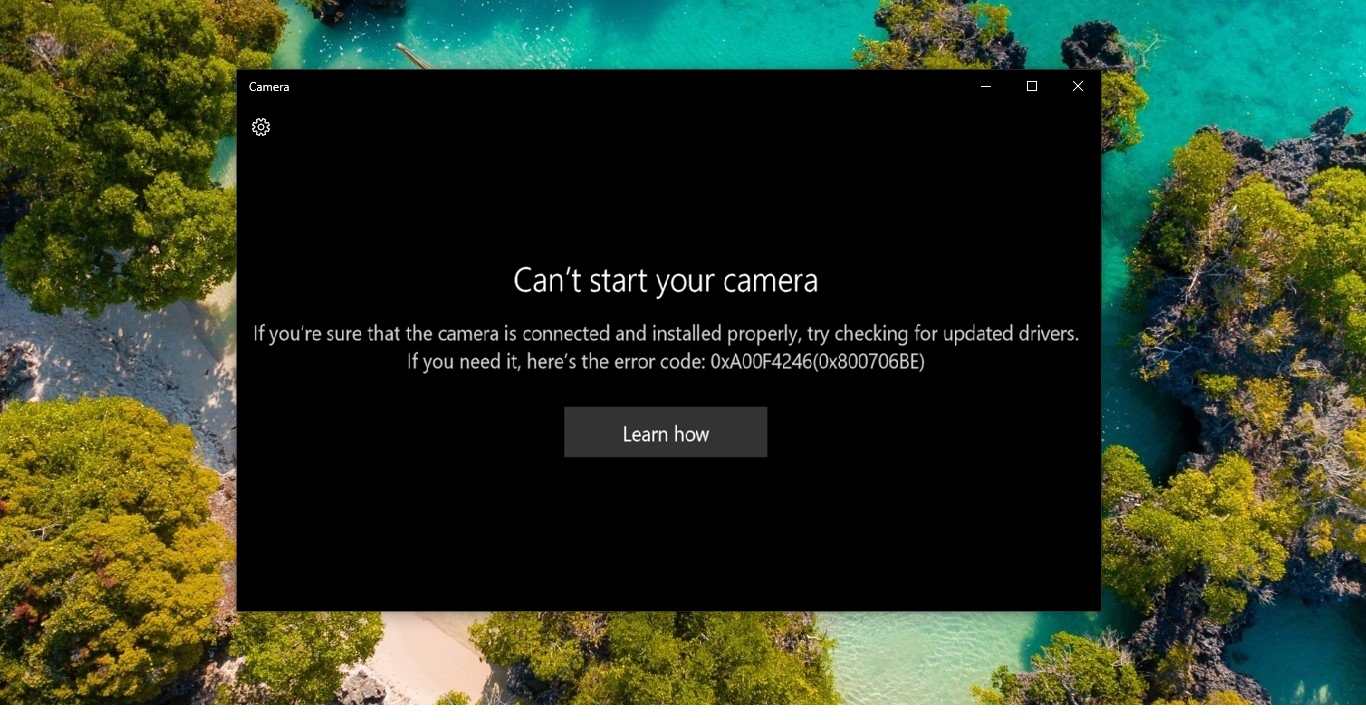
If you are encountered with this error then probably you are struggling to open Webcam on your Laptop or Computer. In Windows 10 webcam is used by many apps, particularly Teams, Skype, or web browsers. By default, these apps have permission to access the webcam on your laptop. But sometimes you will receive this kind of error while accessing your webcam from any other app. This error is the most frequently reported error, this article will guide you to fix Can’t Start your camera, Error 0xa00f4246 in Windows 10.
Fix Can’t Start your camera, Error 0xa00f4246:
Once you receive Can’t Start your camera error follow the below-mentioned recommended solution one by one to fix it. Let’s see the resolution methods in detail.
Check the Camera is allowed in BIOS:
If the Camera is greyed out in the device manager itself then you have to check it in the BIOS settings. Open BIOS settings as per your computer or laptop manufacturer. Then check the integrated camera is enabled or not, Follow the instruction as per your Laptop/Computer Manufacturer.
If the inbuilt camera is Enabled on your Laptop then proceed to the next resolution method.
Check apps permission to access the camera:
Open windows settings by pressing Windows + I and then choose Privacy.
From the left-hand side choose the Camera, from the Right-hand side choose Allow apps to access your camera.
Turn the toggle button. And scroll down and look for Allow desktop apps to access your camera.

Make sure the toggle button is turned on and check your app is listed or not.
Check the Camera in Device Manager:
Sometimes the webcam might be disabled in the device manager. So open the Device Manager and make sure the device is not disabled.
Open Run command by pressing Windows + R and type devmgmt.msc and hit enter. This command will open the Device Manager console.
Expand the Cameras and make sure the camera is not disabled. If it is disabled then right-click on it and choose Enable Device.

Check for any exclamation mark, if there any exclamation mark then it is having a driver issue, then install the suitable driver for your camera from the manufacturer website.
Run Windows Store Apps Troubleshooter:
Windows Store Troubleshooter is an application from Microsoft that will help users to fix all issues and problems you may be facing with windows store Apps. Download this application form the Link and run the Windows Store Apps Troubleshooter.
Once you launch the Windows Store Apps Troubleshooter you can see the advance option. Click on the Advanced Option. And check the Apply repairs automatically and click on Next.

Then Sign in with a Microsoft account and click on Next. This Windows Store Apps Troubleshooter for Windows 10 will scan your computer, identify the problems, and attempt to fix the This app can’t open issue automatically.
Run Hardware and Devices Troubleshooter:
Open Run command in elevated mode and type the following command and hit enter.
msdt.exe -id DeviceDiagnostic
This command will run the Hardware and Device Troubleshooter and it will apply the repairs automatically.
Read Also:
How to Enable Wireless Display feature in Windows 10?