Nowadays most of the laptops comes with Internal Webcams, mostly these webcams are integrated into the body of the computer and located just above the screen. These webcams works in the same way as an external webcam, but it includes fewer features. In Windows 11 you can manage the webcam using Windows Settings. And Windows 11 automatically download and install the suitable drivers for the integrated webcam. You can manage the Camera using the windows settings page. You can find the Camera settings page under the “Bluetooth & devices” section, and it includes all sorts of settings to manage your laptop’s inbuilt camera. Under this page, you can find settings to adjust camera settings like brightness and contrast. And also, this page includes Camera privacy settings which is used to restrict app access to the camera device. And Windows 11 new integration setting allows you to disable the camera completely from the Settings page. This article will guide you to Enable/ Disable camera in Windows 11.
Enable/Disable Integrated Webcam in Windows 11:
In Windows 11 inbuilt camera is enabled by default, to disable the camera in Windows 11 use the following methods.
Disable Integrated Webcam using Windows Settings:
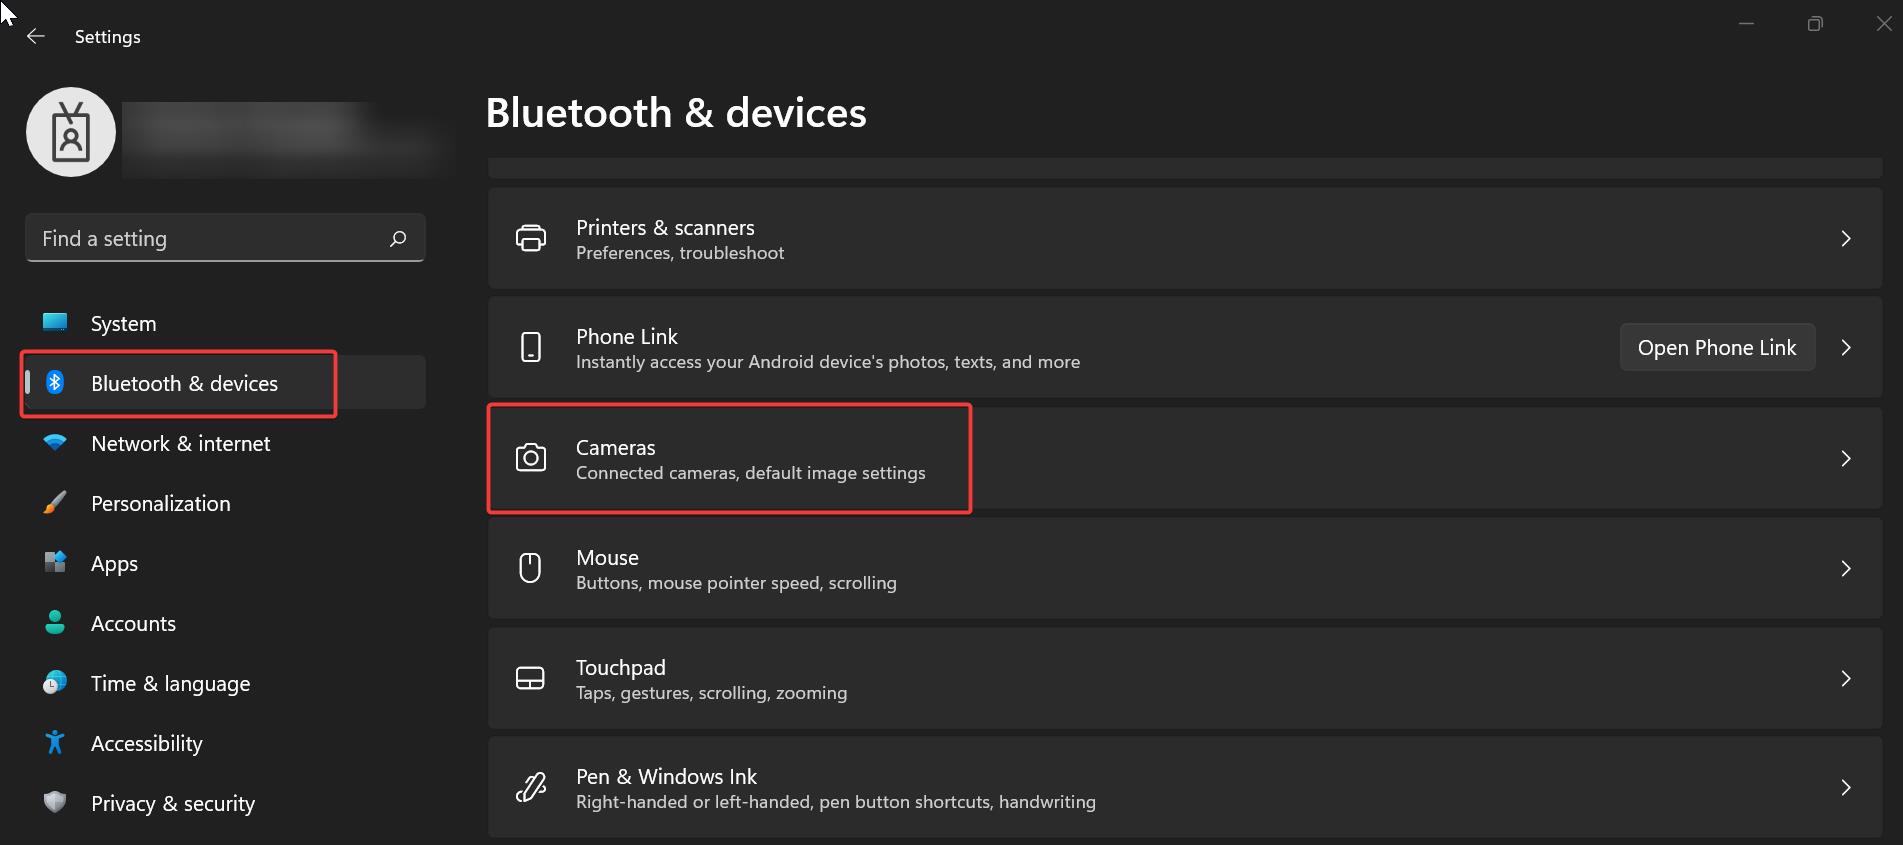
Open Windows Settings by pressing Windows + I and from the left-hand side click on Bluetooth & devices, and from the right-hand pane click on Cameras.
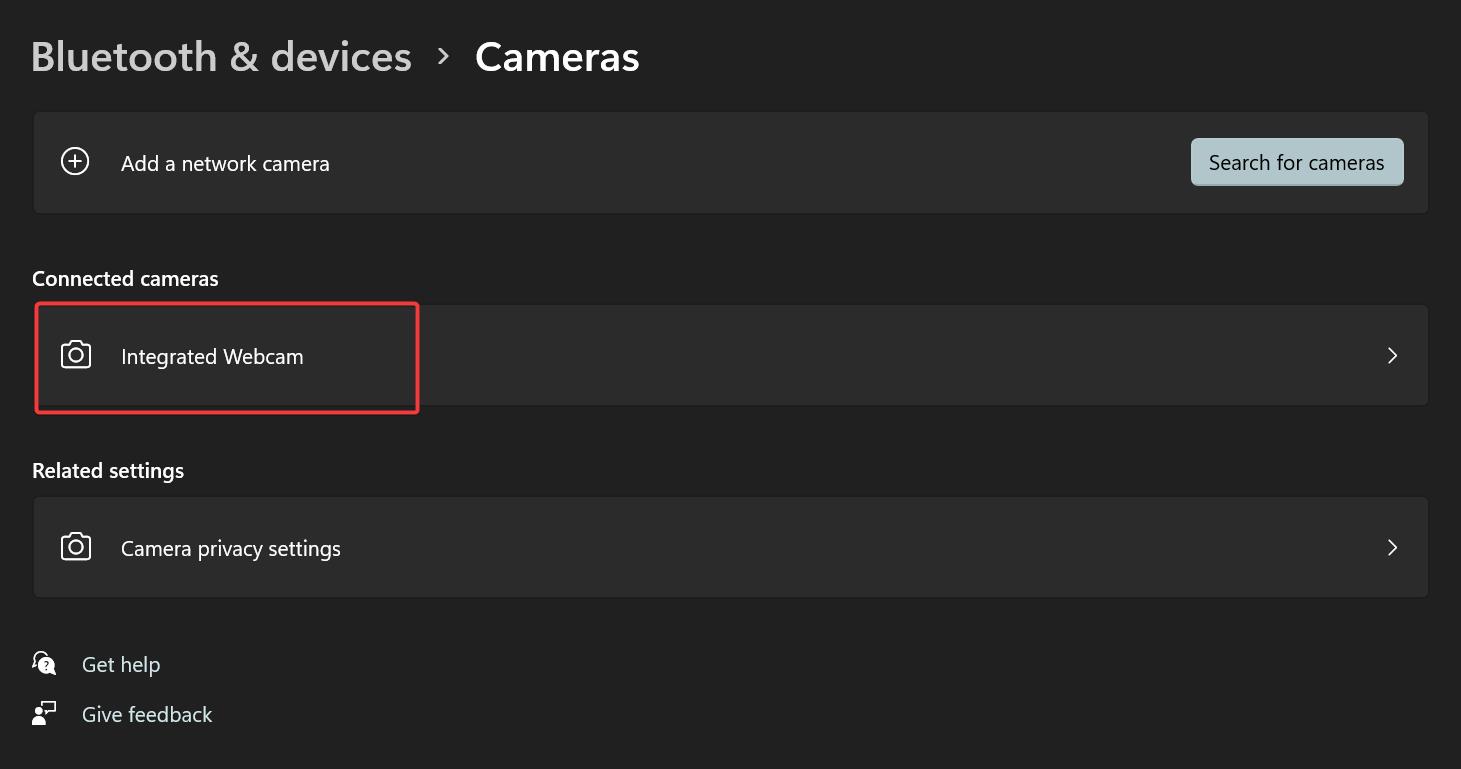
Under the Cameras page, click on the Camera you wish to Disable, if you want to disable the Integrated Webcam, then click on Integrated Webcam.
On the next following screen, under Integrated Webcam click on Disable button to disable the camera.
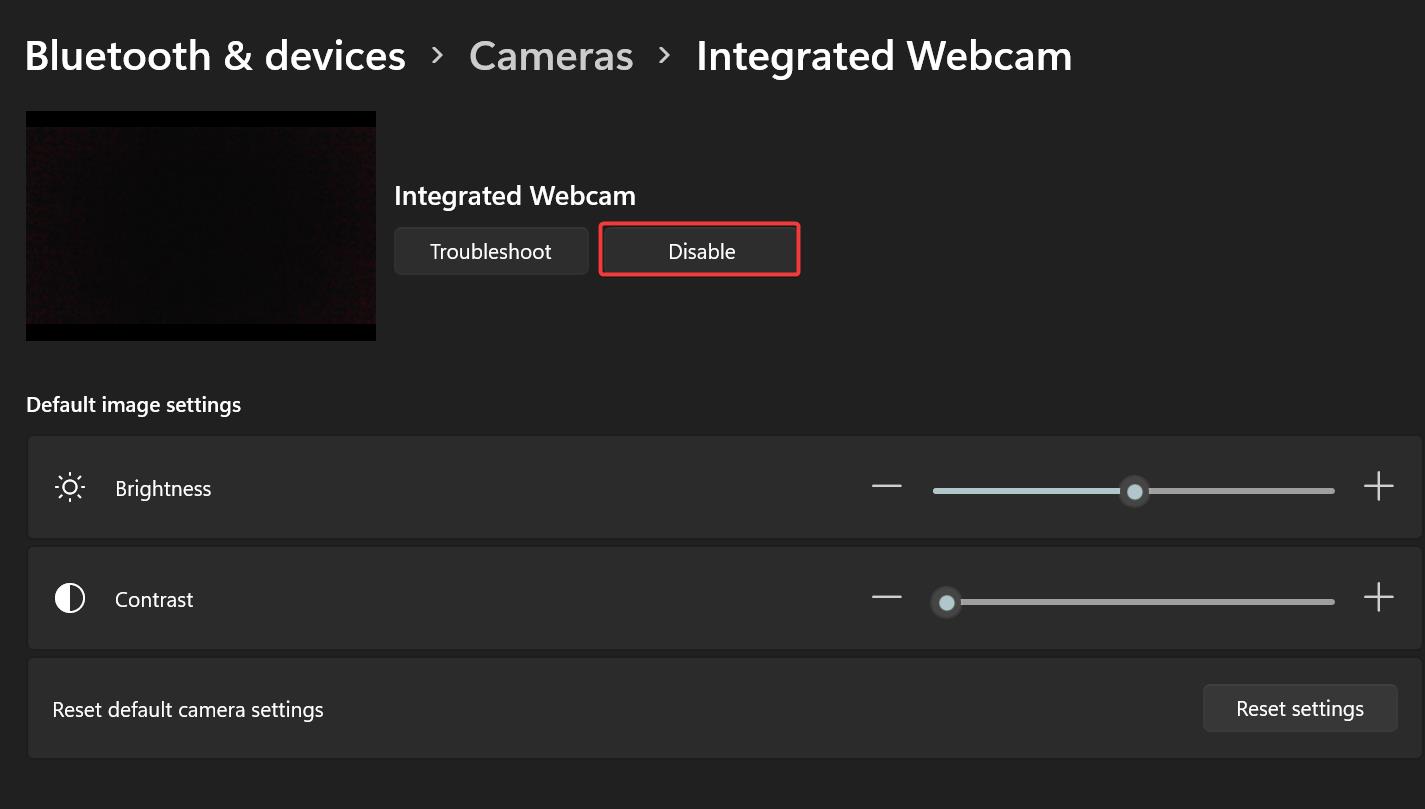
To Enable the camera back, just follow the same steps above and Click on Enable button to enable the camera.
Using Device Manager:
Open Run command by pressing Windows + R and type devmgmt.msc and hit enter, this command will open the Device Manager.
Under Device Manager, expand the Cameras section and right click on Integrated Webcam, and choose Disable device.
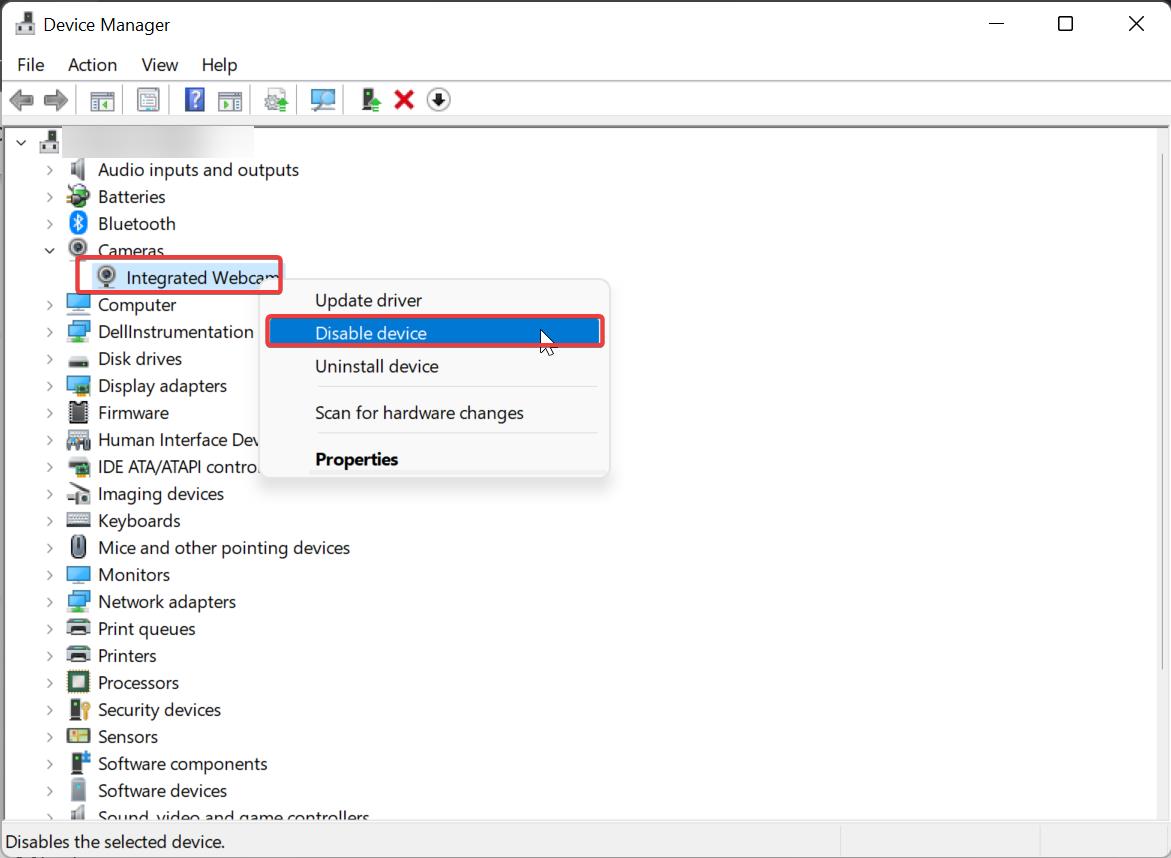
This will Disable the integrated webcamera, follow the same steps above and choose Enable device to enable the camera.
Read Also:
How to Adjust Teams Camera Settings in Windows 11/10?
How fix Can’t start your camera error in Windows 11?
How to Enable Hidden Camera Privacy indicator in Windows 11?

