In Windows 10 Wireless Display Optional feature adds the Connect app in Windows 10. This apps allows users to Mirror the screen of any devices like laptops, tablets, and Smartphones to your computer screen. Projecting to this PC features uses connect app in Windows 10, that allows you to wirelessly project your Windows Phone, another PC, or Android devices to the screen of your PC. Also, you can use its keyboard, mouse, and other device and control it easily with your PC. Starting from Windows 10 version 2004, the connect app for wireless projection which is using Miracast is no longer installed by default in Windows 10. This app is moved to an optional feature, if you want you can enable this feature. This article will guide you to Enable Wireless Display feature in Windows 10.
Enable Wireless Display feature:
You can add or remove this optional feature in two different methods, let’s see the methods in detail. Make sure you are logged in as an Administrator, you need admin privileges to Enable this Feature.
Using Windows Settings:
Open Windows Settings by Pressing Windows + I and click on Apps & Feature.
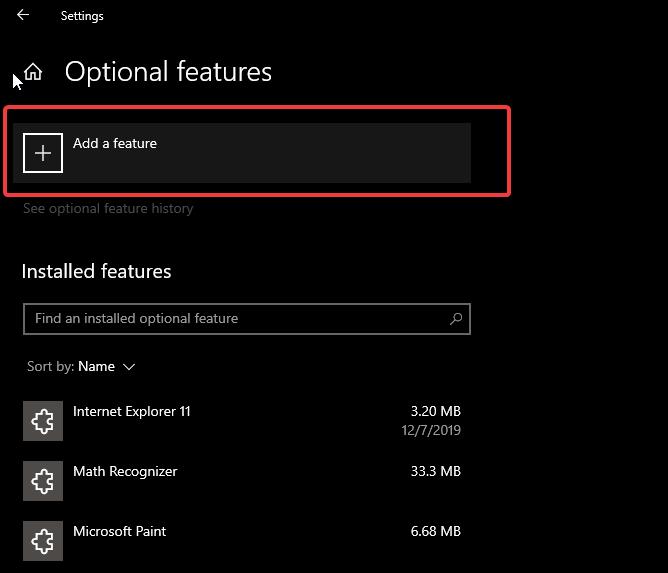
Under Apps & Features, click on Optional features > Add a feature.
Under Add an optional feature, look for Wireless App and click on Install.
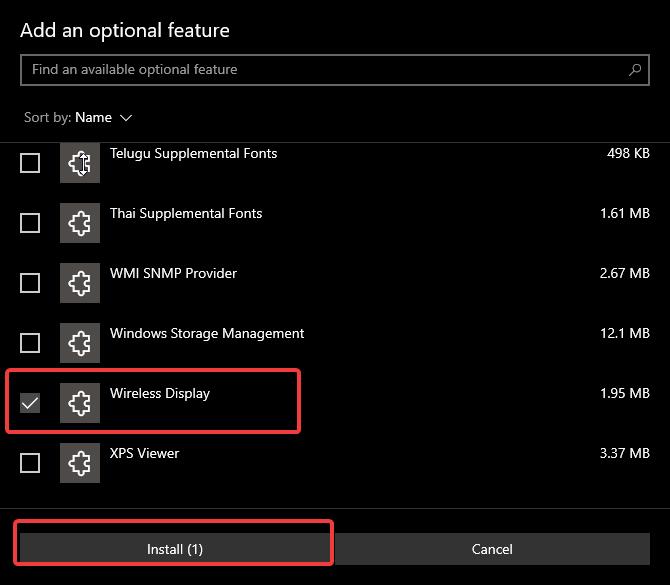
The installation will take time depends on your system performance and network speed. Once the installation completed, the wireless display will be added to the Start Menu as a Connect app. Now you can open the Connect app and connect with another device’s display.
To uninstall the Wireless display, follow the same steps above and open the Optional feature, from the installed Optional feature choose the Wireless display and click on Uninstall. Uninstallation will take some time.
Using Command Prompt:
You can also use the command prompt to install or uninstall the Wireless display, follow the below-mentioned steps to install the Wireless display on your computer.
Open Command Prompt in elevated mode and type the following command.
DISM /Online /Add-Capability /CapabilityName:App.WirelessDisplay.Connect~~~~0.0.1.0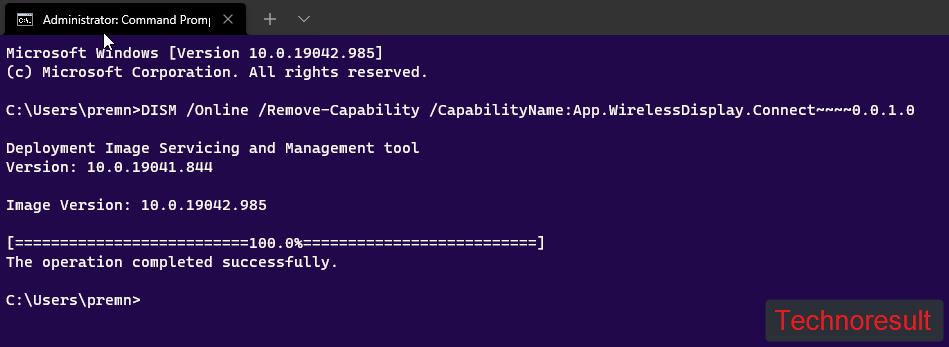
This command will install the Wireless Display app to your system. The installation will take time. You can see the progress of the installation in the command prompt as well as in the Settings App. Once the command executed successfully, you’ll get the successful message like “The operation completed successfully”.
Most of the users reported that they are getting error while using the command, make sure your system is fully updated, if not open the windows update settings and install all the pending updates. After the windows update, try to install the Windows Display app.
To Uninstall the Wireless Display using the command prompt, use the following command. Open the command prompt in elevated mode and copy paste the following command and hit enter.
DISM /Online /Remove-Capability /CapabilityName:App.WirelessDisplay.Connect~~~~0.0.1.0
This command will remove the Wireless Display app from your PC/Laptop.
Read: Fix Can’t access Ransomware protection in Windows Defender
Read Also: What is Wireless Display feature in Windows 11?




install nhi ho raha hai wireless display failed ho ja raha hai again and again