Most Organizations use Virtual Private Networks (VPNs) for several reasons, The main reason to use VPN is for Security and accessing the Organization’s network. VPNs allow employees to connect to the Organization network securely from the outside of the office. It enabled remote work and collaboration. And one more main advantage of using a VPN is to reduce Cost, VPN can reduce the need for expensive leased lines or dedicated network connections, so employees can use their home network to securely connect to the organization’s network. There are other benefits of using VPN, most of the organizations configure VPN on users’ laptops or configure, there are different protocols available to create VPN like (PPTP,L2TP, OpenVPN, SSTP, and IKEv2), the choice depends on the specific needs of organizations. In Windows Configuring and connecting VPN is very easy, but sometimes while connecting VPN you may receive an error, recently few users have experienced the following error while connecting VPN, “A connection to the remote computer could not be established. You might need to change the network settings for this connection.” This article will guide you to Fix Connection to the Remote Computer Could Not Be Established VPN Error in Windows 11/10.
Fix Connection to the Remote Computer Could Not Be Established VPN Error:
Once you encounter this issue, you may receive the following error message, follow the below-mentioned resolution methods to resolve this problem.
Can’t connect to VPNA connection to the remote computer could not be established. You might need to change the network settings for this connection.In our organization, we use an inbuilt VPN client to connect VPN, all the settings and configurations are correct, but still, users received the above-mentioned error. If you are experiencing a similar issue, then follow the below-mentioned resolution methods.
Solution 1: Disable Proxy
Open Run command by pressing Windows + R and type inetcpl.cpl and hit enter, this command will open the Internet Properties.
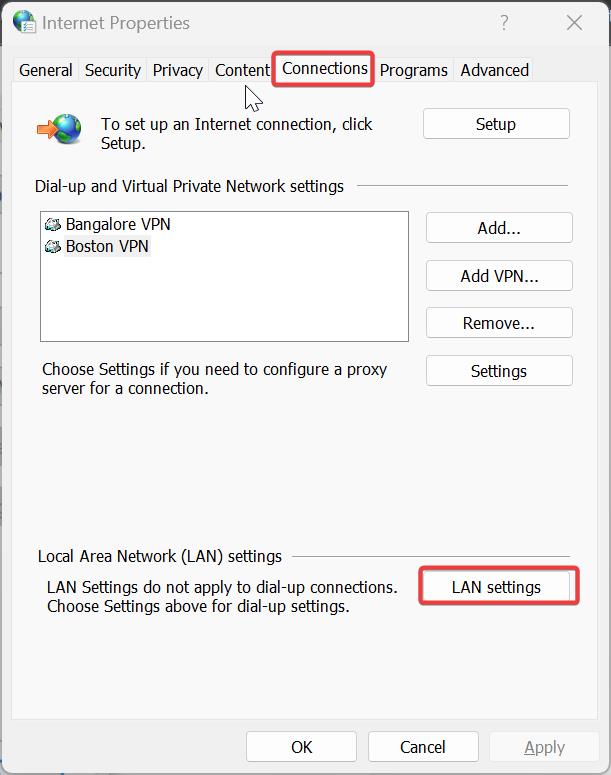
Click on the Connections Tab from the top tab list.
Under the Connections tab, click on LAN Settings.
Under LAN Settings, uncheck Use automatic configuration script, and check Automatically detect settings.
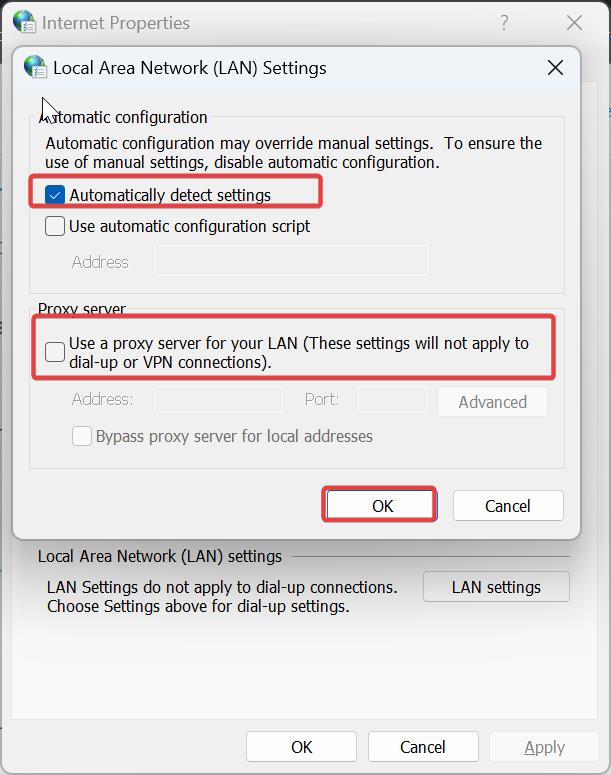
Click on OK and try to connect the VPN and check.
Solution 2: Uninstall WAN Miniport
Open Run command by pressing Windows + R and type devmgmt.msc and hit enter, this command will open the Device Manager.
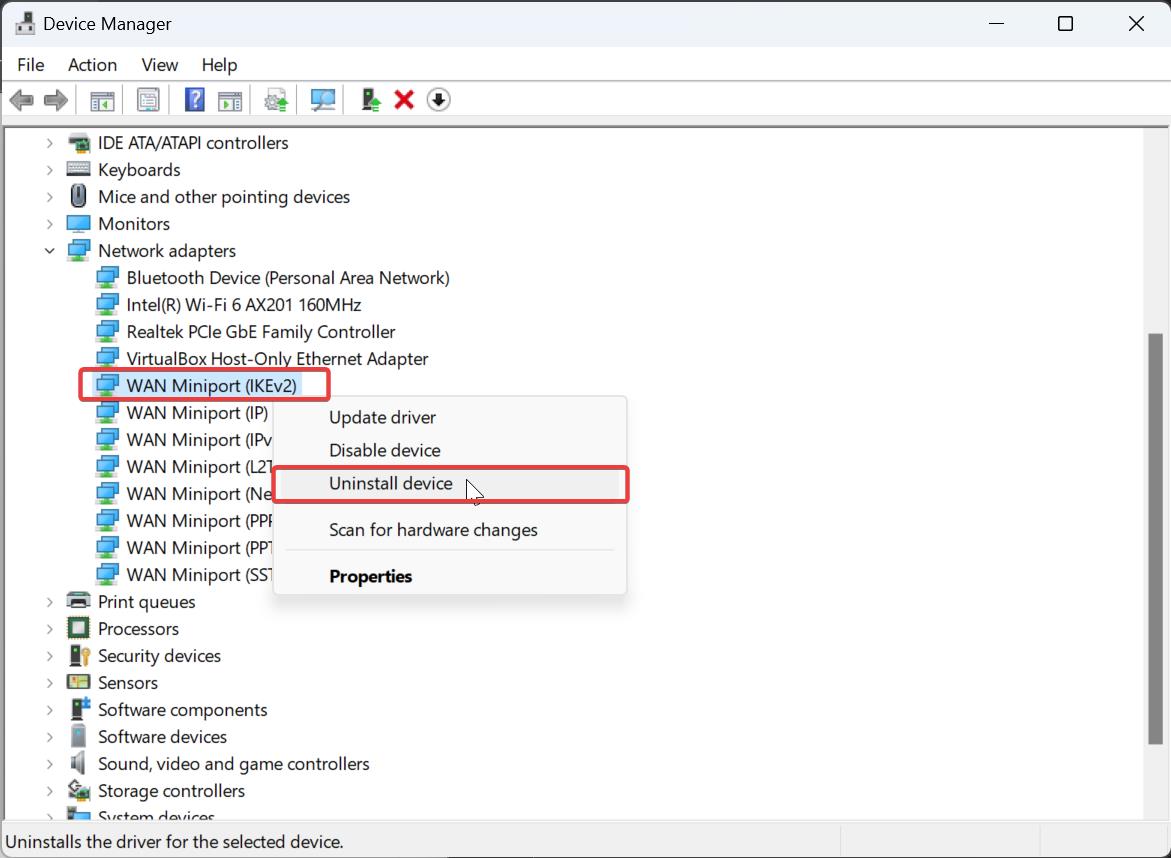
In the Device Manager Window, Expand the Network adapters, and now you can see the WAN Miniport adapters, right click on WAN Miniport and choose Uninstall.
Repeat the same process for
- WAN Miniport (PPTP)
- WAN Miniport (PPPOE)
- WAN Miniport (Network Monitor)
- WAN Miniport (L2TP)
- WAN Miniport (IPv6)
- WAN Miniport (IP)
- WAN Miniport (IKEv2)
- WAN Miniport (SSTP)
Uninstall all WAN Miniport adapters.
Next, click on the Action tab at the top of the Window and choose Scan for hardware changes from the Context menu.
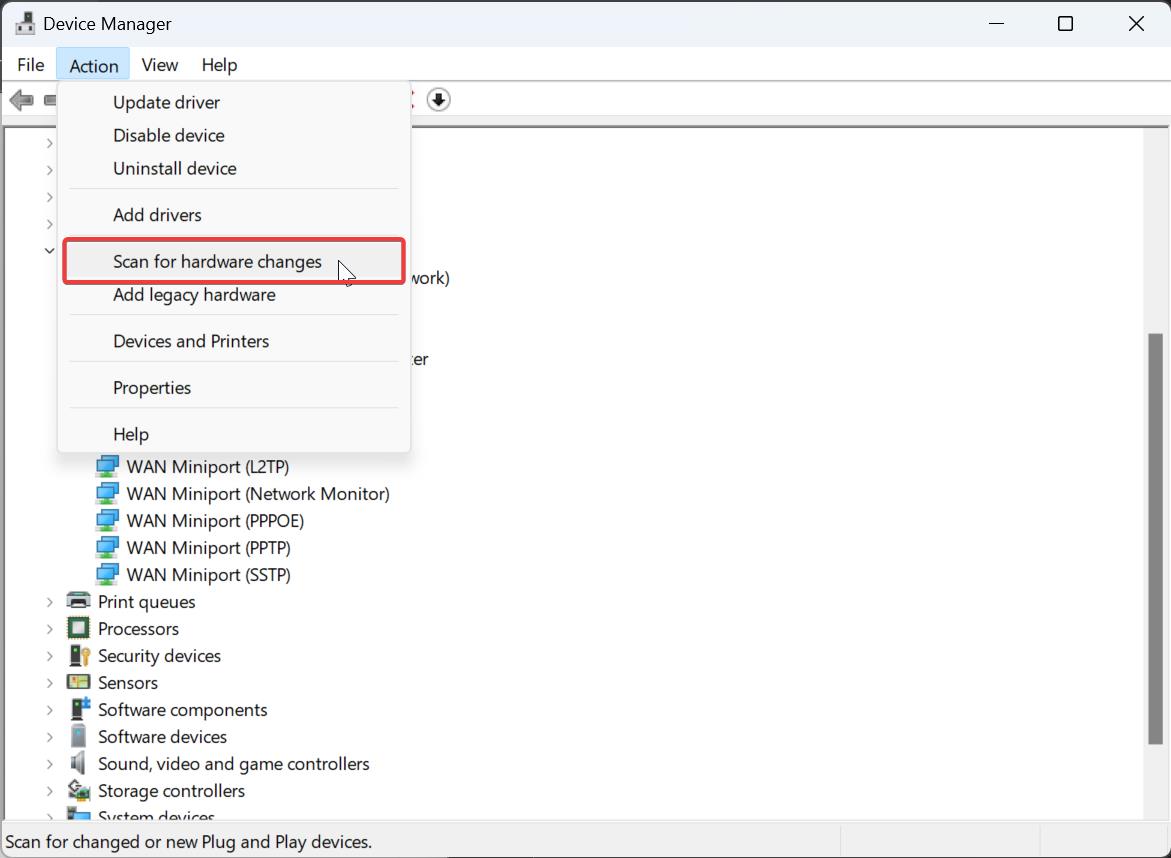
This will reinstall all WAN Miniports, It will uninstall the corrupted drivers and reinstall them freshly. Now open your VPN and try to connect VPN.
Read Also:
Fix L2TP Connection Attempt Failed Because the Security Layer VPN error
Error While installing Cisco VPN Client




Thank you! This fixed my VPN so I can continue to work!!!