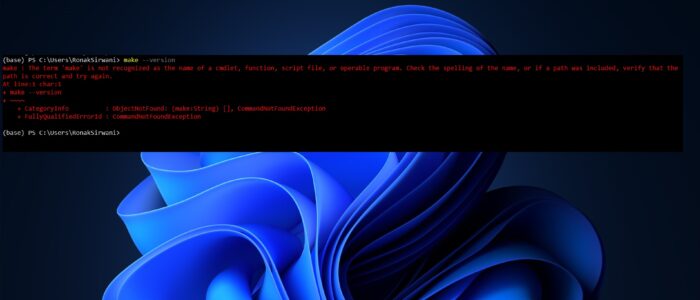
Make is a tool that is primarily used in software development to manage the build process of software projects, It was originally developed for Unix-based systems but it can also run on other platforms like Windows and macOS. This allows developers to compile and link these code segments. You might have this error, for example, if you are running this “make” command for the first time in Windows, and you might encounter this error saying make is not recognized as the name of a cmdlet, function, script file, or operable program. That is because make is not installed by default on Windows. This article will guide you to fix make is not recognized as name of a cmdlet in Windows 11.
Fix make is not recognized as name of a cmdlet in Windows 11:
The make command is typically used on Unix-based systems like Linux or macOS for managing builds in projects, but it can be installed on Windows as well using the following methods.
Method 1: Install Make via WSL (Windows Subsystem for Linux)
We all know Windows supports WSL, WSL allows you to run Linux distros directly in Windows. If you already using WSL then you can directly enter the following commands to use the make command. If not install the WSL first.
Inside the WSL terminal run the following commands.
sudo apt updatesudo apt install build-essentialThis command will install make and other development tools, once you installed essential tools, now you can use the make command inside the WSL Linux Terminal.
Method 2: Install Make using Chocolatey
Chocolatey is an open-source package manager for Windows that automates the process of installing, updating, configuring, and removing software from a Windows operating system. It provides a command-line interface (CLI) and a centralized repository of software packages.
First, make sure Chocolatey is installed on your Windows machine. Run the choco --version to verify the Chocolatey. If Chocolatey is not installed, use the following command to install Choco.
Open the command prompt in elevated mode and run the following command.
Set-ExecutionPolicy Bypass -Scope Process -Force; [System.Net.ServicePointManager]::SecurityProtocol = [System.Net.ServicePointManager]::SecurityProtocol -bor 3072; iex ((New-Object System.Net.WebClient).DownloadString('https://community.chocolatey.org/install.ps1'))Next, run the following command to install the make.
choco install makeThis command will install make, after installation, you can verify using this command make --version.
Method 3: Install GnuWin32 Make
Alternatively, you can install a standalone version of GNU Make.
Click Environment Variables, find the Path variable, and add the path to the make.exe file.
Download GNU Make for Windows from GnuWin32.
Follow the installation instructions.
Add the bin directory of the GNU Make installation to your system’s PATH environment variable:
Go to Control Panel > System > Advanced system settings.
Click Environment Variables, find the Path variable, and add the make bin path to the local env.
C:\Program Files (x86)\GnuWin32\bin
After completing any of these options, the make command should be recognized in your terminal or command prompt.


