Sleep option is a Low power state in Windows 11 that lets you quickly resume your work when you wake the computer back up. It’s an alternative to full shutdown, instead of turning off your computer completely, you can use sleep mode. Sleep mode uses significantly less energy, also it will wake your computer faster. One of the main benefits of sleep mode is Pick up Where you left off, when you put your computer to sleep, all your programs and files are saved in your computer’s memory (RAM). This means you can use your computer where you left off, without having to close and reopen everything. So sleep option is very useful, if you are not able to find the sleep option in the Power menu, then you can use the following solutions to get back the sleep option. This article will guide you to fix Sleep option missing in Windows 11.
Why Sleep Option missing in Windows 11?
There can be several reasons for the sleep option missing in Windows 11. One primary cause might be the power settings configuration. Sometimes, updates or system alterations modify these settings unintentionally. Furthermore, outdated or incompatible drivers can also lead to this issue. Lastly, it can even be due to specific BIOS/UEFI configurations that need adjustments. In this article, we have mentioned all the resolution methods to fix this issue.
Fix Sleep option missing in Windows 11:
If you are unable to find the Sleep option on the Windows 11 power menu, follow the below resolution methods to fix it.
Solution 1: Check if Sleep is Disabled on Control Panel
Windows operating system allow users to enable to disable the Sleep option from the control panel. By default, Windows comes with the default power configuration, if there is any misconfiguration, you can check and verify using the following steps.
Open the Control Panel and go to System and Security > Power Options.
From the left-hand pane, click on Choose what the Power button does.
Under Shutdown settings, ensure sleep is checked, if not, check the Sleep option.

Click on Save Changes and restart your system once.
After restart, check if you can access the Sleep option in the Power menu.
Some user reported that they are not able to see the Sleep Option under Shutdown settings. If the Sleep option is missing from the Control panel Power option, follow the remaining resolution methods.
Solution 2: Restore Default Power Plans
If there is any misconfiguration on the current Power Plan, you can rest using the following steps, restoring the Power plan will fix the misconfiguration.
- Open the Start menu and search for Command Prompt.
- Right-click on Command Prompt and select Run as administrator.
- In the command prompt window, type the following command and press Enter:
powercfg -restoredefaultschemes- The command will reset all power plans to their default settings.
Once you have successfully executed the command, restart your system, and check if the issue persists.
Solution 3: Modify the Group Policy Settings
Open Run command by pressing Windows + R and type gpedit.msc and hit enter, this command will open the Group Policy Editor.
Navigate to the following path
Computer Configuration > Administrative Templates > Windows Components > File Explorer
From the left-hand side look for File Explorer and from the right-hand side Look for Show Sleep in the Power options menu, double-click on it, and open the Policy Settings.
Choose Enabled and click on Apply and OK.

Restart your system once and check if you are able to access the sleep option in the Power menu.
If you are not able to see the Sleep Option in the Power Menu, try to modify one more policy. Follow the below-mentioned steps to modify the policy.
Computer Configuration > Administrative Template > System > Power Management > Sleep Settings.
Look for Allow Standby states (S1-S3) when sleeping (plugged-in) and Enable the Policy.

Restart the system once and check if the issue persists.
Solution 4: Update Graphics Drivers
Updating your graphics drivers can often solve compatibility issues with applications. Follow these steps to update your graphics drivers:
Open the Run command by pressing Windows + R and type “devmgmt.msc” and hit enter, this command will open the Device Manager.
Expand the “Display adapters” category.
Right-click on your graphics card and select “Update driver”.

Choose the option to automatically search for updated driver software.
Wait for the update process to complete. If you received a message there is no update, then visit your laptop or computer’s official manufacturer site and download the latest graphics driver, and install it. Updating the Graphics driver may fix the issue.
Solution 5: Check for Windows Updates
Keeping your Windows 11 up to date is essential for optimal performance and compatibility. Microsoft regularly releases updates that address known issues and provide bug fixes. Also, you may receive a Driver update from Windows, Check if Windows is showing any notification for pending updates, if there are pending updates then restart the system to install the pending updates.
Follow the below-mentioned steps to check for updates.
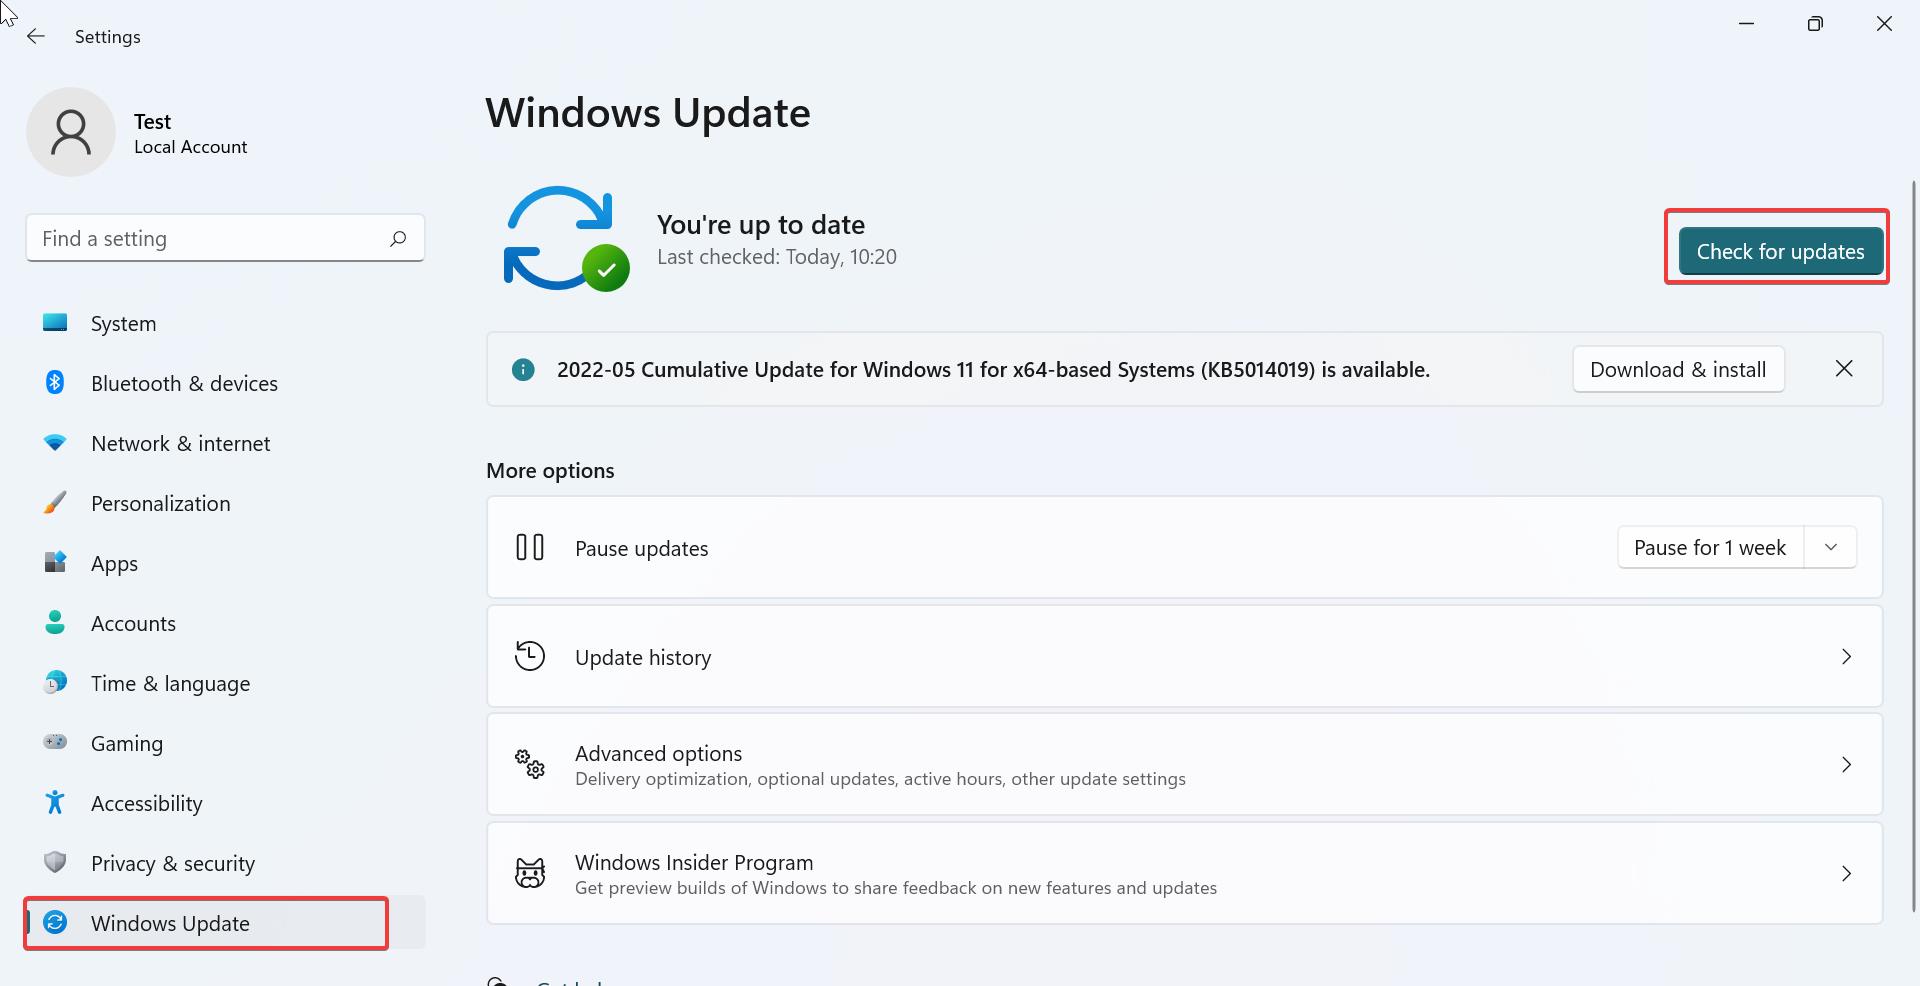
Open Windows Settings by pressing Windows + I and from the left-hand side click on Windows updates.
Click on Check for updates. Windows will automatically download and install suitable updates.

Once the Windows updates are installed, restart the system once.
Solution 6: Run the Power Troubleshooter
Windows Operating system comes with a built-in troubleshooter that can help you to fix problems related to hardware and settings. Power Troubleshooter is one such tool that can help you to fix Power-related issues. check out the link below to Run the Power Troubleshooter.
How to Run troubleshooter from Command-line in Windows 11?
Solution 7: Enable the InstantGo Feature
If your laptop supports the InstantGo feature, but it is disabled, then you may not see the sleep option, to fix this you need to enable the InstantGo Feature.
InstantGo, also known as InstantOn or Modern Standby, is a hardware and software feature introduced by Microsoft in Windows 8 that aims to bring smartphone-like power management capabilities to laptops. Some Laptop comes with the InstantGo features to optimize Power usage on Windows computers. It’s a hardware feature and it’s different from the regular Standby(S3) sleep option. Check and enable if the InstantGo feature is in disabled state.
First, check your laptop is compatible with the InstanatGo feature, Open the Command prompt and type powercfg /a this command will list of available Power States.

Check if Standby (Connected) is displayed on the Output, If yes, then your system support InstantGo, and you can enable the InstantGo feature using Registry Editor.
Open Registry Editor and navigate to the following Registry path.
HKEY_LOCAL_MACHINE\SYSTEM\CurrentControlSet\Control\Power
On the right-pane, locate the CsEnabled value.
Right-click on CsEnabled, and select Modify.
Type 1 in the Value data field and click OK to save the changes.

If there is not CsEnabled DWORD then your laptop does not support InstantGo.
Close the Registry Editor and restart the system once, mostly this will fix the issue.
Read Also:
How to Skip sign-in page after resuming from sleep in Windows 11?
Fix Windows Says Locking and Sleeps Randomly
How to Hide Power button on Login Screen in Windows 11?


