Just like other Browsers Internet Explorer also stores browser cache in a temporary location. By Default, this temporary location will be C:\Users\user name\AppData\Local\Microsoft\Windows\INetCache. This browser information contains bookmarks, favorites, cookies, etc. storing this browsing info in a temporary location will increase the user experience. Recently few users reported that they encountered an issue while using internet explorer. They faced an issue frequently like “Temporary Internet Files Location has Changed”. Mostly this error occurs if you change the Internet Explorer’s temporary files location to a new location or uninstalled the Internet Explorer. This article will guide you to fix Temporary Internet files Location has changed on Windows 10.
Temporary Internet files location has changed:
Modify the Registry:
Note: Modifying the Registry is risky, and it causes irreversible damage to your OS Installation Follow the steps correctly. Friendly advice Before Modifying Registry Creating Restore Point is recommended.
Open Run command by pressing Windows + R and type Regedit and hit enter. This command will open the Registry Editor console.
Now Navigate to the following path.
[code]
This
is
an “example”!
[/code]
Computer\HKEY_USERS\.DEFAULT\Software\Microsoft\Windows\CurrentVersion\Explorer\User Shell Folders
From the Left-hand side click on the User Shell Folders and from the Right-hand side look for Cache String Value. Double click on the Cache String Value and enter the below-mentioned string value and click on Ok.
%USERPROFILE%\AppData\Local\Microsoft\Windows\INetCache

Click on Ok and Restart the system once.
Modify File Explorer Settings:
If the registry editor method didn’t work, you can try the File Explorer method by changing explorer settings manually.
Open Run command and type inetcpl.cpl and click on OK. This command will open the Internet Properties Window.
Now click on the General Tab and under Browsing history click on the Settings option.
 Now you will get one separate window, In the Website Data Settings window click on Temporary Internet Files.
Under the current location, click on the Move folder and browse to the below-mentioned path.

C:\Users\%username%\AppData\Local\Microsoft\Windows\iNetCache\
Click on “OK” and save the settings.
 Restart the system once, mostly this will fix the issue.
Clear Local Cache:
A temporary file or temp file is a file created to hold information temporarily while a file is being created. After the program has been closed, the temporary file should be deleted. Temporary files are used to help recover lost data if the program or computer is abnormally halted.
Open Run command and type the below-mentioned command and hit enter.
Temp %Temp% Prefetch
These commands will open the cache file location, now select all the files inside the folder and delete. Or use this method to delete the temp files automatically.
Disable Antivirus and check:
If you are using any antivirus, disable it once and check, follow the instructions as per your antivirus guidelines. If you are using windows 10 default built-in Windows Defender Antivirus. Then follow the below-mentioned steps to disable the Real-time protection.
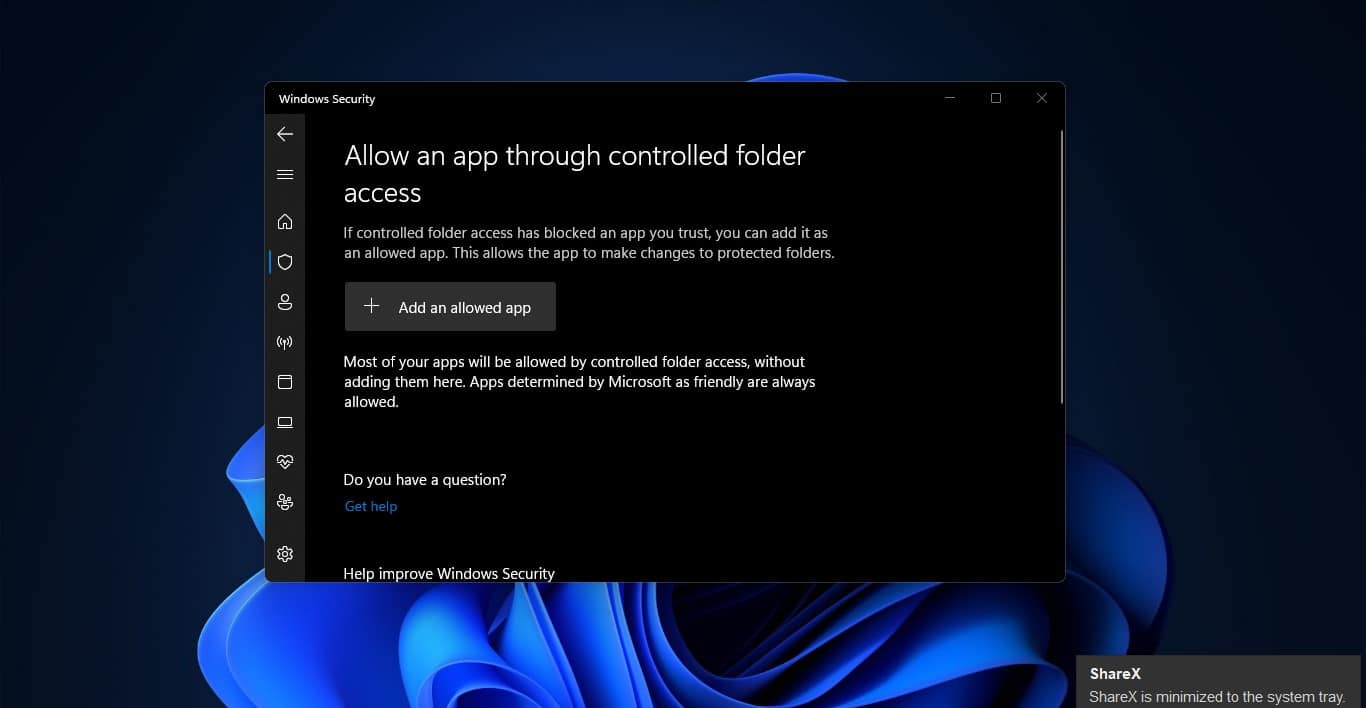
Open Start and search for Windows Security and Click on Windows Security.
From the Left-hand side click on Virus & threat protection.
Under Virus & threat protection settings from the right-hand side click on the Manage settings. Turn Off the Real-time Protection toggle switch to disable Windows Defender temporarily.

If you are using any third-party antivirus then you can stop the antivirus service. This will disable the antivirus.
Open Run command by pressing Windows + R and type services.msc and hit enter.
In Services Management Console find the list of services that is associate with your Antivirus.
Stop all the services that are related to Antivirus. Right-click on that Particular service and choose Properties. And under the General tab, set the startup type to Disable.

Click on OK and Restart the system once. Once the system boots run the chkdsk scan and check. Follow the next method.