This is one of the commonly known error in windows machines, most of them seen this error while safely removing a USB flash drive from your windows computer. By right-clicking on the USB drive from the explorer or taskbar you can see the safely remove hardware option, using that option you can remove your USB drive safely from the computer, this is the standard process which is recommended by Microsoft and other USB drive manufacturers. Most of the users questioned about the safe removal or ejecting the USB drive, is the safe removal is necessary? This is very tricky question after this question you will get one more question what happens if I remove the device without selecting safe remove? For example, if you remove the USB device while the data transferring the data might get corrupt, and moreover there may be a chance for USB driver corruption which leads the USB device to get faulty soon.
If there is no data transfer between computer and USB is that the right time to remove the USB? No actually after the data transfer also still the data might be stayed out in the cache to transfer, this is called as write caching, If you choose safe removal this writes caching will be terminated and the USB is ready to remove. Sometimes when you choose to safe removal you will get Device is Currently in Use error, this guide will help you to fix this error.
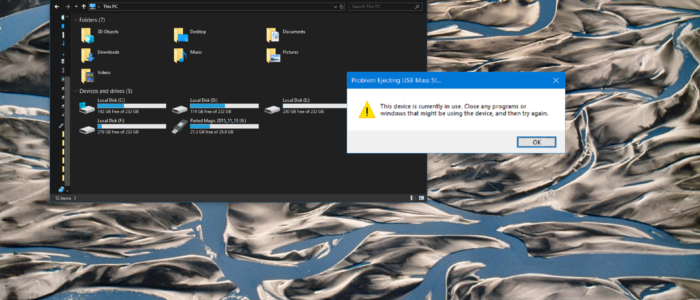
Error Code: “This device is currently in use. Close any programs or windows that might be using the device, and then try again.” This error clearly indicating that to close all the programs and windows, If you closed all the programs and windows after that also if you faced this error means try below solutions to fix.
Solution 1: Using Task Manager
- Ending all the running explorer tasks is one of the easiest and quickest way to fix this error, Open the task manager, press windows + x, and choose task manager.
- Go to the processes tab and choose the Programs or process related to your USB device, If you are not able to find the Process which hogging on your USB, you can use Solution 4 to find it.
- Once you find the process or program, click on that and End task or End process.
- Then find the explorer from the process tab and restart the explorer process.
Solution 2: Using Disk management
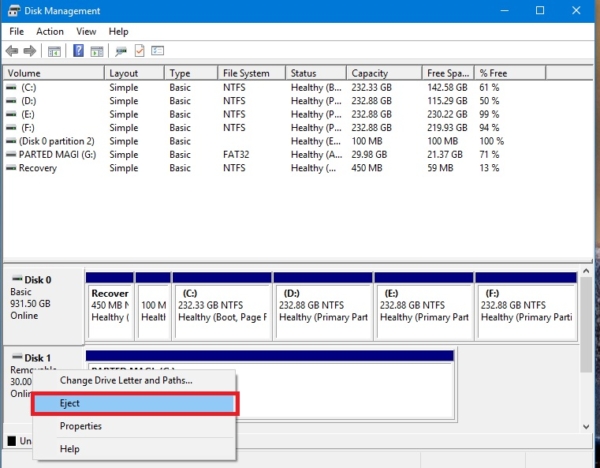
- Open Run command and type diskmgmt.msc, this command will open the disk management console.
- Now Locate the USB disk from the Disk management and Right-click on the disk and choose eject.
- If you are using External HDD then you can see the “Offline” option instead of “Eject”, click on Offline to remove the External HDD.
- Next time when you plug in the External HDD you have to follow the above steps and click on Online.
Solution 3: Using Disk Part
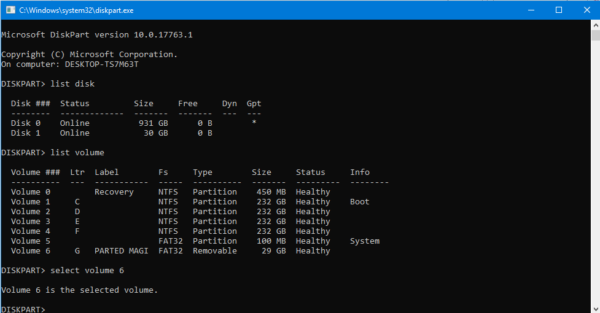
- Open the command in elevated mode, then type diskpart and hit enter. This command will open the diskpart utility, then type list disk
- Next type list volume, this command will list out all the disk and their partition.
- Then type select volume #, Type the Volume number, you can see the volume number from the list,
- Type Offline volume # and hit enter, this will eject the selected volume, to enable it back follow the same steps above and type online volume #.
Solution 4: Using Device Manager
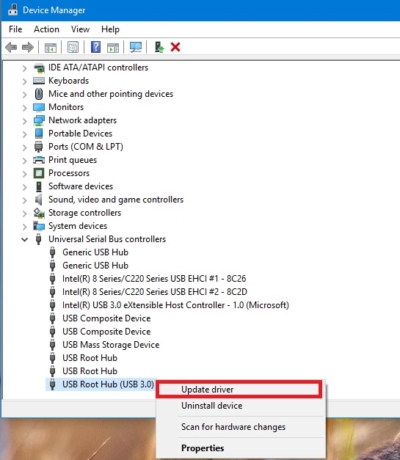
- Press Windows + R and type devmgmt.msc, this will open the device manager console.
- Now Right-click on the USB driver and choose to uninstall driver. Next time when you plug the USB the driver will automatically get install.
- And also this will eject the USB drive.
Solution 5: Terminating the Exact Process
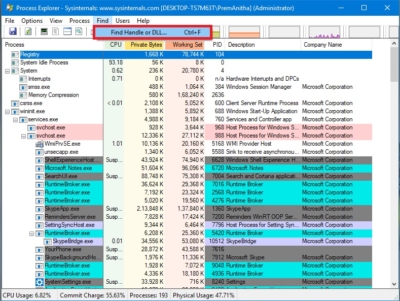
- To terminate the exact USB process download the Process explorer from Microsoft and then run the exe file.
- From the ribbon menu click on the Find option, click on find and now you can see the Find handle or DLL
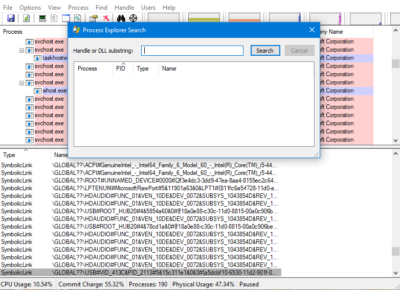
- This will open the Process Explorer search option. Type your USB storage drive letter and click on search.
- Now you can see all the process that related to USB storage device, Kill all the process and then try to eject the USB storage device.
Solution 6: End Task Service Host
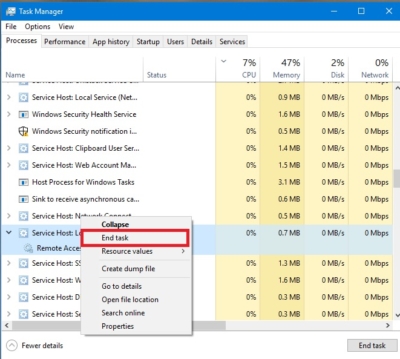
- Press Windows + X and then open task manager.
- Now click on the process tab and search for service host, click on the service host local system.
- And click on End task
Solution 7: Apply Quick Removal Policy
- Open Run command by pressing Windows + R, and type diskmgmt.msc and hit enter, this will open the disk management.
- You can find your USB drive at the bottom of the disk management window, right-click on its name and choose properties.
- You will get another pop-up window click on the policies tab and from there you can see two removal policy.
Quick removal Better performance
- Quick removal – This will disable write caching on the USB device, and your data will be written to physical drive in real-time. So you will be able to disconnect your USB drive even without using the “Safely Remove Hardware” option.
- Better performance – This will cache the write operations to optimize performance and your data will be written to physical drive at a later time. Before unplugging your USB drive, you have to click the “Safely Remove Hardware” icon that appears in the system tray to tell Windows to write all the cached data to disk.
Select quick removal policy and click on ok, that’s all as I mentioned above when the USB is not in use you can directly remove it from your PC.

