If you are experiencing issues with your mapped drives on Windows? Do you find that your Windows system is not recognizing the changes you made to your mapped drives? And sometimes do you feel slowness on the Mapped Drive. All this issue occurs due to the high amount of cache memory. In this article, we will guide you on how to clear the mapped drive cache in Windows.
Understanding Mapped Drives
Mapped drives are shortcuts to a specific network location or folder on another computer or server. By mapping a network drive, you can easily access and manage files and folders on remote locations without having to physically connect to the server or computer. This is especially useful in workplaces where multiple users need access to the same set of files.
Why Clear Mapped Drive Cache?
Now, you might wonder why it is necessary to clear the mapped drive cache. Well, the mapped drive cache is a feature that Windows uses to store information about your mapped drives to improve performance. However, sometimes this cache can become outdated or corrupted, leading to issues such as drives not appearing or changes not being recognized. Clearing the mapped drive cache can resolve these problems and ensure that your system accurately reflects the current state of your mapped drives.
Clear Mapped Shared Folder Cache:
In this article, we are going to use three different methods to clear the mapped shared folder cache in Windows Operating system.
Clear Mapped Shared Folder cache using Registry:
Note: Modifying the Registry is risky, and it causes irreversible damage to your OS Installation Follow the steps correctly. Friendly advice Before Modifying the Registry Creating Restore Point is recommended.
Open the Run command by pressing Windows + R and type Regedit and hit enter. This command will open the registry editor.
Now Navigate to the following path.
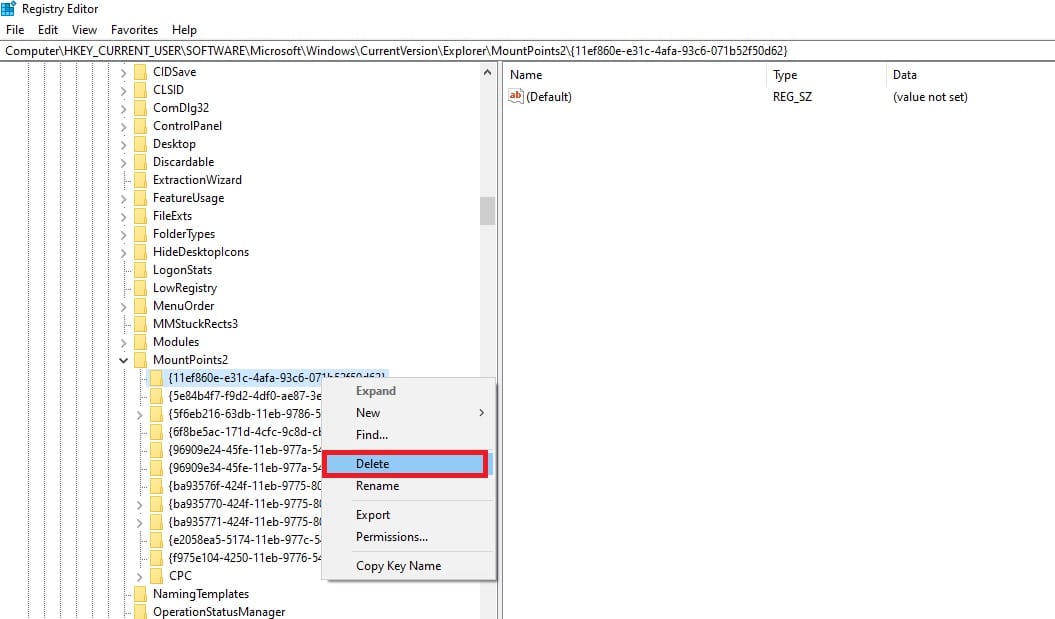
HKEY_CURRENT_USER\Software\Microsoft\Windows\CurrentVersion\Explorer\MountPoints2Expand the MountPoints2 Registry key and right-click on the sub-registry key and choose delete.
Next, navigate to the following path.
HKEY_CURRENT_USER\Network
And from the left-hand side, expand the Network registry key and right-click on the shared folder drive letter, and choose delete.
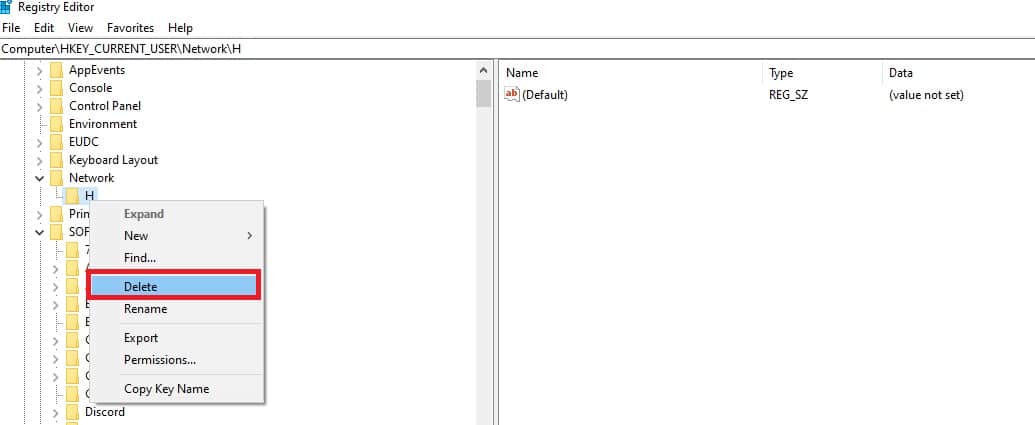
This registry key exactly resembles the mapped shared folder, deleting this registry key will delete all the cache of the shared folder.
Using Command Prompt:
Open Command prompt in elevated mode and type the following command and hit enter.
net use H: /delete
Here H: represents the shared folder drive letter, this command will delete or remove all the active connections on a local computer. Wait for the successful message to appear.
Remove a Network Location by deleting its shortcut:
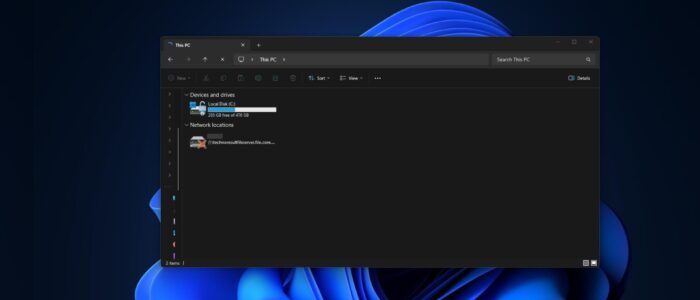
Open File Explorer by pressing Windows + E and click on This PC from the left pane. Now you’ll see the list of all mapped shared folders.
To clear the shared folder cache, right-click on the shared folder and choose Disconnect, and connect it back.
This will refresh the connection to the Mapped drive, and it will clear the cache.

