Service Host Delivery Optimization is a service that allows you to download Windows Updates faster, it is basically a client update service. It combines data from Microsoft data centers and local devices, the combined data helps to deliver a complete update faster at a low bandwidth cost. The main idea behind this service is Delivery Optimization speeds up the download process by allowing updates to download from other Non-Microsoft servers. For example, if you owned several computers, each one would need to download every update separately from the Microsoft Server. With the help of Delivery Optimization, Windows 10 will consider the Microsoft Servers as one of the many update sources. While updating, the system will first consult with other devices on your network and if the update is already downloaded by one of the systems on your Local network then it will make a peer-to-peer connection and download the update from that system faster. But sometimes you can see that the service host delivery optimization will use High memory usage. This is one of the main drawbacks of this service. This article will guide you to Disable Service Host Delivery Optimization, Disabling the service will reduce High memory usage.
Disable Service Host Delivery Optimization in Windows 10:
Disabling the Service Host Delivery Optimization will prevent Windows from acquiring updates from Non-Microsoft Sources, this includes devices on your local network. But many users reported after disabling Delivery Optimization will reduce the High Memory Usage.
Disable Using Windows Settings:
Open Windows Settings by pressing Windows + I and choose Update & Security.
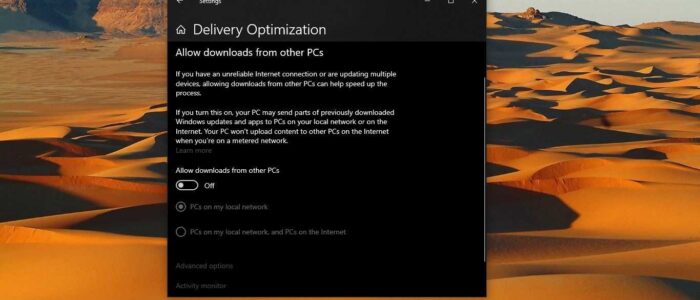
Under Update & Security, from the left-hand side click on the Delivery Optimization, and from the right-hand side turn off the toggle button Allow downloads from other PCs.

This will disable the Service Host Delivery Optimization.
Using Group Policy Editor:
Open Run command by pressing Windows + R and type gpedit.msc and hit enter. This command will open the Group Policy Editor.
Now navigate to the following path.
Computer Configuration > Administrative Templates > Windows Components > Delivery Optimization
From the left-hand side click on the Delivery Optimization and from the right-hand side look for the policy named Download Mode.
Double click on the Policy and open the Policy settings and choose Enabled, this will enable the Policy. Now under the Download Mode Drop-down menu choose Simple (99).
Click on OK and Restart the PC.
Read: How to Add Disk Cleanup to right-click Context menu?