In Windows 10 File Explorer usually to select multiple items (Files, images, or Folders) we hover the cursor over those items until they’re selected. If you want to select only few items, we can select one item and hold the shift key and click on the other items to select. One more method to select items is by pressing Ctrl on the keyboard and clicking on the other items using the mouse. These are the usual selection methods. Have ever seen the touch screen windows 10 laptops, those laptops have a different type of selection method, you can see the checkboxes on the left-hand side of the items in the file explorer. To select any item in the file explorer, you have to click on the check box. It is very easy to select and easy to manage. You can enable the same type of check box selection methods in normal laptops and computers. This article will guide you to Enable Check Boxes to select items in Windows 10.
Enable Check Boxes to select items:
You can enable checkboxes to select items in file explorer, in two different methods. One is by using folder options and the other method is by using the registry editor.
Using Folder Options:
Open File Explorer by pressing Windows + E and click on the View menu.
Under View options, click on Change folder and search options. Now you will get the Folder options pop up.

Under Folder options click on the View tab and under advanced settings, scroll down and check Use check boxes to select items.

Next click on Apply and OK.
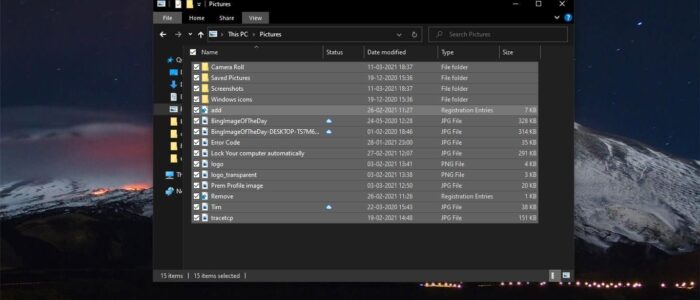
Now you can see the check boxes to select items in file explorer on Windows 10.
Using Registry Editor:
Note: Modifying the Registry is risky, and it causes irreversible damage to your OS Installation Follow the steps correctly. Friendly advice Before Modifying Registry Creating Restore Point is recommended.
Open the Run command by pressing Windows + R and type Regedit and hit enter, this command will open the Registry Editor Console.
Now Navigate to the following path.
Computer\HKEY_CURRENT_USER\SOFTWARE\Microsoft\Windows\CurrentVersion\Explorer\Advanced
From the Left-hand side click on the Advanced Registry Key and from the right-hand side, you can see AutoCheckSelect DWORD.
Double click on the AutoCheckSelect DWORD and enter the Value as 1.

Click on Ok and Close the registry editor.
This will enable the Check Boxes to select items in Windows 10