If you are using Windows 11 22H2 and want to try out the new Microsoft Copilot feature, then this article will guide you to Enable Microsoft Copilot in Windows 11 without upgrading to Windows 11 23H2. We all know Windows 11 23H2 comes with a lot of new features like Copilot AI, the new Windows Backup app, the redesigned version of File Explorer, the new Dynamic Lighting functionality, etc. Microsoft Originally announced, September 26, 2023, as the release date of the 23H2 version, but the update got delayed, then the company shortly announced that the September rollout was merely a non-security update preview for version 22H2 that enabled the few new features that already mentioned above. If you have a Windows 11 22H2 make sure, your Windows version is updated, and check the following KB update is installed KB031354, if its already installed then you can enable the Microsoft Copilot using the following method. If you don’t have that KB Update, then you can download and install the KB file manually. Go to Microsoft Update Catalogue, Search for KB031354 and download the suitable version of KB file, and install it, after the system restart follow the below-mentioned steps.
Enable Windows Copilot in Windows 11:
Windows Copilot is an AI assistant that combines Bing Chat AI and first and third-party plugins, it will help you enhance your productivity and creativity. You can interact using natural language to get complete answers to questions and it also changes your system settings. You can see the Copilot button on your taskbar, also you can press the Windows + C Keyboard shortcut to access the Copilot flyout menu. This article will guide you to enable Windows Copilot in Windows 11.
You can Enable Microsoft Copilot in Windows 11 22H2 using ViveTool,
You can download this tool from the GitHub page, click here and download. Download the Zip file.
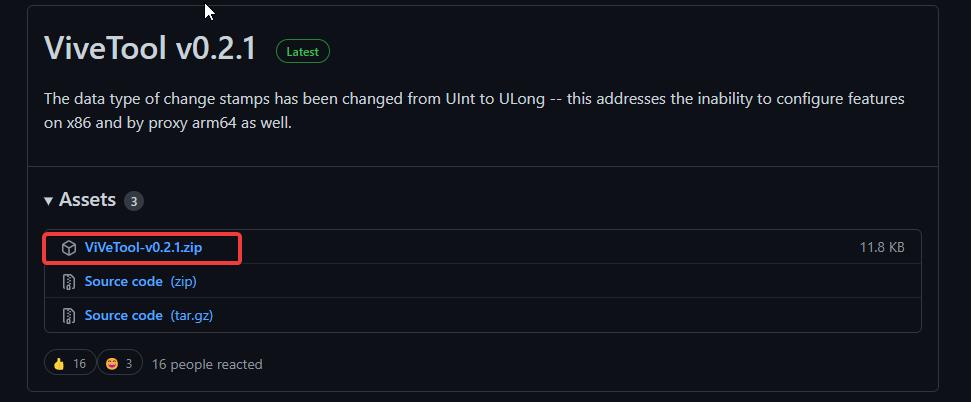
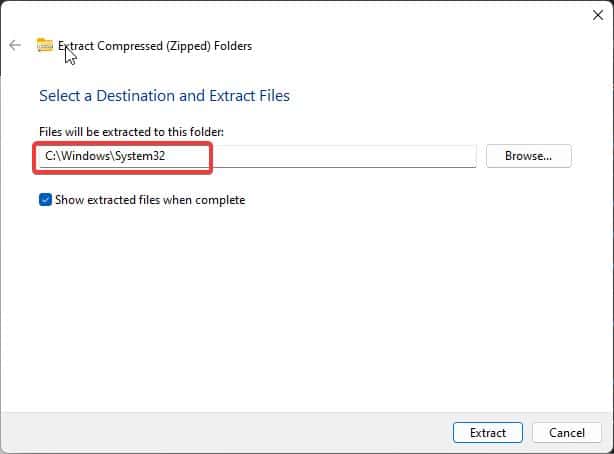
Next, you need to extract it, right-click on the Zip file, and choose Extract all. Extract all the files to the Windows > System32 folder.
You’ll get an admin prompt, click on yes and extract all the files to the System32 folder.
Next, open the command prompt in elevated mode, right-click on the Command prompt and choose Run as administrator.
Type the following command and hit enter.
vivetool /enable /id:44774629,44776738,44850061,42105254,41655236once you have seen the successful message, Close the command prompt and restart your system once to make the changes effective. After the restart, you can see the Copilot preview icon on the Taskbar.
If you do not see the Copilot icon, go to the settings > Personalization > Taskbar items and enable the Copilot feature.

Once you enable Copilot, click on the Copilot icon and launch the Copilot, ask your questions, this can directly interact with the Windows settings, so you can change the Dark/White mode. other examples like “Turn on do not disturb,” “Take a screenshot,” “Summarize this website” (Only active tab from Microsoft Edge). This feature is not in its complete form, the Copilot for Windows 11 won’t run through Edge, instead, it runs as a separate integration. If you want to disable the Copilot feature, follow the same steps above and just enter this command vivetool /disable /id:44774629,44776738,44850061,42105254,41655236 and restart your computer. This will disable the Copilot feature.
Read also:
How to Disable Copilot feature using Intune?
How to Disable the Microsoft Edge Sidebar using Microsoft Intune?
List of Windows Copilot Prompts to Change Windows Settings
Remove Bing Chat Copilot Button in Microsoft Edge


